Welcome!

How we came to purchase our home.

WPA Photo

A Works Progress Administration photo offers a glimpse of our home's past.

Reproduction Windsor Chair

Finally, a dining room set.

No Power, No Heat.

Our first snow storm and it's aftermath, October, 2011.

Lead Poisoning

Updates to our son's lead levels.

Bit By Bit

My wife's blog on being pregnant, giving birth and raising our first child with all the complications, hardships and joys that life throws our way.

Friday, June 8, 2012

Hot Water... Or Lack There Of


When we moved in, our hot water was just OK.  The faucet had to be turned to the hottest possible setting before the water would become warm.  We thought this was due to the age of our oil boiler, being around 50 years in age.  After the October snow storm, the water seemed to go from warm to luke warm and would take a while before reaching that point.


Then, as the weather changes to winter, the heating would come on as expected.  Since the boiler heats not only the hot (I mean luke-warm) water, it also heats the baseboard fed home heating system.  When the heat is on, we had no hot water.


I bit the bullet.  Not wanting to make more of an issue by dismantling our, by most standards, antique oil boiler (and not remembering how to put it back together again as my wife can attest to), I called in our oil supplier to give us a cause.  Turns out, it's normal for the boiler to shut off the hot water while heating the home.  What isn't normal is the non-existent hot water when the heating is off.  

Mental thought:  Great... how much is this going to cost us?

James Warner Home of 1760Surprisingly, the plumber said that this is a common issue and the repair is due to a solitary valve on the exterior of the boiler.  It has a spring on the inside that adjusts the amount of hot water being sent to the faucets based on a predetermined setting on the valve.  With time, the spring becomes encased in calcium or various other minerals.  The buildup retards the movement of the spring locking it in a cold setting.  The plumber added that this will occur again in time.

This repair in it's entirety was $90.40 (completed in March of 2012).  Not bad considering.  

On a side note, my wife asked the plumber the life span of our antique heating appliance.  His response was interesting:  

"It will last longer than you want it to."

Should I be scared?

Thursday, June 7, 2012

Memorial Day

It's been quite difficult to update this blog recently.  My pregnant wife and I have been spending many-a-weekend preparing for the arrival of our little boy who is expected June 27.  From the end of March until now, there have been trips to baby stores, family, showers, birth classes, etc. that have taken up plenty of our time without much being spent on home repairs/upgrades.  I am working on small projects and will report when I am able to.  

Recently, however, I made a very small change.  I have been yearning to display some Americanism in my colonial period home.  And when Memorial day approached, I thought this was the time.  As we live in a home from before the Revolutionary period, those living at that time would've been witness to the birth of our nation.  Perhaps displaying an American flag in the late 1770's, when this home was just a baby.  Besides, what colonial period home doesn't need an American flag?  It's like peanut butter and jelly, a combination that just works (for those who aren't allergic).  So, this past Memorial Day, I've decided to put up an American Flag, but not just any American flag.  I wanted a flag that would've originally hung in/on this home, something historical.  So now, the Betsy Ross flag is hanging in our second floor landing window.  If you have the time, wikipedia.com has an article on the history of the flag:  Click Here.


Monday, June 4, 2012

Home History - Part I


 Update:  See Home History - Part III for updated information.

My wonderful wife had a week off from work due to spring break in March.  She took that time to research our home's history in Town Hall.  Since government offices closes at 4:00 PM during the working week and is closed on weekends, my wish to peruse the records is nullified as I, like most people, work.


Starting with the most recent owner of record, she was able to trace the history back to the mid-19th century before the records ended due to the town having been incorporated in 1849.

Here is what she was able to decipher from the printed and handwritten documentation in the Town Hall Vault:


Owner (Last Name)     Year     Cost      Notes             
"Us"                  2011     $275,000
Dion, D.              1992
Tinney, D.            1989               Survivor
Tinney, H. & D.       1978
Vezina, E. & L.       1968     $ 12,750                       
Mell, D.              1965     $     10 
Warner, Carl G.       1965               Executor
Warner, J. G.         1934     $  5,000
Warner, Carl G.       1929               Executor/Inherited
Warner, James H.      1898               Inherited
Warner, James           ?                Home's Name Sake
Merriam               1842
End of Known Records

The owners of our home varied greatly.  There were numerious instances where the home was sold for $1 to family members (or $5,000 as the case may be) or as part of debt settlements throughout the later 19th and early 20th centuries.  The above list is abbreviated.  

According to the folklore from the prior owner and other documentation (like the tacky brass mail order plaque she screwed to the exterior wall), our home was "built" by James Warner in 1760.

If I ever get a chance, or time, I'll have to dig up some more information...

Saturday, May 12, 2012

Review: Big Wally's Plaster Repair Kit

Watching the PBS program "This Old House", I saw contractor Tom Silva use Big Wally's branded plaster repair kit on a rather large crack.  The process looked simple enough and having plaster everywhere in the home with every wall having some sort of crack, I decided to buy a small pack to try out.


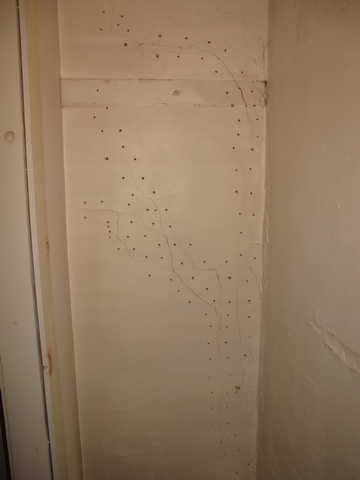
In our future baby room, where a closet was built (circa 1960's), are a series of exposed cracks on the west exterior wall.  This area will eventually be covered by a closet system, so I figured I can't make it look any worse.  You can see the previous owners attempts of sloppy repair along the corner.


Following the directions, I drilled my first hole near the crack to locate the lathe behind.  With a set spacing between each lathe, I drilled along the crack keeping far enough away not make it bigger, yet close enough for the process to work.  I believe the directions said about an inch to two away.  I vacuumed each hole to clean it of all dust and you'll also want to vacuum the floor and other nearby items, plaster dust gets everywhere.


Once this was complete, the holes are primed with a chemical within a squeeze bottle, left to sit for 15 minutes, then the glue is pumped into each hole using a caulk gun.  The directions stated that one full pull of the caulk gun's trigger is needed per each hole or until the glue pops out of the hole.  That may be overkill.  On a series of drilled holes, I found myself squeezing two to three pulls of the trigger with no glue being forced back out of the hole.  I must have hit a pocket or found a void between the lathe.  Either way, the purchased kit was stated at repairing 9 linear feet of crack.  I believe you could get more out of the kit once you get used to it.  The kit isn't cheap, so making it effectively last is an excellent goal.

After filling all the holes, a special washer was screwed into selected holes which, when screwed in, pulls the lathe and plaster back together again while the glue cured.  


The directions said that I should give time to allow the glue to dry; I waited a week, just to be sure.  Then  I removed all the washers with a putty knife.  Did a little sanding and applied joint compound on the surface to fill the drilled holes and cracks.  I let it dry, sanded and repeated until the wall was smooth.  After I painted the surface, the final product looked amazing!  See the special note at the bottom of this post.


The kit came with glue, special washers, primer, gloves and directions.  Extras needed were a drill, masonry bits, vacuum, scraper (to pry off the washers), joint compound and a plaster knife/trowel.  But these are tools that every handyman (or woman) should have laying around.

The entire process is messy mainly because of the joint compound, plaster dust, glue and my inexperience.  Gloves are included in the kit, and thinking that I was a tough guy, I didn't bother with them.  Use them, the glue does sting if you have any cuts on your hands.  Protect your floors too and don't be a tough guy.

Total cost was $79.00 for the small nine foot kit with shipping being an extra $17.50! (in 2012).  As pricing becomes more affordable per foot once you buy in bulk, I may consider going after the larger Contractor kit.  However, it is still on the expensive side for my budget.  I will admit, that without trying any other kit, Big Wally's does what is should and was relatively simple to complete.

For more information, see Big Wally's site:  http://www.plastermagic.com/

Here is the video from "This Old House" that inspired this repair:
How to Repair Plaster Walls with Tom Silva

Note:  No, I have not been paid in any way to review this product.  Though I have to say that I had to pay them to try it.

Special note regarding painting:
1.  DO NOT assume the paint the previous owner labeled innocently enough as "White Interior Paint" on an attached post-it note is not (in actuality) yellow tinted white exterior trim paint.

2.  DO NOT forget to open the only window in the room for ventilation.

... and this one is really important...

3.  DO NOT assume 1. to be true, conduct 2. and forget that the storm window is closed.

Friday, March 23, 2012

Vent Fan Up and Running

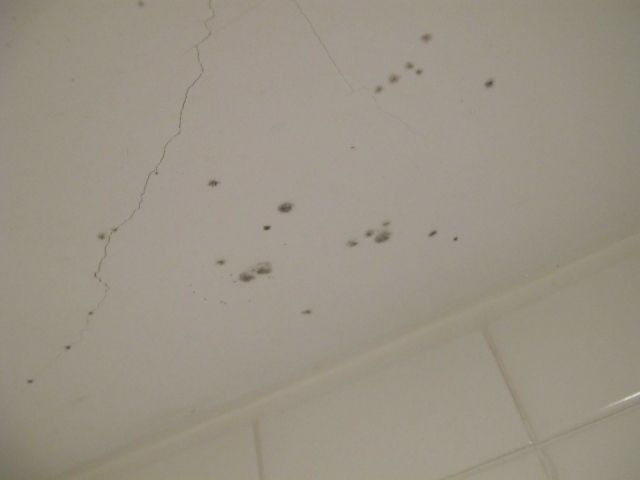
Mix a bunch of humidity in a confined space with no where for that moist air to go and you get mold... lots of it.  In a previous post, I mentioned that my lovely wife just loves her hot showers.  With no ventilation, mold builds quickly, especially when I have the window covered with a plastic seal to stop any drafts.

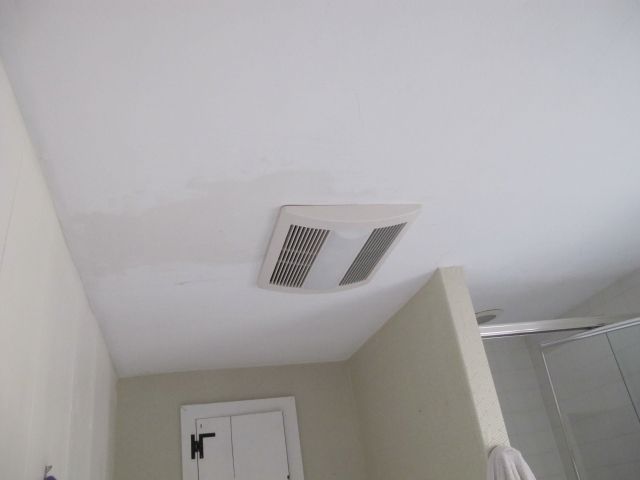
Several months ago, I researched out the best vent fan for the bathroom.  Overwhelmingly, I found that Panasonic was the brand to go after.  Beyond venting the bathroom, I also wanted to improve the lighting and add heat.  The undersized baseboard is just not large enough to heat our bathroom.  So the top-of-the-line Panasonic FV-11VHL2 was the fan to go after.  With a retail price at $502, it is not cheap but I'll rarely settle for retail pricing.  Searching online found the best price, namely, Amazon.com (pricing may vary).  For $251.00 with free shipping (of course) this rather large bathroom vent fan was in my home.

Installing it was a bit difficult only because of my inexperience and it's an old house.  There are two options for installation, both of which required cutting a hole in either my siding or my roof.  With no ladder (yet), I needed to enlist the help of a co-worker who moonlights as a handyman (for a fee).  As I have a mild fear of heights, I thought it best to have him aide me with the roof installation.  The roof install was our chosen method since I wanted to minimize any changes to the home's exterior looks, as a roof install would not be seen from the street.  Not only did he aide me with the roof install, he also took over the entire instillation.

Side Note:
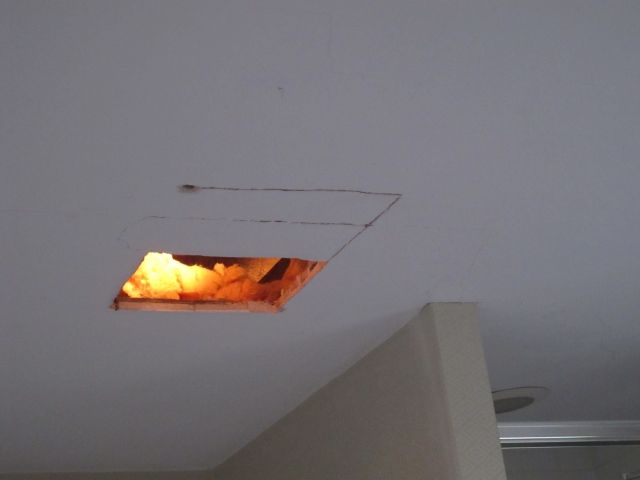
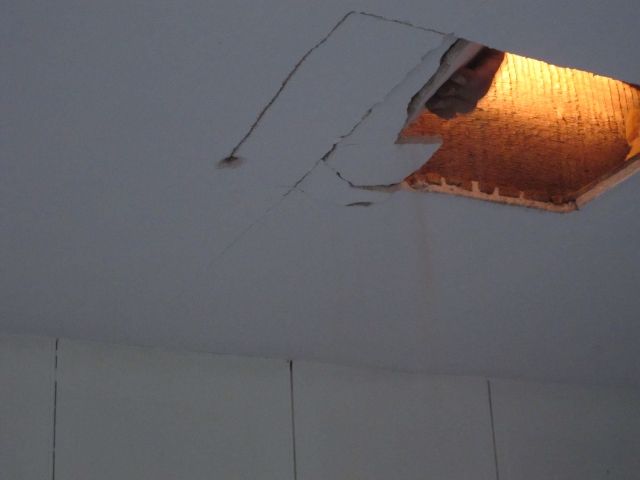
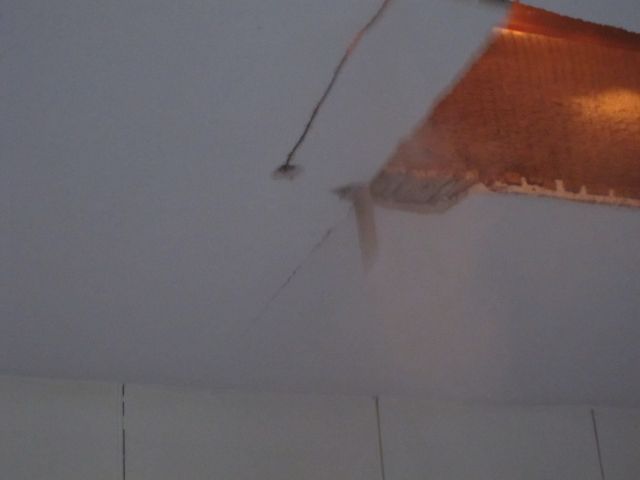
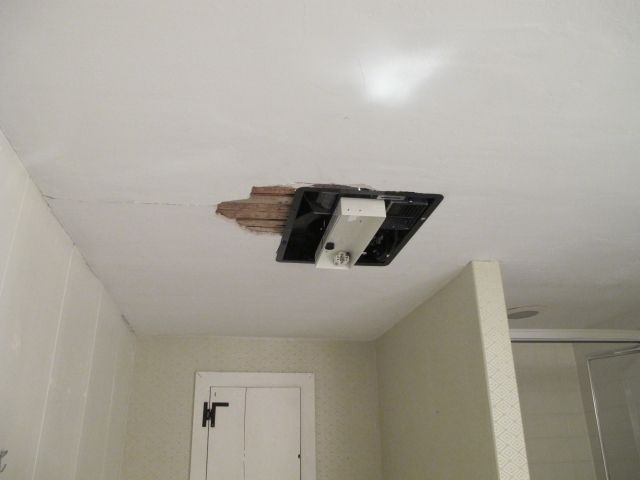
It's not always a good idea to get "hired help" from a co-worker/friend.  I wanted to replace an existing smaller lamp in the bathroom with this much larger unit.  In order to do this, we needed to make the ceiling opening larger.  My co-worker friend decided to get the job done with a power tool.  Not thinking, I fetched it for him.  He used his "sawzall" from the attic side down to cut apart my 250 year old plaster ceiling.  For those of you not familiar, a "Sawzall" is a reciprocating saw that shakes the crap out of what ever is near it.  I have to admit, I was pretty upset by the sight of a one square foot piece of plaster crumble and fall to the bathroom floor.  Being a co-worker and a friend, I didn't have the heart to verbally beat him up for it.  He did take the blame for it and, over the course of a few months (yikes!), patched it.  The work started November 20, 2011, and ended this past Friday night, February 17, 2012.  Of course, most of the work was completed on November 20th.  The remainder of the time was spent juggling schedules, cancellations, etc. while waiting for my co-worker friend to come back and apply the plaster patch in three layers.

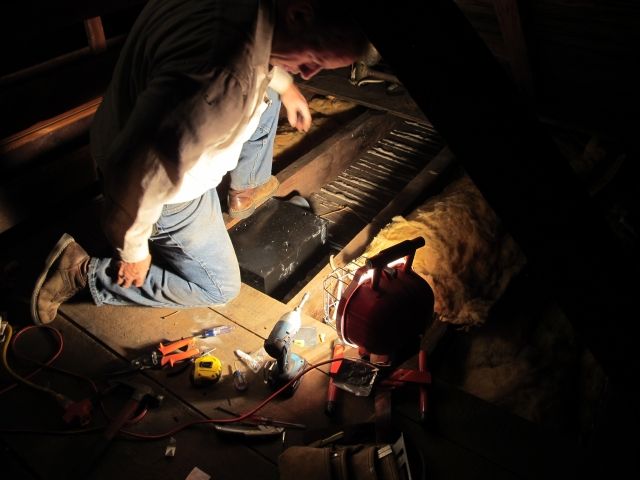
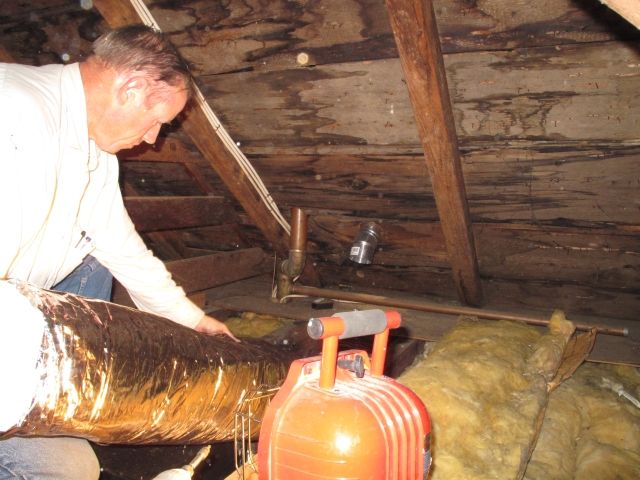
The following are photos during the installation of November 20, 2011.


Now that the vent fan is in place, its time to route power and the exhaust duct to the roof.

A little insulation around the exhaust helps to avoid condensation during use.

While walking through the attic, we noticed that there was a junction box labeled "extra".  Inside were four free lines.  We had hoped to connect the heater to one of those lines since it required a dedicated line straight from the electrical panel.  My friend connected a breaker-finder tool to the wire and went to the electrical box to find which breaker the line went to.  No breaker was found.  The conclusion at that time was that the wire may have terminated in another junction box.  

With perhaps the 10th hour that we've been working approaching, my friend needed to get on with life.  We called it quits after making a temporary connection to the existing lighting.  When the light switch was turned on,  so did the fan and the lights.  No heat since I wouldn't want to set off the breaker making everything useless.
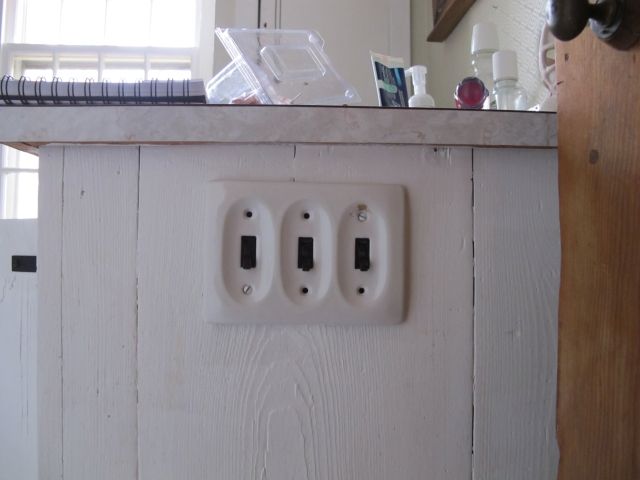

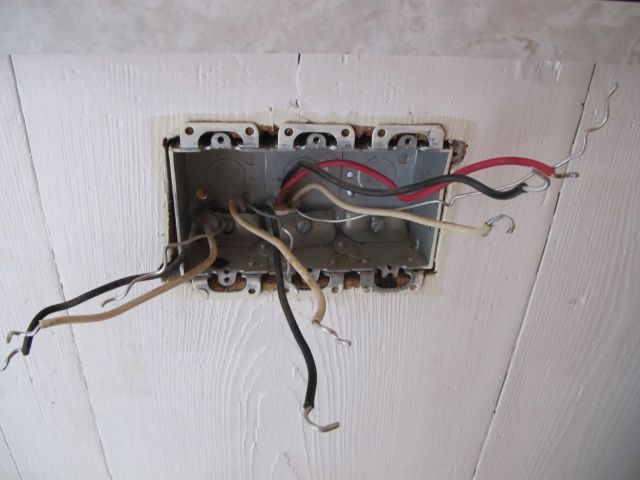
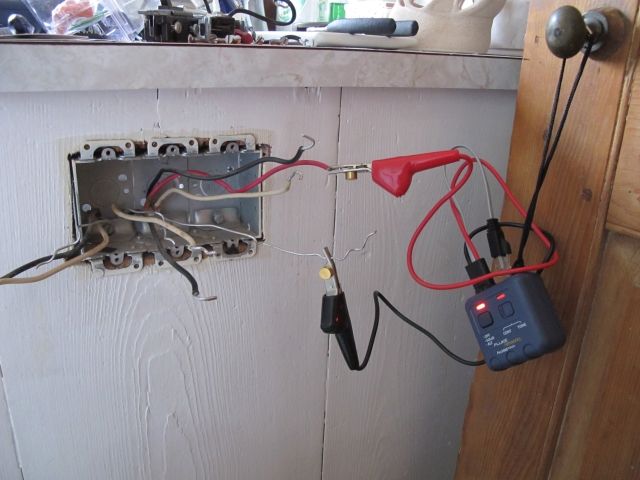
Over the next couple of weekends I dedicated my time to tracing the wires in the bathroom.  I turned off the breaker to the bathroom and took off the decorative switch plate revealing the wiring inside.
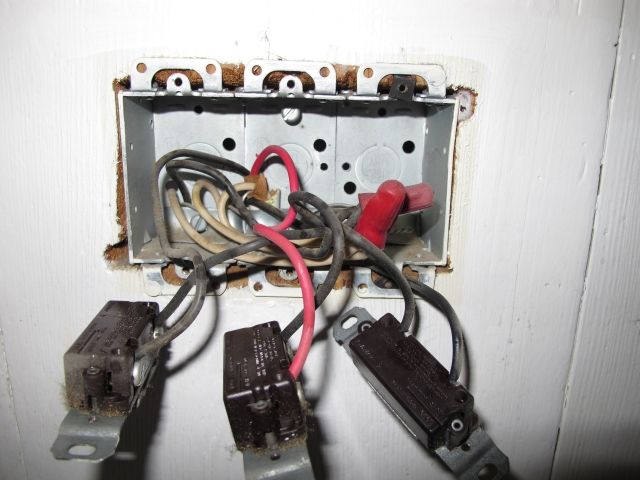

What a mess... I tried to organize the wiring into the individual conductors.  On the left is one line (one hot, one ground and one neutral).  In the center, pointing downwards is another line (one hot, one ground and one negative).  Pointing to the right is the third line (two hot, one ground, one neutral).

I then connected a tracer to each line and used the included probe to literally trace the connected wire back to the panel (or wherever it may lead).  The tracer was purchased from Amazon.com for a little under $80.
As it turns out, the left line went to a GFCI outlet, the middle one was from the panel and the right line went to the lighting.  The switches were wired in the most annoying fashion.  The left two switches controlled the GFCI outlet, why two I do not know.  It was more of an annoyance when my wife would plug in her hair dryer and it wouldn't work.  We would have to play with the two switches to get the outlet to work.
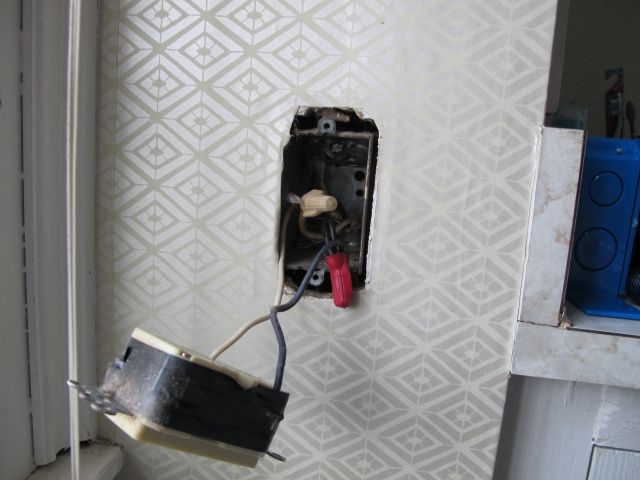

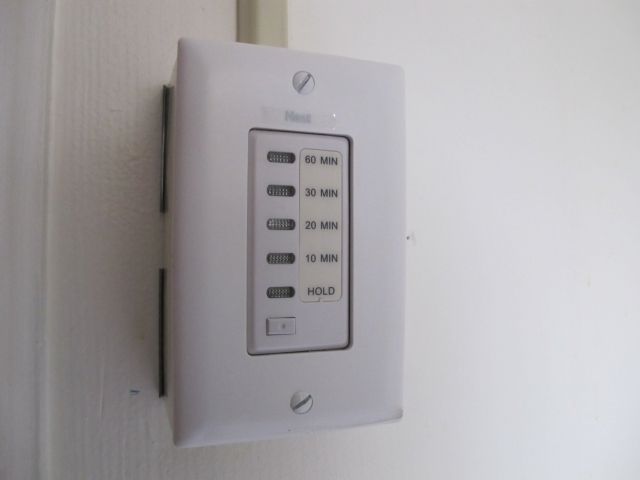
I straightened the wiring out removing what was originally installed.  I purchased two new 15 amp switches and one timer switch.  Identifying the source line, I hard wired the GFCI plug to be always on as opposed to on/off with a switch.  From that same line, I also feed the lighting and the new fan through a switch and timer, respectively.  In the photo below, the switch on the left is a dummy switch since the big name home improvement store did not have any blank plugs for the three switch plate.
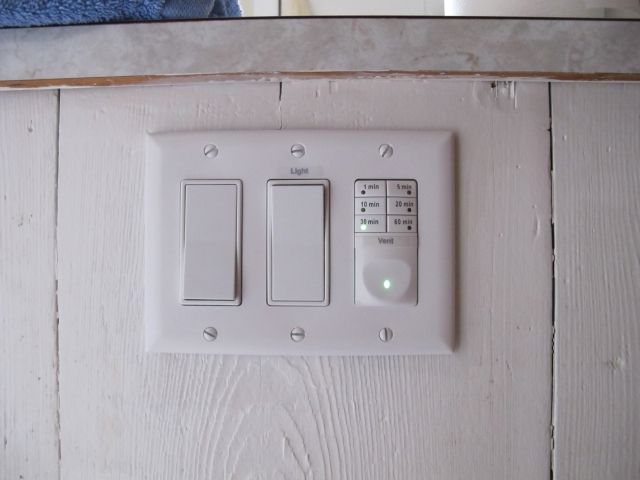
Now, the heater.  This was perhaps the hardest part.  The heating element required a dedicated 20 amp breaker.  Using the tracer, I was able to locate where the extra line in the attic terminated.  It ended up in the panel in the basement, just not connected to a breaker which would explain why my friend's breaker tracer couldn't find it (no breaker, no trace).  I purchased a 20 amp breaker for my GE panel (the name brand matters) and installed it in one of the empty slots.  At the same time I purchased wire mold chases and a switch box.  I also got a timer rated for the 20 amp circuit.


There's so much more to describe, and by the time I finish giving the details of everything, boredom would have passed and the point lost.

So what is the point?  Well, I bought a vent fan to remove the possibility of mold build up and to also help heat the bathroom on our cold winter nights.  After many months, it was finally done!


Update 02/08/15:  After having the vent fan installed and used for almost 3 years, the vent fan has not been the perfect unit as researched.  I have gone through one set of CFL bulbs (yes, they do eventually go out, but after only 18 months of use?) and the heater had stopped working.  I called into Panasonic to get a solution and was told that the unit is under warranty still (with 30 days left) and a new heating element will be mailed.  FOUR MONTHS LATER (must be on purpose).... the heater came in, I installed it and.... I still have no heat in the bathroom.  Damn thing still doesn't work even though there is power going to the unit.  This is another issue that I have to sort out in time, since I'm no longer under warranty.