


 After the scares with leaded paint, my wife felt that it was prudent to have me take a class in lead safety, just so that I know the current standards in protecting our family from lead dust. Doing research online, I came across many classes meant for contractors at varying costs. Some were a week long program for heavy lead abatement (think Hollywood style HAZMAT/alien invasion with plastic rooms and space suit-like attire). I was not about to spend a week's worth of vacation time to sit in a HAZMAT training class. Instead, I came across a one day class that, since 2010, has been a requirement for persons to either earn a contractor's license or receive a permit in certain towns. This one day class is for the RRP certification, or Renovation, Repair and Painting Program. The one day class instructs contractors on how to identify potential projects where lead may be present, how to test for lead, how to inform the customer of the presence of lead, how to prepare the area being worked on to avoid the spread of leaded dust, how to protect yourself and, lastly, how to clean the work area. The information is provided by the EPA and is taught by EPA certified companies. Some states run their own program directly, like Rhode Island and Massachusetts. In Connecticut, the regulations are set by the Federal government (based out of Boston, go figure?)
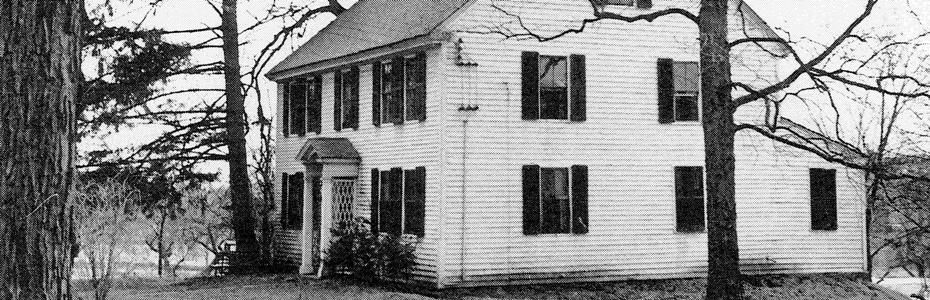
After having taken the course this past June, I reflected on the two separate contractors that have worked on our home. Only one of them have actually followed the RRP rules. The crew that did (seen here), did preparatory work by the book. The other, more recent contractor (seen here), did nothing; even after being told that there was lead present.
The RRP class is one vacation day and around $200. You're certified for 5 years and a refresher course (4 hours long) is required every 5 years to maintain the certification. The class was hosted by Fuss and O'Neil, an engineering company in Manchester, CT. They, specifically, charged $190 (2014) for the class and provided lunch. The information is public information as it is from the EPA. Below, I have listed out the procedures that one must take when dealing with a leaded project. These are the rules as stipulated by the EPA for a contractor to follow. For the rules of a home owner, scroll to the end...
1. Upon arrival to the project, ask the owner when the home was built. If they tell you it was built prior to 1978, test for lead. If they don't know, test for lead. If it was built on or after January 1, 1978, it magically doesn't have lead and the RRP rules no longer apply; you may commence work.
2. Test for lead using EPA approved test kits (seen here and here). Document the areas tested and record the results. If negative, RRP rules no longer apply. If positive, inform the homeowner and provide them with a government sourced brochure regarding lead risks to children (Renovate Right). Within 30 days of the completion of the project, a copy of the results are to be submitted to the homeowner. The homeowner is now fully aware that there is leaded paint present.
3. Purchase:
6-mil thick plastic sheets (100 feet x 10-foot roll is roughly $60 at Home Depot)Contractor trash bags (again, Home Depot, 3-mill thick 42 gallon bags, 50 count for $26)HEPA certified shop vacuum (no, not a vacuum with a HEPA filter, that doesn't count!, Amazon, $250+)Swifter wet mops (cheapest functional)Swifter dry mops (cheapest functional)Duct-Tape (extra wide painter's tape is more safe for floors)An empty spray bottle (for water wash downs)Protective coveralls, hooded, and booties (roughly $10, per laborer per day)Sticky pads (120 sheets for $100).
4a. If working on a leaded exterior, protect the ground with 6-mil thick plastic sheets a minimum of 10 feet from the building, 20+ feet when at the second floor. A contractor is suppose to use their judgement beyond 10-20 feet, where working on a third floor, for example, may cause leaded dust to fall beyond 20 feet from the house. The edge closest to the building should be duct-taped to the exterior to ensure no gaps. Cover any wall openings, i.e. windows and doors in the immediate area with the plastic and duct-tape. The plastic on the ground is to drape over all landscaping, including bushes and vegetable gardens. Ensure that the sheets are weighed down and never work in windy conditions. At the end of each day, use the HEPA vacuum to remove all contaminants that fell on the plastic. The plastic sheet can be re-used, so long as it is cleaned daily, kept in good condition and not transported around the building. Do not remove the plastic while having contaminated material on it, a risk of the debris falling out and contaminating the ground exists.
4b. If working on a leaded interior, protect the floor 6 feet from the surface being worked on. Cover all openings with plastic and duct tape. Turn OFF any force air A/C or heating system and cover with plastic and duct tape any vent openings in the area. Access to the room can be made by cutting the sealed plastic at one doorway straight down the center. A flap is then installed (black contractor's trash bag, cut along seams works perfect) and double hung from the door frame. Place a sticky mat at the entrance to allow removal of any dust from the feet upon exiting. Clean up at the end of each day using the HEPA certified vacuum. Vacuum yourself before you leave then dispose of any coveralls used in a contractor's trash bag.
5. Commence work.
6. Upon completion, clean up is required. Always work from the top down. HEPA Vac the entire room. Then, using the spray bottle, wet the ceiling surfaces and wipe clean with a white cloth. Keep wetting and wiping until the white cloth remains mostly white. Then go to the walls and work your way to the floor. Once complete, carefully remove the plastic on the doorways, windows and vents and gently roll the plastic from the floor ensuring not to disturb any potential dust remaining on it. Throw them and all the used cloths into the contractor's trash bag. Use the wet swiffer to mop the bare floors until the white swiffer mop is no longer picking up dirt (still white after being used). Focus on a 20 square foot area at a time. The room should be cleaner than when you arrived. Seal all used contractor bags using a gooseneck closure. Dispose of in a hazmat container.
7. Retest for lead.
If you are a homeowner, RRP rules do not apply (go figure?). A homeowner can dispose of leaded waste, in their municipal trash, up to 30 cubic yards! That's insane, but legal.
There are little details here and there that are discussed in the class, but the critical issues are:
Information - be knowledgeable of what you are dealing with.Test - test, test, test.Protection - ensure your family (including the furry type) is safe.Clean - make sure you wipe down EVERY surface.Disposal - throw the leaded material, wipes, plastic, etc. out in accordance with the law.
More information can be gained from the EPA: EPA.Gov - Renovation Repair and Painting Rule.


