Welcome!

How we came to purchase our home.

WPA Photo

A Works Progress Administration photo offers a glimpse of our home's past.

Reproduction Windsor Chair

Finally, a dining room set.

No Power, No Heat.

Our first snow storm and it's aftermath, October, 2011.

Lead Poisoning

Updates to our son's lead levels.

Bit By Bit

My wife's blog on being pregnant, giving birth and raising our first child with all the complications, hardships and joys that life throws our way.

Monday, August 31, 2015

Refinancing...

When we purchased our home, the mortgage that we locked into had a rate of 4.375%, a conventional loan lasting 30 years.  Since we did not put down 20%, the dreaded PMI was tacked on.  Our mortgage broker told us that in two years we can get rid of it.  What a fat lie.

Private mortgage insurance is an insurance that the bank takes out against you because you failed to put down 20% of the purchase price as a down payment.  If we were able to put down the full 20% of the sale price with the bank covering the remaining 80%, should we default on the loan, the bank would sell the home and make back their 80% AND gain our 20% deposit.  Now, as we did not have that 20%, the bank takes out that insurance on us to make up the difference in case we default.  Per our broker, after a two year period, we make a call to the bank, tell them it's been two years and they'll get rid of the PMI portion of our mortgage.  In our specific case, it's $100.04 per month or $1,200.48 per year.

Makes sense?  No, it's still confusing and a waste of money for us.  So where's the "big-fat-lie"?  It's been 3½ years since we purchased our home.  I contacted the bank and naively asked for the PMI to be taken away.  The bank said, "Hold on a second, not so fast....you have to prove the value of the house is high enough to surpass the debt to value ratio of 80%."  "How do we prove that?" was my response.

The answer is annoying.  The bank will hire a real estate appraiser (who we pay for) that will compute the value of our home.  Take the balance of our mortgage principal (the amount left on your mortgage) divided by the value of the home (per the appraiser).  If the number you get is equal to or less than 0.80, then you've surpassed the 20% threshold and the PMI can be taken away (assuming that 2 years have passed, of course).

Ok, so how does this look for us?  Well...

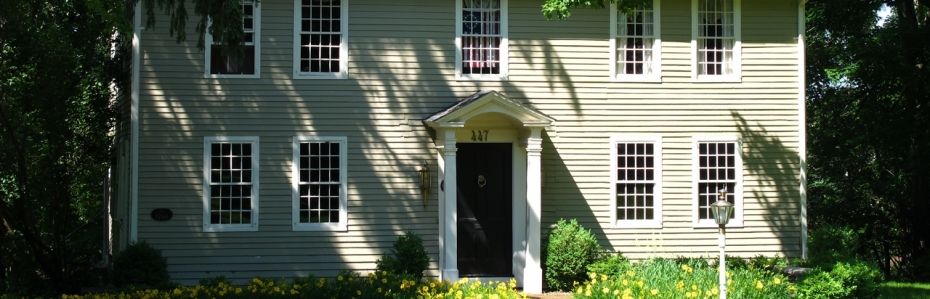
We purchased the home for $275,000.
We made a down payment of $30,000 (10.9% of the purchase price).
The loan from the bank covered the rest at $245,000.
Since we were less than 20%, the bank charged us PMI at $100.04 per month.
It's been 3½ years, so we are past the minimum 2 year "wait" period per the bank.
 
After 3½ years of mortgage payments, we've paid approximately $83,000 to our bank. 
 
Breakdown:  $21,000 was for property taxes, $4,200 went to PMI, $24,200 went to the principal and $33,600 went straight into the trash (I mean interest charges). 
 
After paying $83,000, our mortgage dropped from $245,000 to $220,800, that's it.  Our home would have to be worth $281,250 today for the debt to value ratio to be 80% or less.  If not, I would have to pay more to the principal to make up the difference or walk away and continue paying the mortgage as is.

Now here's the point of this post.  If I get rid of the PMI and I refinance the mortgage from a 30 year down to a 15 year term, since the interest rate is much smaller than our current rate, we would save approximately $160,000 over the course of 15 years while paying roughly $300 more per a month than what we are paying now.  Doesn't that just sound awesome?!  I've started dreaming in my head.

The process for refinancing the mortgage is very similar to the removal of the PMI (which is how this whole process came to light).  I searched for banks with the lowest rates and found a small local bank offering 2.89% on a 15 year mortgage.  I contacted them, filled out the mortgage application, spoke with the broker who asked that I pay $410 for an appraiser to appraise our home.  With a refinance, the bank needs to see how much we're asking the bank to cover versus how much our home is worth now.  We paid the fee and prepared for the appraiser to come.  I made a list of all the work done on the home since our arrival.  I was shocked to realize that we've spent $45,000 on repairs and upgrades since 2011 (tack that onto what was paid to the mortgage and you can see why these homes are money pits)!  I also included a list of our area's attractions, after all, real estate is all about location, location, location, right?.....WRONG!

When the appraiser came, we gave our list to him, he toured our home, took a few lousy photographs and left.  The whole encounter lasted less than 30 minutes.

About a week past by before the appraiser submitted the all important number.  The whole time waiting for him, the interest rates hadn't changed, that is, until he submitted his documentation.  By this point, the rate had jumped to 3.0% (gee... thanks for taking your time).
 
Drum roll.... the appraiser "computed" our home's official value at $276,000.  Yes, that's right, its worth only $1,000 more than what we paid for it in 2011 (appraised then at $283,000).  Dumping in another $45,000, I was hoping our home's value would've been around the $300k mark.  What a major disappointment.  The bank told us that we'll have to pay $4,200 to make up the debt to value ratio.  I can't get rid of the PMI nor can I even refinance without dipping into our last bits of savings.  After our recent lead abatement (future post), you can imagine angst.

I just have no luck.

If a banker and/or an appraiser happen to read this blog, please consider these factors:

1.  Make sure the appraiser is from the area that the home is located.  It doesn't make sense to have an appraiser totally unfamiliar with the area make an appraisal.

2.  When appraising, if the local inventory of HISTORIC PROPERTIES is limited, perhaps you should open the field to get a better understanding of the home values around the entire region, not just a pin point on a map.

3.  Don't use the ONLY historic home that sold recently as a basis for my home's value.  These homes vary greatly in condition and with a limited inventory, using only one valuation is not a true indication of value.

---------------------------------- two weeks later -----------------------------------
 
So we sat on this for a couple weeks or so.  I was, quite frankly, pissed.  The appraiser took his time, the rates had surpassed 3.0% and we would have to pay several thousands of dollars to avoid the PMI.  Once I got over it, I checked the rates again.  They had dropped.  With the FED doing their usual dancing and freaking out the markets, I was pleasantly surprised that the rate dropped a bit.  My wife and I discussed our finances and decided to continue with the process.  We locked in the new rate, moved money around and now have a 15-year refinanced mortgage. 

Current mortgage is as follows:

Term:  15-year, 180 payments
Rate:  2.89%
Loan:  $220,800.00
Total Due at Closing:  $7,704.98 (includes down payment to remove PMI, escrow startup, legal fees and bank fees)

Home Insurance was removed from the mortgage (per the bank's policy, weird), restructured and paid on an annual basis.  Altogether, the home insurance dropped.  The new biweekly mortgage amount became $966.41 with an anticipated end date in 2028 (yes, that's less than 15 years, exciting!). 
 
Can't wait to be mortgage free...

I've updated our Expense page to reflect the new mortgage.


Side Note:
I've got an old high school friend working "on Wall Street".  That is to say, he works in NYC with the financial markets.  He advised me that paying off the mortgage is a bad idea.  I would be loosing out on the annual tax deduction and I could make more money in the markets instead of putting the cash towards the mortgage.  To all of you whom feel compelled to say the same thing to me, here's my response:
 
1. I suck at investing, I obviously live in a "money pit".  Though as much as I try to learn anything in finances, I only win by pure luck rarely and fear loosing money all the time.  So going into the markets isn't an argument for not getting rid of the mortgage. 
 
2. Taxes... really?  I'll be honest, my wife and I receive roughly $2,000 to $3,000 a year of our own money back from Uncle Sam.  If our mortgage was $2,000 a month and is now paid off, I would be saving $24,000 a year (minus property taxes) of, again, our own money.  I'd rather loose the annual tax rebate from our mortgage interest and gain an extra $20,000+ in cash every year (which I can place into investments, home repairs, add to retirement, etc).  Opportunity costs being what they are, we're still putting money into our retirement accounts as well as college savings for our children.
 
3. When our mortgage is paid off, my wife and I will be in our mid to late 40's, my son will be almost 18, his sister 15.  I'll need to prepare for their college education as well which I estimate will be $30k to $50k per year (if they're not going to Harvard/Princeton/MIT/etc).
 
I hope my logic makes sense to some.
 

Wednesday, July 1, 2015

Abatement Contractors and Lead Testing

August 2014...

After my son's blood lead level began to rise again, our parlor was sealed for the next few months.  I asked for word of mouth references and searched online for another.  Altogether, I sourced four different painting contractors.

For each one, my wife and I discussed what we were looking for.  We explained that we were not sure exactly where the lead-based paint was.  We wanted all wood trim stripped bare.  We wanted all the god awful wallpaper gone.  We also wanted the work to coincide with my wife's work schedule so that she and my son can leave our home for the duration of the work.

Contractor No. 1 (from Madison, CT):
The owner was a kind and punctual man.  He arrived when he said he would and was a no-nonsense kind of guy.  He through numbers out based on his knowledge, quoting $10,000 a floor.  He indicated that it's difficult to quote an antique home due to the unknowns.  He wanted to do the work on an hourly basis, I wasn't comfortable with that.  He suggested a $2,000 max to start and see how far his crew could get.  That sounded reasonable, but when we started to breakdown what was included within the $2,000, it wasn't just his crew's hours, it also included travel time for his crew and travel time for him separately making approximately two visits a day.  It seemed unreasonable for me to pay for 4 men, at 40 minutes each way... what's that a minimum of 5 hours of "commute" time?  At roughly $35/hr for just the painters, I'd loose $175/day minimum from that $2,000 limit.  That leaves only $1,825 to spend on the paint stripping, wall paper removal and plaster patching, that works out to be 1.5 days assuming nothing goes wrong.

Contractor No. 2 (from Meriden, CT):
The owner took a quick tour and he described his restoration efforts of his own antique home.  He described gutting the entire building.... that put me off as it showed that he had very little respect for the historic fabric of the home.  Beyond that, he submitted a quote to do as we had asked and place 2 coats of LBC paint. The total estimate was $15,000 for the entire interior.  He also supplied his insurance information.

Contractor No. 3 (realtor reference, unknown location):
This gentleman was described as being very expensive but getting the  job done (haven't I heard that one before).  He came over and toured our home.  He was very sympathetic and said that if we have patience, he will find a way to do the job for free.  Yes, that's what he said. He explained that he doesn't believe that we should pay for something that should have never been allowed in the country.  He left saying that when he figures out how to make it happen, he'll get back to us.  We never heard from him again.

Contractor No. 4 (from East Hartford, CT):
This last painter came recommended from two different sources, the local paint supply store and a general contractor that specializes in antique homes.  This painting contractor had also done work on a rather famous historic house locally.  He took a tour of our home, but didn't want to give an estimate as he said we needed to have the home fully tested in order to ensure we knew where all the lead was.  This was the first time a contractor had recommended getting the home tested.  So, with that, he left and I searched for a lead inspector.


Lead Inspection

Is it worth the expense?  Simply put, yes, if your home was built/painted prior to 1978, chances are there is lead and because of that, knowing where it is can save you a headache.  However, knowing that there is lead, and it is not dealt with, disallows you, as a homeowner, from checking off that ridiculous "No Knowledge of its Presence" box when selling your home (we all know it's a lie anyway). However, removing the lead will help to raise the property value... just saying, it's worth it from an expense point of view and for your sanity.


I hired HLB Environmental to scan my home with an XRF gun.  This is the best method to check for lead.  It is not the least expensive nor is it a perfect test.  But, it is much more accurate than the read-everything-as-lead 3M sticks or the read-everything-as-safe D-Lead chemistry sets.

The proprietor, Matt Baber, arrived on time with an assistant.  The three of us spent approximately 4 hours going room by room with the XRF gun.  Within each room, he took one reading per each wall, the ceiling, the floor and one like trim (i.e., one window frame, one door frame, etc).  In the end, he took a total of 217 readings throughout our home.

How accurate is it?  The XRF measures a 1 cm2 area at the tip of the gun. The gun computes the concentration of lead and reveals it in grams per cm2.  Because each manufacturer of an XRF gun has a plus or minus reading error (ours was somewhere in the range of ±0.3 to ±0.7 gm/cm2), CT state assumes that a reading above 1.0 gm/cm2 is positive for lead based paint.  So, if you were checking a wall that was 7 feet tall and 10 feet wide and you checked one square centimeter of that entire area and it came back greater than 1.0 gm/cm2, that doesn't mean there is lead based paint throughout that 70 square foot wall surface.  That reading only means that single square centimeter has lead based paint.  Chances are the entire wall has that nasty stuff, but take it with a "grain of salt".  This also works the other way: where you'll get a reading of 0.0 gm/cmat one location, move the gun over a couple feet and you'll hit the jackpot.  The accuracy is what it is from that one area that is being testing immediately in front of the gun. And, you could test the same area over and over and not get the same exact number.  That's because the XRF gun's power source is a tiny radioactive particle that emits electrons and a sensor within the gun counts those electrons returning.  However, as the radioactive material decays, it's readings change.... without getting into the nuclear engineering of it, the device needs to be re-calibrated every-so-many times in use.  For our inspection the XRF gun was calibrated before scanning, once during scanning and when done with the scanning.

Now, normally, the fees for such an inspection cost between $700 and $1,000.  The reason is because of paperwork.  There are abatement plans that can be generated and a monitoring program that can be added as well per town rules or what-have-you.  Honestly, the "abatement plan" is to remove the paint down to bare wood then encapsulate.  The "monitoring program" is to visually check the encapsulated surfaces periodically to ensure they are still intact.  That's it, what I just wrote out (albeit with more flowery words) entails the gist of the added expense.  All I wanted to know was where the lead was.  Pricing for just the licensed inspector with his XRF gun for one house of my size was $450.  Done.

Like previous products and services mentioned, I did not receive any compensation nor discounts.  I've placed his company's website here in case someone else in CT is looking for the bare essentials of an XRF scan.  He does do the rest of the documentation as well, for a fee.  HLB Enviromental.

Steve, how would you rate HLB?  That's a tough question to accurately answer since I don't invite lead inspectors over my home on a regular basis.  He arrived on time, gave me a decent price and gave me a report for my use.  However, here are what could be considered negatives:

1.  Upon scanning the front entry, he forgot to scan the stairs, spindles and banisters.  This seems like a pretty obvious thing to not miss... He did correct the issue, came back a second time, free of charge, scanned the last few locations and submitted a second sheet of data, just for the stairs.

2.  While scanning a room, the wall closest to the front yard is labeled A, the wall to the right, B, etc.  This is the standard for all inspectors.  One of the rooms in the rear of our second floor confused Matt and he had labeled a couple walls incorrectly which confused myself and the contractor later on.  It wasn't a major issue for us, but for a more complex home or a less observant homeowner, it could have been wasted money when it came time to abate/remediate.

3.  Now this is something that I am hesitant to mention because I wouldn't want to have someone pity anyone.  Yet, it may be of some worth to mention that Matt has Parkinson's Disease.  While using the XRF, the gun's tip is not held motionless on the surface being tested as Matt does shake a bit.  I do not have a manual to refer to so I am not sure if the XRF needs to stay motionless for the entire duration of the scan (which can take between a few seconds to a minute depending on age of the gun).  For some comfort, Matt did have an assistant which I can only assume would be to help him out in the future.

Within a couple days, I received the test results.  HLB Environmental was required by State law to also submit the report to the Sanitarian (...remember him?) in my town as I had a child under the age of 6 residing in our home.  Every town is different, some strict, other's not.  I haven't heard from my town's sanitarian since he passed gas in our dining room two years ago.

A copy of the test results were emailed to the contractors mentioned earlier.  Only one of the contractor's got back to us (no, it wasn't the free guy).  We scheduled for a December 2014 start date.  

To be continued...

Friday, March 6, 2015

Parlor Renovation, Part IV - Paint Stripping

March, 2014...

The parlor is coming along.  It is a mess right now, but still, I can picture the final look in my head.  My wife, though she tries, is more annoyed with the time it has taken to get to this point.

I keep bouncing between different aspects of the room.  Plaster repair, wallpaper removal and paint stripping have been tackled at the same time.  For this post, I'd like to focus on the paint removal from our paneled wall.

The wall was unpainted when our previous owner moved in.  After hiring an interior decorator, the two decided (perhaps in a drunken stupor) that a dark green colored room would be best suited for the Asian themed Americana home (see here for photos before we purchased the home).  As with previous posts, it now becomes my task to undo their horrid decisions.  The panel was painted with a primer and a coat or two of that green/gray paint.  For several months I chipped away using an Amazon.com sourced paint scraper for detail work.  The results were pretty decent.  As I became cocky with my scrapping, I began to gouge the surface damaging the wood.  It didn't matter what the profile was, one slip was all it took to make the scar.  Knowing that the surfaces were painted in the last 20 years, I was confident that there was no lead in the room.  I took a test just to be sure; the result was negative.

I was about halfway through this job when I began researching lead paint removal for a future project.  This would've been for the exterior yet would also work on any painted surfaces.  The contraption discovered was called a Speedheater.  The company's advertising can be seen on youtube and on their site:  eco-strip.com.  It's a $499 tool that heats the surface, much like a heat gun or a heat plate would, except, the temperature is much less.  Since lead vaporizes above 1000degF, this contraption heats the surface to 200 to 400 degrees, just enough to bubble the paint.  Since this temperature range is far less than the vaporization point of lead, it makes sense as a lead removal tool.  They also sell a scraper kit for an extra $99.  The combined kit, for the most part, does a decent job but is not perfect.

Where the scrappers from Amazon.com were simple, effective tools; one slip and the surface was gouged.  With the Speedheater, the surface sizzled and bubbled during a 20-second exposure.  The bubbled paint came off very nicely with no gouging of the surface.  However, there were times when the process did not work.  Instead of making large bubbles that peeled away easily, the Speedheater created small bubbles that made the surface tacky and extremely difficult, if not impossible, to scrape the paint off.  Additionally, if one leaves the Speedheater on the surface for too long, it does burn the wood.  Several times, my wife would poke her head into my work area and comment, "why's it so smoky in here?" Eventually, the tacky areas, the mildly burned spots and the gouges gave way to a good sanding.  I took my finishing sander and loose pieces of sand paper and went at it.  I hated doing it, having had the desire to keep any semi-original finish, but after realizing that large portions of the paneled wall were a more recent reproduction, my objective changed to a clean, fresh surface.  I worked on the entire wall over the next few months, nearly the entire surface was bare except the dental molding.  Becoming annoyed with the tedious paint removal of the molding, I ventured to other painted surfaces.  I had previously tested the plaster walls, wood paneled wall and windows with the D-Lead lead test kit, all coming back negative.  I started removing the paint from the window trim...

...June, 2014...

It was around this time that our son had his next periodic lead test.  To everyone's surprise, it was slightly higher than last time (see here).  Everything STOPPED.  As a precaution, I washed down every surface immediately at our front entrance, washed down my tools and sealed the room.  I looked at the lead test kit I used previously and noted that the kit was defunct!  It was either expired (though it was in-date on the package) or tainted.  I have to stop this insanity, I give up!  It's my child's health at risk.  I called in three lead abatement certified painting contractors and am awaiting estimates... I'm done with the "Parlor Renovation"  ...to be continued...

Thursday, February 26, 2015

Parlor Renovation, Part III - Water Leak Repaired

November, 2013...

The hole in the wall had become larger due to my eagerness (see Part I).  I had contracted with Sunderland Period Homes to repair the south facing parlor window.  As promised in Part I, the following are the procedures that were taken to repair the window frame:
Sunderland Period Homes

The crew of two started with the removal of the siding. Each board was removed, numbered and stacked in the front yard. The boards were scraped for a clean edge while the paper around the window was torn off.  A product they had called "ice and water" (branded as Protecto Wrap) was used as a first layer of defense around the window.  The product is a tacky tar-like membrane that helps secure the joint between the clapboards and window frame from water.  It came in a roll and was placed first along the bottom of the window, then the sides which overlapped the bottom and finally across the top of the window, overlapping the sides.
Siding removed, "ice & water" partially installed, storm window being removed. 
Rotted wood on the frame was marked for removal.  The marking delineated an area that was easy to cut and replicate. A scraper was used to remove paint to expose the wood's surface.  A straight edge was then used to complete the mark out.
Scraping the paint off the damaged area.


Using a straight edge for mark out.  


Once the area to be removed is marked, it is then removed using a router.  
The depth of the router is adjusted prior to the removal.

Starting from the outside edge, the carpenter carefully routers the wood to the indicated shape.


A stock piece of wood slightly thicker than the area being patched is used.  It is laid against the frame and the cutout is traced onto the stock wood.  A jigsaw was used to cut it out.
Scrap of wood being cut using a jigsaw.  Note the clapboards on the sawhorses.


Perfect match.

 With the patch ready, time to install.  The carpenter recommended that a 3x construction adhesive be used instead of stronger adhesives (such as the 8x) as the stronger varieties tend to be too gritty for this application.
Construction adhesive, 3x strength.

The application of the adhesive into the cut out.
The previously sized stock piece of wood is squeezed into the fresh adhesive.  The carpenter pre-drills screw holes and secures the patch with stainless screws.  Once the adhesive sets, the patch is planned flush with the original frame.
Pre-drilling for the screws.
This process was repeated several times around the perimeter of the window's frame.  Once complete, the crew moved on to the siding.  
Patchwork complete.  Note the Great Stuff insulating foam in between the planked wall boards.


It was suggested by the carpenter that while the siding is off, we should fill the gaps between the planks with foam.  What an excellent idea.  Now, I realize this is not going to be anywhere near as efficient as R15 insulation batting; however, compared to having no insulation versus this sprayed into the one inch cavities to help button up our home, I was all too eager to go out and purchase a whole bunch for the crew.  I was told to purchase the blue bottle for windows and doors.  This is because, per the carpenter, it was formulated to fill the spaces around windows and doors without making them un-plum.  The regular red can applies more pressure to the surfaces it comes into contact with which can cause alignment issues.  
Great Stuff, Window and Door.


Felt paper is now installed as a secondary wind and rain barrier.  It's installed with small siding nails.
Felt installed overlapping each other.

Siding nail.


Flashing installation is done in the same manner as the "water and ice" except the flashing needs to be scewed into the side of the house.
Flashing is installed over the "ice and water" membrane and under the frame's lip.  It is secured through the window frame.


The flashing is installed similar to the "water and ice" membrane starting at the bottom, overlapping the sides onto the bottom and then the top overlapping the sides.
A clear caulk was then used to seal the perimeter of the window.
Clear caulk.


Once caulked, the clapboards were re-installed with new pieces being added where needed.


For the next couple of days, this is how the side of my home looked.  The work finished within a week with the installation of lead flashing above the window (sorry, I ran out of vacation time, no photos of that installation).  The remaining clapboards were replaced and the work was done on the outside.  However, in the estimate, Sunderland Period Homes specified rosehead nails for the siding, the carpenter used regular siding nails.  It was a deviation that was very disappointing.  Upon pointing this oversight to Edward, he ordered the correct nails and had his carpenter install them.  His reasoning for not using it was because even though he wrote it down in the estimate, the existing nails in the siding were regular nails so he didn't think that he needed to install the more expensive rosehead nails.

On to the inside...
Interior face of the south exterior parlor wall before any repair work.
Sunderland himself worked on the plaster patching.  He took a sample of one of the window's trim and had it replicated exactly.  He also did the same with the sill.  Both of the components were damaged by yours truly in my feeble attempt to "fix" the window.
Plaster placement in progress.

Plaster material used.

Done.  Plaster and trim completed.


Once Edward and his crew were done, now, it was my turn to fix the cracks in the walls.

Big Wally's Plaster Magic, Contractor's Pack.


So the total cost for Sunderland Period Homes was:  $3,450.00 (does not include the Plaster Magic).  Pricing included an extra $250 due to there being more plaster repair than Edward had initially thought.  I don't yet know how much a 50 pound bag of Structo-Lite costs, but I doubt its anywhere near that price.

This truly was very expensive.  I have to admit that towards the end of this project, I lost my temper with Edward.  He tended to want to do 'this' and 'that', seemingly pull numbers out of the air and make me feel quite idiotic on a continual basis.  He didn't realize that we are not one of his wealthy clients that are restoring their vacation house.  This is our home, we live here and we only have so much money to spend.  I snapped at him one evening and told him that I just cannot afford him.  With his posh attitude, he didn't seem to care and we haven't spoken since.

Now with that being said, he was able to stop the window leak, perfectly duplicate the trim and do a decent job of plaster repair.  He also did not mind that I was asking questions of his crew most of the time and also did not mind the photographs.  Would I hire him again... eh, simply because of the expense, I think I'll shop around next time.  At least I was able to get a decent idea of how to seal a window.  I thank Chris, the lead carpenter, for being so educational.

Future plans are to prime the exterior surfaces left exposed and continue working on the interior of the parlor myself with paint removal and crack repair.