




Welcome!

How we came to purchase our home.

WPA Photo

A Works Progress Administration photo offers a glimpse of our home's past.

Reproduction Windsor Chair

Finally, a dining room set.

No Power, No Heat.

Our first snow storm and it's aftermath, October, 2011.

Lead Poisoning

Updates to our son's lead levels.

Bit By Bit

My wife's blog on being pregnant, giving birth and raising our first child with all the complications, hardships and joys that life throws our way.

Showing posts with label Contractor. Show all posts

Wednesday, July 1, 2015

Abatement Contractors and Lead Testing

August 2014...

After my son's blood lead level began to rise again, our parlor was sealed for the next few months.  I asked for word of mouth references and searched online for another.  Altogether, I sourced four different painting contractors.

For each one, my wife and I discussed what we were looking for.  We explained that we were not sure exactly where the lead-based paint was.  We wanted all wood trim stripped bare.  We wanted all the god awful wallpaper gone.  We also wanted the work to coincide with my wife's work schedule so that she and my son can leave our home for the duration of the work.

Contractor No. 1 (from Madison, CT):
The owner was a kind and punctual man.  He arrived when he said he would and was a no-nonsense kind of guy.  He through numbers out based on his knowledge, quoting $10,000 a floor.  He indicated that it's difficult to quote an antique home due to the unknowns.  He wanted to do the work on an hourly basis, I wasn't comfortable with that.  He suggested a $2,000 max to start and see how far his crew could get.  That sounded reasonable, but when we started to breakdown what was included within the $2,000, it wasn't just his crew's hours, it also included travel time for his crew and travel time for him separately making approximately two visits a day.  It seemed unreasonable for me to pay for 4 men, at 40 minutes each way... what's that a minimum of 5 hours of "commute" time?  At roughly $35/hr for just the painters, I'd loose $175/day minimum from that $2,000 limit.  That leaves only $1,825 to spend on the paint stripping, wall paper removal and plaster patching, that works out to be 1.5 days assuming nothing goes wrong.

Contractor No. 2 (from Meriden, CT):
The owner took a quick tour and he described his restoration efforts of his own antique home.  He described gutting the entire building.... that put me off as it showed that he had very little respect for the historic fabric of the home.  Beyond that, he submitted a quote to do as we had asked and place 2 coats of LBC paint. The total estimate was $15,000 for the entire interior.  He also supplied his insurance information.

Contractor No. 3 (realtor reference, unknown location):
This gentleman was described as being very expensive but getting the  job done (haven't I heard that one before).  He came over and toured our home.  He was very sympathetic and said that if we have patience, he will find a way to do the job for free.  Yes, that's what he said. He explained that he doesn't believe that we should pay for something that should have never been allowed in the country.  He left saying that when he figures out how to make it happen, he'll get back to us.  We never heard from him again.

Contractor No. 4 (from East Hartford, CT):
This last painter came recommended from two different sources, the local paint supply store and a general contractor that specializes in antique homes.  This painting contractor had also done work on a rather famous historic house locally.  He took a tour of our home, but didn't want to give an estimate as he said we needed to have the home fully tested in order to ensure we knew where all the lead was.  This was the first time a contractor had recommended getting the home tested.  So, with that, he left and I searched for a lead inspector.


Lead Inspection

Is it worth the expense?  Simply put, yes, if your home was built/painted prior to 1978, chances are there is lead and because of that, knowing where it is can save you a headache.  However, knowing that there is lead, and it is not dealt with, disallows you, as a homeowner, from checking off that ridiculous "No Knowledge of its Presence" box when selling your home (we all know it's a lie anyway). However, removing the lead will help to raise the property value... just saying, it's worth it from an expense point of view and for your sanity.


I hired HLB Environmental to scan my home with an XRF gun.  This is the best method to check for lead.  It is not the least expensive nor is it a perfect test.  But, it is much more accurate than the read-everything-as-lead 3M sticks or the read-everything-as-safe D-Lead chemistry sets.

The proprietor, Matt Baber, arrived on time with an assistant.  The three of us spent approximately 4 hours going room by room with the XRF gun.  Within each room, he took one reading per each wall, the ceiling, the floor and one like trim (i.e., one window frame, one door frame, etc).  In the end, he took a total of 217 readings throughout our home.

How accurate is it?  The XRF measures a 1 cm2 area at the tip of the gun. The gun computes the concentration of lead and reveals it in grams per cm2.  Because each manufacturer of an XRF gun has a plus or minus reading error (ours was somewhere in the range of ±0.3 to ±0.7 gm/cm2), CT state assumes that a reading above 1.0 gm/cm2 is positive for lead based paint.  So, if you were checking a wall that was 7 feet tall and 10 feet wide and you checked one square centimeter of that entire area and it came back greater than 1.0 gm/cm2, that doesn't mean there is lead based paint throughout that 70 square foot wall surface.  That reading only means that single square centimeter has lead based paint.  Chances are the entire wall has that nasty stuff, but take it with a "grain of salt".  This also works the other way: where you'll get a reading of 0.0 gm/cmat one location, move the gun over a couple feet and you'll hit the jackpot.  The accuracy is what it is from that one area that is being testing immediately in front of the gun. And, you could test the same area over and over and not get the same exact number.  That's because the XRF gun's power source is a tiny radioactive particle that emits electrons and a sensor within the gun counts those electrons returning.  However, as the radioactive material decays, it's readings change.... without getting into the nuclear engineering of it, the device needs to be re-calibrated every-so-many times in use.  For our inspection the XRF gun was calibrated before scanning, once during scanning and when done with the scanning.

Now, normally, the fees for such an inspection cost between $700 and $1,000.  The reason is because of paperwork.  There are abatement plans that can be generated and a monitoring program that can be added as well per town rules or what-have-you.  Honestly, the "abatement plan" is to remove the paint down to bare wood then encapsulate.  The "monitoring program" is to visually check the encapsulated surfaces periodically to ensure they are still intact.  That's it, what I just wrote out (albeit with more flowery words) entails the gist of the added expense.  All I wanted to know was where the lead was.  Pricing for just the licensed inspector with his XRF gun for one house of my size was $450.  Done.

Like previous products and services mentioned, I did not receive any compensation nor discounts.  I've placed his company's website here in case someone else in CT is looking for the bare essentials of an XRF scan.  He does do the rest of the documentation as well, for a fee.  HLB Enviromental.

Steve, how would you rate HLB?  That's a tough question to accurately answer since I don't invite lead inspectors over my home on a regular basis.  He arrived on time, gave me a decent price and gave me a report for my use.  However, here are what could be considered negatives:

1.  Upon scanning the front entry, he forgot to scan the stairs, spindles and banisters.  This seems like a pretty obvious thing to not miss... He did correct the issue, came back a second time, free of charge, scanned the last few locations and submitted a second sheet of data, just for the stairs.

2.  While scanning a room, the wall closest to the front yard is labeled A, the wall to the right, B, etc.  This is the standard for all inspectors.  One of the rooms in the rear of our second floor confused Matt and he had labeled a couple walls incorrectly which confused myself and the contractor later on.  It wasn't a major issue for us, but for a more complex home or a less observant homeowner, it could have been wasted money when it came time to abate/remediate.

3.  Now this is something that I am hesitant to mention because I wouldn't want to have someone pity anyone.  Yet, it may be of some worth to mention that Matt has Parkinson's Disease.  While using the XRF, the gun's tip is not held motionless on the surface being tested as Matt does shake a bit.  I do not have a manual to refer to so I am not sure if the XRF needs to stay motionless for the entire duration of the scan (which can take between a few seconds to a minute depending on age of the gun).  For some comfort, Matt did have an assistant which I can only assume would be to help him out in the future.

Within a couple days, I received the test results.  HLB Environmental was required by State law to also submit the report to the Sanitarian (...remember him?) in my town as I had a child under the age of 6 residing in our home.  Every town is different, some strict, other's not.  I haven't heard from my town's sanitarian since he passed gas in our dining room two years ago.

A copy of the test results were emailed to the contractors mentioned earlier.  Only one of the contractor's got back to us (no, it wasn't the free guy).  We scheduled for a December 2014 start date.  

To be continued...

Thursday, February 26, 2015

Parlor Renovation, Part III - Water Leak Repaired

November, 2013...

The hole in the wall had become larger due to my eagerness (see Part I).  I had contracted with Sunderland Period Homes to repair the south facing parlor window.  As promised in Part I, the following are the procedures that were taken to repair the window frame:
Sunderland Period Homes

The crew of two started with the removal of the siding. Each board was removed, numbered and stacked in the front yard. The boards were scraped for a clean edge while the paper around the window was torn off.  A product they had called "ice and water" (branded as Protecto Wrap) was used as a first layer of defense around the window.  The product is a tacky tar-like membrane that helps secure the joint between the clapboards and window frame from water.  It came in a roll and was placed first along the bottom of the window, then the sides which overlapped the bottom and finally across the top of the window, overlapping the sides.
Siding removed, "ice & water" partially installed, storm window being removed. 
Rotted wood on the frame was marked for removal.  The marking delineated an area that was easy to cut and replicate. A scraper was used to remove paint to expose the wood's surface.  A straight edge was then used to complete the mark out.
Scraping the paint off the damaged area.


Using a straight edge for mark out.  


Once the area to be removed is marked, it is then removed using a router.  
The depth of the router is adjusted prior to the removal.

Starting from the outside edge, the carpenter carefully routers the wood to the indicated shape.


A stock piece of wood slightly thicker than the area being patched is used.  It is laid against the frame and the cutout is traced onto the stock wood.  A jigsaw was used to cut it out.
Scrap of wood being cut using a jigsaw.  Note the clapboards on the sawhorses.


Perfect match.

 With the patch ready, time to install.  The carpenter recommended that a 3x construction adhesive be used instead of stronger adhesives (such as the 8x) as the stronger varieties tend to be too gritty for this application.
Construction adhesive, 3x strength.

The application of the adhesive into the cut out.
The previously sized stock piece of wood is squeezed into the fresh adhesive.  The carpenter pre-drills screw holes and secures the patch with stainless screws.  Once the adhesive sets, the patch is planned flush with the original frame.
Pre-drilling for the screws.
This process was repeated several times around the perimeter of the window's frame.  Once complete, the crew moved on to the siding.  
Patchwork complete.  Note the Great Stuff insulating foam in between the planked wall boards.


It was suggested by the carpenter that while the siding is off, we should fill the gaps between the planks with foam.  What an excellent idea.  Now, I realize this is not going to be anywhere near as efficient as R15 insulation batting; however, compared to having no insulation versus this sprayed into the one inch cavities to help button up our home, I was all too eager to go out and purchase a whole bunch for the crew.  I was told to purchase the blue bottle for windows and doors.  This is because, per the carpenter, it was formulated to fill the spaces around windows and doors without making them un-plum.  The regular red can applies more pressure to the surfaces it comes into contact with which can cause alignment issues.  
Great Stuff, Window and Door.


Felt paper is now installed as a secondary wind and rain barrier.  It's installed with small siding nails.
Felt installed overlapping each other.

Siding nail.


Flashing installation is done in the same manner as the "water and ice" except the flashing needs to be scewed into the side of the house.
Flashing is installed over the "ice and water" membrane and under the frame's lip.  It is secured through the window frame.


The flashing is installed similar to the "water and ice" membrane starting at the bottom, overlapping the sides onto the bottom and then the top overlapping the sides.
A clear caulk was then used to seal the perimeter of the window.
Clear caulk.


Once caulked, the clapboards were re-installed with new pieces being added where needed.


For the next couple of days, this is how the side of my home looked.  The work finished within a week with the installation of lead flashing above the window (sorry, I ran out of vacation time, no photos of that installation).  The remaining clapboards were replaced and the work was done on the outside.  However, in the estimate, Sunderland Period Homes specified rosehead nails for the siding, the carpenter used regular siding nails.  It was a deviation that was very disappointing.  Upon pointing this oversight to Edward, he ordered the correct nails and had his carpenter install them.  His reasoning for not using it was because even though he wrote it down in the estimate, the existing nails in the siding were regular nails so he didn't think that he needed to install the more expensive rosehead nails.

On to the inside...
Interior face of the south exterior parlor wall before any repair work.
Sunderland himself worked on the plaster patching.  He took a sample of one of the window's trim and had it replicated exactly.  He also did the same with the sill.  Both of the components were damaged by yours truly in my feeble attempt to "fix" the window.
Plaster placement in progress.

Plaster material used.

Done.  Plaster and trim completed.


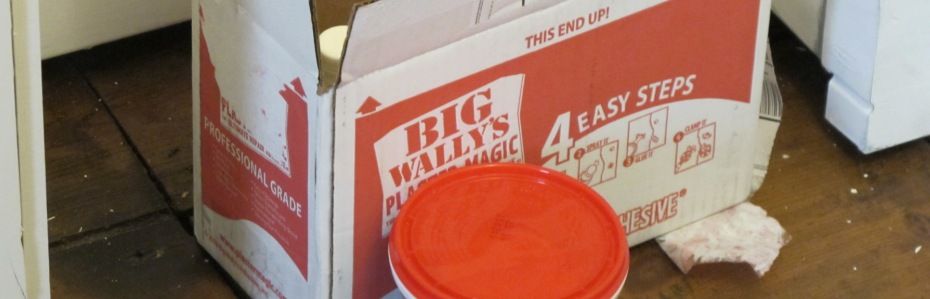
Once Edward and his crew were done, now, it was my turn to fix the cracks in the walls.

Big Wally's Plaster Magic, Contractor's Pack.


So the total cost for Sunderland Period Homes was:  $3,450.00 (does not include the Plaster Magic).  Pricing included an extra $250 due to there being more plaster repair than Edward had initially thought.  I don't yet know how much a 50 pound bag of Structo-Lite costs, but I doubt its anywhere near that price.

This truly was very expensive.  I have to admit that towards the end of this project, I lost my temper with Edward.  He tended to want to do 'this' and 'that', seemingly pull numbers out of the air and make me feel quite idiotic on a continual basis.  He didn't realize that we are not one of his wealthy clients that are restoring their vacation house.  This is our home, we live here and we only have so much money to spend.  I snapped at him one evening and told him that I just cannot afford him.  With his posh attitude, he didn't seem to care and we haven't spoken since.

Now with that being said, he was able to stop the window leak, perfectly duplicate the trim and do a decent job of plaster repair.  He also did not mind that I was asking questions of his crew most of the time and also did not mind the photographs.  Would I hire him again... eh, simply because of the expense, I think I'll shop around next time.  At least I was able to get a decent idea of how to seal a window.  I thank Chris, the lead carpenter, for being so educational.

Future plans are to prime the exterior surfaces left exposed and continue working on the interior of the parlor myself with paint removal and crack repair.

Sunday, July 27, 2014

RRP Rule

After the scares with leaded paint, my wife felt that it was prudent to have me take a class in lead safety, just so that I know the current standards in protecting our family from lead dust.  Doing research online, I came across many classes meant for contractors at varying costs.  Some were a week long program for heavy lead abatement (think Hollywood style HAZMAT/alien invasion with plastic rooms and space suit-like attire).  I was not about to spend a week's worth of vacation time to sit in a HAZMAT training class.  Instead, I came across a one day class that, since 2010, has been a requirement for persons to either earn a contractor's license or receive a permit in certain towns.  This one day class is for the RRP certification, or Renovation, Repair and Painting Program.  The one day class instructs contractors on how to identify potential projects where lead may be present, how to test for lead, how to inform the customer of the presence of lead, how to prepare the area being worked on to avoid the spread of leaded dust, how to protect yourself and, lastly, how to clean the work area.  The information is provided by the EPA and is taught by EPA certified companies.  Some states run their own program directly, like Rhode Island and Massachusetts.  In Connecticut, the regulations are set by the Federal government (based out of Boston, go figure?)

After having taken the course this past June, I reflected on the two separate contractors that have worked on our home. Only one of them have actually followed the RRP rules.  The crew that did (seen here), did preparatory work by the book.  The other, more recent contractor (seen here), did nothing; even after being told that there was lead present.

The RRP class is one vacation day and around $200.  You're certified for 5 years and a refresher course (4 hours long) is required every 5 years to maintain the certification.  The class was hosted by Fuss and O'Neil, an engineering company in Manchester, CT.  They, specifically, charged $190 (2014) for the class and provided lunch.  The information is public information as it is from the EPA.  Below, I have listed out the procedures that one must take when dealing with a leaded project.  These are the rules as stipulated by the EPA for a contractor to follow.  For the rules of a home owner, scroll to the end...

1.  Upon arrival to the project, ask the owner when the home was built.  If they tell you it was built prior to 1978, test for lead.  If they don't know, test for lead.  If it was built on or after January 1, 1978, it magically doesn't have lead and the RRP rules no longer apply; you may commence work.

2.  Test for lead using EPA approved test kits (seen here and here).  Document the areas tested and record the results.  If negative, RRP rules no longer apply.  If positive, inform the homeowner and provide them with a government sourced brochure regarding lead risks to children (Renovate Right).  Within 30 days of the completion of the project, a copy of the results are to be submitted to the homeowner.  The homeowner is now fully aware that there is leaded paint present.

3.  Purchase:
6-mil thick plastic sheets (100 feet x 10-foot roll is roughly $60 at Home Depot)
Contractor trash bags (again, Home Depot, 3-mill thick 42 gallon bags, 50 count for $26)
HEPA certified shop vacuum (no, not a vacuum with a HEPA filter, that doesn't count!, Amazon, $250+)
Swifter wet mops (cheapest functional)
Swifter dry mops (cheapest functional)
Duct-Tape (extra wide painter's tape is more safe for floors)
An empty spray bottle (for water wash downs)
Protective coveralls, hooded, and booties (roughly $10, per laborer per day)
Sticky pads (120 sheets for $100). 
4a.  If working on a leaded exterior, protect the ground with 6-mil thick plastic sheets a minimum of 10 feet from the building, 20+ feet when at the second floor.  A contractor is suppose to use their judgement beyond 10-20 feet, where working on a third floor, for example, may cause leaded dust to fall beyond 20 feet from the house.  The edge closest to the building should be duct-taped to the exterior to ensure no gaps.  Cover any wall openings, i.e. windows and doors in the immediate area with the plastic and duct-tape.  The plastic on the ground is to drape over all landscaping, including bushes and vegetable gardens.  Ensure that the sheets are weighed down and never work in windy conditions.  At the end of each day, use the HEPA vacuum to remove all contaminants that fell on the plastic.  The plastic sheet can be re-used, so long as it is cleaned daily, kept in good condition and not transported around the building.  Do not remove the plastic while having contaminated material on it, a risk of the debris falling out and contaminating the ground exists.

4b.  If working on a leaded interior, protect the floor 6 feet from the surface being worked on.  Cover all openings with plastic and duct tape.  Turn OFF any force air A/C or heating system and cover with plastic and duct tape any vent openings in the area.  Access to the room can be made by cutting the sealed plastic at one doorway straight down the center.  A flap is then installed (black contractor's trash bag, cut along seams works perfect) and double hung from the door frame.  Place a sticky mat at the entrance to allow removal of any dust from the feet upon exiting.  Clean up at the end of each day using the HEPA certified vacuum. Vacuum yourself before you leave then dispose of any coveralls used in a contractor's trash bag.

5.  Commence work.

6.  Upon completion, clean up is required.  Always work from the top down.  HEPA Vac the entire room.  Then, using the spray bottle, wet the ceiling surfaces and wipe clean with a white cloth.  Keep wetting and wiping until the white cloth remains mostly white.  Then go to the walls and work your way to the floor.  Once complete, carefully remove the plastic on the doorways, windows and vents and gently roll the plastic from the floor ensuring not to disturb any potential dust remaining on it.  Throw them and all the used cloths into the contractor's trash bag.  Use the wet swiffer to mop the bare floors until the white swiffer mop is no longer picking up dirt (still white after being used).  Focus on a 20 square foot area at a time.  The room should be cleaner than when you arrived.  Seal all used contractor bags using a gooseneck closure.  Dispose of in a hazmat container.  

7.  Retest for lead.

If you are a homeowner, RRP rules do not apply (go figure?).  A homeowner can dispose of leaded waste, in their municipal trash, up to 30 cubic yards!  That's insane, but legal.

There are little details here and there that are discussed in the class, but the critical issues are:
Information - be knowledgeable of what you are dealing with.
Test - test, test, test.
Protection - ensure your family (including the furry type) is safe.
Clean - make sure you wipe down EVERY surface.
Disposal - throw the leaded material, wipes, plastic, etc. out in accordance with the law.
More information can be gained from the EPA:  EPA.Gov - Renovation Repair and Painting Rule.

Sunday, April 20, 2014

Parlor Renovation, Part II - Window Sashes

A continuation from Parlor Renovation, Part I.

It was agreed that I would strip the window sashes to save on cost in preparation for the work to be done to our southern parlor window.  It was a simple task (isn't it always?).  I purchased paint stripper, a scraper, a dust suite and a lead vapor rated painter's mask.  I setup my area in the driveway placing a disposable plastic tarp on the pavement, two horses atop and dawned my space suite attire.  I retrieved the sashes from the back porch and while carrying them to my work area, one of the rails loosened and nearly fell off.  Well, there goes stripping them...

Turns out, the bottom rail on one of the sashes was rotted at the joint and had come loose.  My tail between my legs, I called Sunderland and requested his opinion.  He felt that it was an easy fix of a job costing roughly $300.  As usual, I wanted to make sure I was getting the best price.  After he explained what that cost entailed (replacing the bottom rail and re-glazing the three bottom panes).  I told him to never mind the whole window altogether and simply focus on repairing the rot and water issue with the frame.  I sought to replace the window sashes outright.

I searched online and came across Caroline Sly of Ashfield, MA.  She is a one-woman shop and claims to make windows by hand (among other wooden assemblies including stringed musical instruments) and after contacting her, she offered to stop by and show a sample of her work.

Prior to her arrival, we exchanged emails.  We spoke of early expectations and I learned just how affordable she is.  As my readers will recall, I always say that money is a matter of perspective, so what does affordable mean?  Well, if Sunderland Period Homes was willing to repair my one lousy reproduction window sash from the 1960's for $300 plus another $400 to weatherstrip with vinyl/plastic strips both sashes; Mrs. Sly was hand-making TWO sashes, with antique glass from the 19th century and weatherstripping of a similar nature for $425 (un-painted).  $700 to repair one reproduction versus $425 for a new period reproduction.  

I'll take your silence as a nod of approval.  She's a godsend when dealing with a constant barrage of high prices.  Mind you that pieces from Mrs. Sly are a custom one, so what may be of one charge for my home, could be different for yours (meaning, you should contact her for specific applications).  Here is her site: www.CarolineSly.com.

Her work speaks for itself.  Is it perfect, no.  Is it affordable?  For us, yes.  There are little issues I have with her work, details that would annoy me tremendously if Sunderland had done it, especially with his level of pricing.  She gave her opinion with details and listened to our desires.  It took her a week to create the pair of sashes, glaze them and deliver them to our home.  The glazing was still pliable when she dropped them off.

I was hesitant on informing Mr. Sunderland of my purchase.  After all, he is working on our home and has the means and methods of creating windows.  I would not want to offend him by taking business away.  I tried to keep things simple and simply asked that we did not install the weatherstripping on the old sashes and that I'll deal with them later.

But Mr. Sunderland kept on badgering me about the window, that it needs to be repaired or it will not function correctly, etc.   He was right, of course, yet, his pricing is just out of reach for my sanity.  In the end, I relented and confessed the real reason for foregoing the repair of the old sash.  Once my secret plan came to light, Mr. Sunderland really didn't say much.  He didn't seem to mind at that time and I invited him to examine the new sashes. 

Sunderland Period Homes strives for perfection in the details, at least that's the impression.  So, it wasn't until several weeks later that Mr. Sunderland felt compelled to give his full opinion of the sashes.  He examined the window and began pointing out all the inconsistencies in workmanship as well as the structural integrity of the window.  He said that the rebates for the glass were too shallow and that the panes of glass would fall out in time.  He added that the sashes were over tightened while being assembled which warped the sash.  He continued on for a short while, honestly aggravating me quite a bit.  I cannot afford to have Mr. Sunderland do as he pleases on my dime.  I'm not a wealthy person, I'm simply a family man paying my bills with an interest in historic homes.  So, with whatever little extra income we have goes towards our home.  If the expense is too great, something has to give.  I'm not a bottomless pit...

In retrospect (and I'm not an expert) I find it a bit hard to believe that a joiner from the 18th century would have made such perfect sashes by hand with wood sourced from one's backyard that would've passed Mr. Sunderland's critique.  It's been a while since that discussion and I am still annoyed by it.  I'm sure he's also annoyed at me for telling him that he's just too damn expensive for us, literally.

These sashes may not be perfect, but you be the judge.  Do they live up to your expectations?  Here are some closeups as they looked when Sunderland saw them:


The left sash is as Mrs. Sly delivered it, fingerprints and smudges from the glazing process present (so what?).  The right sash was cleaned and prepped for painting.  I think I am satisfied.

Mrs. Sly is due to come back to install the weatherstripping and fitment within our frame.  As of this posting, our agonizingly slow repair is as a result of yours truly having other priorities (a.k.a. LIFE) getting in the way.  As an update can be made, I'll post it up.

UPDATE:
Miscommunication, one of the most annoying things in life.  Between the window sash ordering, scheduling, dealing with Sunderland Period Homes, the lead problems; I must've misunderstood Mrs. Sly when she and I discussed installation.  She was unable to install the window sashes due to age (70+ years to her credit).  So I sit here completely beside myself since the promised windows were delivered without weatherstipping pending installation (hence my assumption of her installing them).  Well at least the price of the window, as is, is still more affordable than a repaired replica.

Wednesday, December 25, 2013

Parlor Renovation, Part I

August 4, 2012...

"OK!  I know it looks bad, but it looks worse than it really is.  I swear!"

That's the only thing I could say to my wife when she came into the parlor.  It's only a hole in the wall, right?  A frown, and the look of "what did you do now" was the kindest of greetings one could receive...

From the survey of our parlor, a rubber-cement glued wallpaper could be seen hiding the water damage plaster underneath (thanks to the previous owner).  As I peeled away the God-awful wallpaper, I opened a can of worms....the wallpaper was holding together the damaged plaster underneath.  In my unknowing nature at that time, the "loosened" plaster fell out and I had continued to remove what I had thought was damaged plaster resulting in a gaping hole in our exterior wall.

Before , left:  Rubber cemented (and painted) wallpaper.         After, right:  Wallpaper removed, punky plaster exposed.


Wallpaper removed, "loose" plaster gone (lathe saved) and the window trim removed (some damaged), I found myself dug deep into a pit.  My knowledge was limited, my hopes high.  I wanted to do the work myself, pride took the better of me.  I continued to knock "loose" the surrounding plaster away.  In the end, I was left with an annoyed wife and crushed pride.

More wallpaper being removed, wetted areas are now visible below the window.


Without the knowledge to repair my deeds, the wall sat there for the remainder of the summer, fall, winter, spring... yes yes, and then summer.  I must have sub-consciously buried the plan to have it fixed for each time I said out loud to my wife that I am busy and can't do this or that right now, she would interject and say, "Like the hole in the wall?" It was painful to have to be reminded of my error or lack of ability.

I removed the wall paper entirely, along with the two sashes, sill, molding and punky plaster.  Notice the solid piece of wood at the window sill height that is where the original chair rail would have been.
August, 2013...

I had a plan (in my head).  I needed to learn how to do repairs on my own home yet books only showed vague interpretations of other jobs but I am a visual and hands-on person.  My plan was to contact Mr. Sunderland of Sunderland Period Homes.  I had the idea that since he's employed several talented persons, perhaps I could hire but one to show me how.  I wanted to learn how to do this and that and thought that perhaps I could "rent" one of his carpenters or plasters for a day to show me the ropes.  An email was sent off.

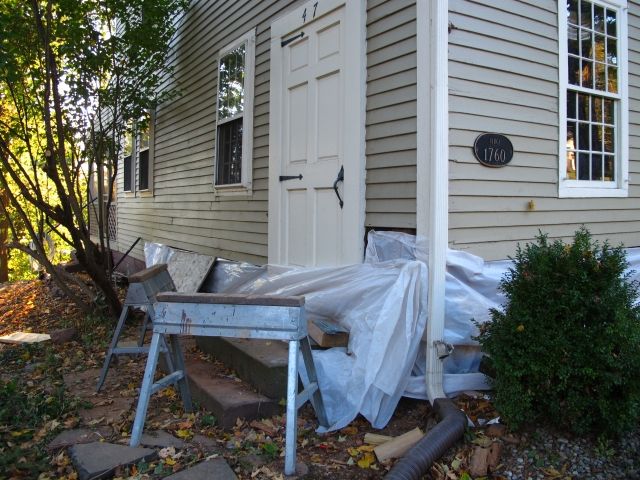
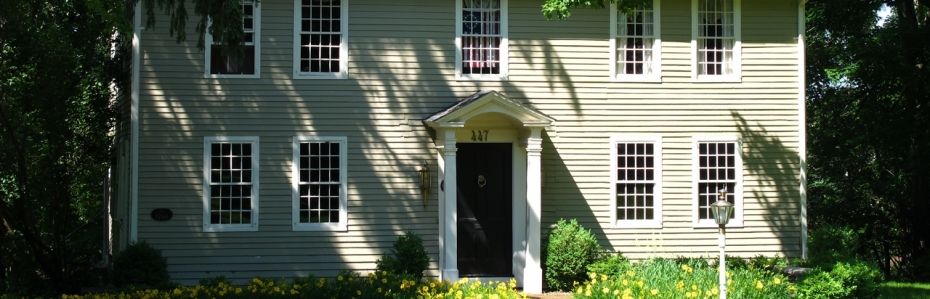
View from the southeast corner of the home towards the west.  The window is just west of our coffin door.  Notice the slight bump that is just below the window.

South exterior wall.
South exterior wall, window and coffin door.
Mr. Sunderland was confused by my questions and request.  He asked to come over and I can surmise that his trip was to evaluate a future job as oppose to a learning experience for the home owner.  We spoke of several topics while he was at our home including making our coffin door functional, adding a chair rail, siding, identifying a possible structural issue below the window... oh, and yes, the window and plaster mess yours truly created.  The idea of instruction was thrown out the window very quickly as Mr. Sunderland was too confused (perhaps on purpose) to follow.  So, we discussed how he would repair the window and bring it to new (along with the aforementioned items).  As I walked Mr. Sunderland to his car, we discussed a budget.  After pricing out how much a new window was from a few sources, to include the sashes and frame, (minus installation) I figured that a repair for such a window would surely not cost anywhere near the estimated $2,000 for the uninstalled package.  Considering our finances, my wife and I decided that $2,000 seemed a reasonable maximum amount to repair that plaster wall, reset the window sashes and stop the water leak.  Mr. Sunderland nodded as if he understood, yet said that it may be a bit more.  It was a one hour chat and an email to follow within the week that blew my mind, and not in a good way.


Here was the estimated total (are you ready for a jaw drop?):  $6,800.00

My mouth dropped open, I even imagine a bit of saliva dribbled out as I was dumb struck.  My wife had to cover my child's ears as, in my delirium, extraordinarily colorful words expelled from my drooling mouth to such extent that my opinion of Mr. Sunderland dropped dramatically.

I emailed/called Sunderland Period Homes to explain to me why it would cost nearly $7,000 to fix a leaky window and patch the plaster?  Here was his response, in layman's terms:

$2,600 is for the chair rail restoration.  The rail had been removed by a previous owner and replacing it would bring the room back to an original appearance.  The cost included the materials and labor which involved scribing the wood chair rail to match the uneven plaster wall along three walls (the fourth being paneled).  I'll pass on a scribed chair rail, saving myself 30% of the estimate upfront.

$600 is for removing paint from the existing reproduction sashes on one window.  Ah, thanks, but I'll spend a few hours over a weekend doing that myself...

$400 is for weatherstripping the two existing reproduction sashes.  What?!  It costs less than a dollar a foot to purchase!  There's no way that labor could be that expensive!

$3,200 is for (quoted from the estimate):

  1. Flash the header window with lead.
  2. Attach wood lathe properly under the window.
  3. Plaster over existing lathe.
  4. Re-install sash and window trim.
  5. Remove exterior storm window.
  6. Strip paint from exterior window frame.
  7. Restore shape of exterior sill.
  8. Remove siding at left, right and beneath window to assess condition of sheathing.
  9. Install new 30 lb. tar paper around and under window.
  10. Install "ice and water" for water proofing around window.
  11. Caulk edges around window frame and re-install siding with rosehead nails.

In addition to the above items, he wrote up an estimate for "custom made interior storm windows" to replace the exterior aluminum units currently installed, restore the clapboard siding and restore the coffin door.  The other estimates combined grossed around $46,000.  All I wanted was to stop the water leak, but at least I can see where Mr. Sunderland's pricing is in other aspects.

I bit the bullet.  I signed a contract with Sunderland Period Homes for the $3,200 + (and yes, plus the outrageous $400 for weatherstripping).  I must seem insane to you, honestly though, I have a reason.  After asking for references, I spoke with a few of his former and current clients.  They all shared one answer.  He is insanely expensive, but he gets the job done right once.  This gave me an idea.  I figured, if I am paying an excessive amount of money for this small job, why not be present, mentally record what would be done and, replicate it on the other 20+ windows that need some sort of repair.  The work will be done for me and I'll be educated in how it's being done by a qualified crew.

My readers, when the job is complete, and time allows, look for a how-to for waterproofing and restoring a leaking 250+ year old window and frame (to be updated in 2014).

Side note (but important):  After the fiasco with my son's lead levels, I decided to take a sample of the underlying paint from our parlor's newly exposed surfaces.

D-Lead test samples.
The test came back negative.  It is assumed that while removing wallpaper, I had inadvertently released this trace amount of lead into the air.  I can rule out this room as being a cause for the lead in my son's system.  See this post:  Lead Poisoning, for the full story regarding lead issues.

Monday, February 13, 2012

Structural Repairs, Part II


Our contractor was busy at work each day until the October snow storm. On most days, they called giving me an update. Most of the time, though, the update was to inform me of "something" they found. His phone calls eventually turned into a fear of answering the phone. I'll be honest though, after he would mention that "something", he would add that it'll be either a small fee or nothing at all. He said that he was once my age and he knew that it was hard on the pockets when buying the first home. That's nice and all, but it means nothing when that same person throws it in your face that he did "extra work" while also throwing a hissy fit after I gave him a two item punch list.

The freebies that he offered were the removal of the plumbing that interfered with the beam replacement (that he did not put back into service), removal of a concrete threshold under the coffin door (which he left for me to dispose of) and a couple of other things that at this moment escape me.

One major call was to notify me that an additional length of sill required replacement. A length equating to over $3,000 in additional work, that's $3,000 missed that his son, the estimator, did not account for during his walkthrough. As we're funding this work through negotiations from the seller, we have a fixed amount to spend based on what his son estimated. Anything additional, we pay for out of pocket.

The work was just about complete when the October snow storm hit. I notified the two man crew that they will be unable to work at our home since there is no power to run their equipment. They understood and requested an update when power was restored.

A day or so before the power was restored; I contacted them with news that I purchased a 5,000 watt generator (see No Power, No Heat.) which would allow them to continue working. Their reply was to give the power company another day, which coincidently, came on the following afternoon.

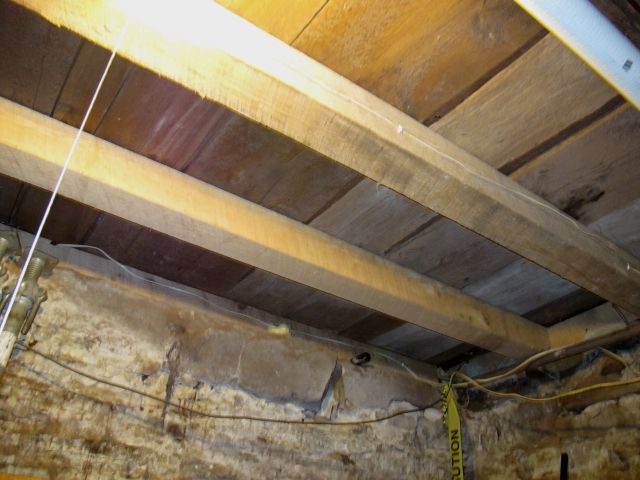
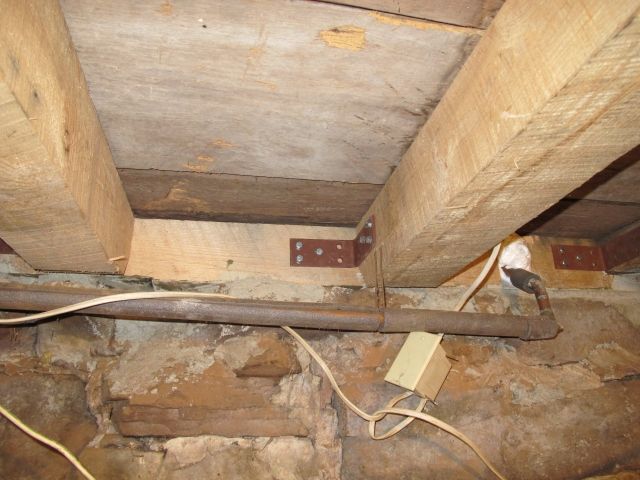
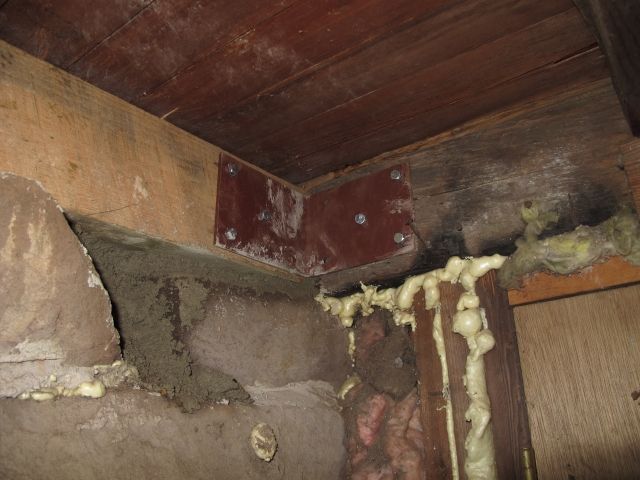
Work commenced and was primarily a finishing task. The final beams were placed and the sill mortared. Temporary support columns removed and angles with bolts screwed in to reinforce joints were installed.

I walked through the basement a couple nights before completion and noticed my oil tank still disconnected. The plumbing removed was not apparently going to be replaced. Specifically, plumbing required to fill and vent the oil tank as well as a spigot for the outside water. There was also an electrical box left unsecured (not really a big deal).


I sent an email to the owner to make sure that "we" didn't forget to put back what was taken down. After all, winter was approaching and the oil tank will need refilling eventually.

His response was not something I would have expected. He suggested that I should contact my oil supplier to re-install the pipe (which would cost me money) as he did not want to assume any liability for an incorrectly installed pipe that he removed. I obliged, contacted my supplier who replied that if our contractor would drill the hole through the sill, they'll re-thread the steel pipes and install them at no charge. The oil company added that they would assume the liability since they're making the connection. Otherwise, having the oil company do the whole job would cost me $100 to $200, plus tax. Having already paid thousands extra, I was running short on cash and wanted to reduce expenses. It made sense to have my contractor drill the hole. He's onsite with a drill. He is also familiar with the structure and would know precisely where to drill without affecting the structural integrity of a brand new sill that he just installed. Plus, his cost is negligible as he's already there whereas the oil company would have to mobilize to visit our property.

Playing the middleman, I relayed the suggestion to my contractor. Yet again I was surprised (perhaps I should stop being surprised...). My contractor lost his composure and literally began yelling at me over the phone. He must have misunderstood me as he became irate stating he (the contractor) shouldn't take the liability, that I should treat my contractors better, that we (the clients) are all the same, if we only knew the work that he did... etc. it was a very long winded, one sided conversation. The discussion became offensive with the contractor unwilling to reason. He then started to reveal a convoluted final thought.

According to his "professional" opinion, technically, I owe money back to the seller. Citing that (and this is the best part) the overall cost of work in the initial estimate was less than estimated so I ought to give 'X' dollars back to the seller. Wow... not that his son failed to properly estimate the cost of repair which forced my wife and I to pay out of pocket an extra $3,000 above the monies we received from the seller means anything...

Our phone conversations abruptly ended after that last call. By the time I got home from work, the contractor had packed things up and left.  Don't get me wrong, he was scheduled to leave that day anyway, but the remaining details showed their ill-placed frustration. The clapboard siding that was replaced lacked adequate caulking. A junction box by the coffin door was not secured properly. The interior wall by the coffin door was miss-aligned. The main power feed to the home was improperly secured after completing investigative work leading to the water in my electrical panel (see Water in my electrical panel). One section of flooring depressed in the old kitchen where they replaced the sill. Though our contract with him stated that we are responsible for waste removal, he told me (and I have it recorded) that he would remove the debris for us free of charge as our project is very small. I still have several construction bags in my backyard with wood, concrete, etc. inside after dumping quite a few already.

I hate fighting with contractors. I do it at work; I don't want to do it at home as well. I tried being the "bigger" man and mailed them a "thank you" card with the remaining balance due. I was planning on putting in two $100 bills for the father and son team as a "thank you" tip. After being treated the way I was with degrading comments and mild stupidity, I changed my mind.

If you're reading this Mr. G., you should treat your customers better.  You never know when they may be a repeat customer. I and my 250 year old home will not be.

Enough with the rant, so what was done and how much did it cost? 

Ah, yes, the important stuff…

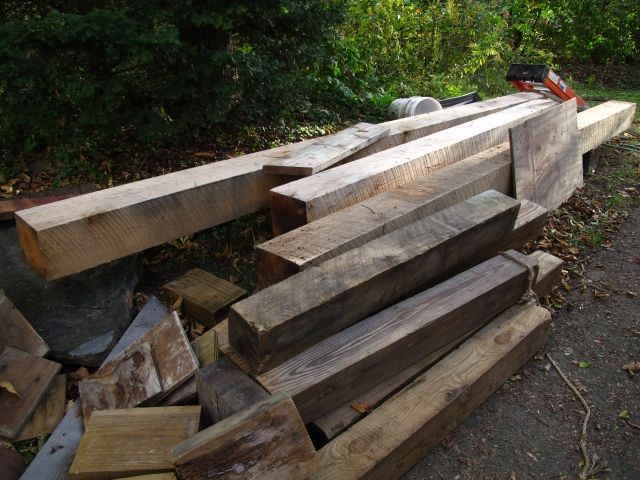
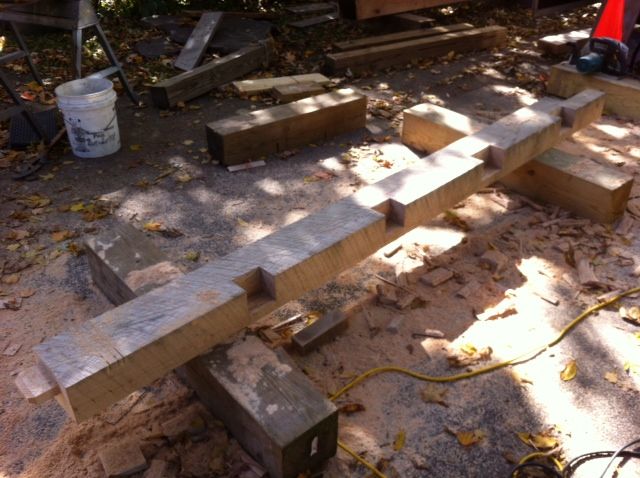
The two man crew did work long and hard while they were on site. Each piece of timber beam had to be custom fitted and hoisted into position. This is not like having a couple of 2"X10"'s nailed together and plopped into place. No, each beam and sill's depth was cut to fit into position. The sill is placed on top of an uneven stone foundation. Like a puzzle, each segment had to fit.  The home had to be lifted a fraction of an inch to allow the removal and installation of the new beams and sills. How they lifted the home is the secret as is how they lifted the heavy beams into place.  Mortise and tenon connections were also created.  The notches for the tenons were made using a circular saw and a large chisel.  Specifically how, must also be a secret.  Though to be quite honest, most methods can be researched online via youtube.com.

The initial estimate was $13,320.  For the:

1.      Removal and replacement of 26 linear feet of sill.
2.      Removal and replacement of 23 linear feet of beams at 6” x 6”.
3.      Remove temporary supports and replace with permanent Lally columns.
4.      Install a 2” x 6” oak to reinforce the beam under the old kitchen’s fireplace.
5.      Install additional horizontal and vertical support beams and posts on the right side of the chimney base.
6.      Reinforce the diagonal braces under the kitchen hearth.

The following was added:
  1. Additional sill removal and replacement, $3,135.00 (labor expense).
  2. Investigative work to explore a trouble area:  $85 for one hour of time.
  3. Additional material and Permit, $2,478.81.
  4. Additional material, $89.60 (clapboards).

So, this all cost a whooping $16,468.41.

But, how much did we pay?

We received three checks from the seller’s attorney totaling $13,320 based on the estimate.

We received a $250 discount for scheduling before a set date.

Out of pocket we paid $2,898.41.

Nothing in the attic was done.  No ventilation, no additional supports.  It was a disappointment for me, but I did not want to continue the relationship plus, having paid more than what we had expected to pay, our finances were short.  I’ll have to save the work in the attic for another day.