Welcome!

How we came to purchase our home.

WPA Photo

A Works Progress Administration photo offers a glimpse of our home's past.

Reproduction Windsor Chair

Finally, a dining room set.

No Power, No Heat.

Our first snow storm and it's aftermath, October, 2011.

Lead Poisoning

Updates to our son's lead levels.

Bit By Bit

My wife's blog on being pregnant, giving birth and raising our first child with all the complications, hardships and joys that life throws our way.

Monday, March 27, 2017

Chicken Coop... The Build, Foundation

I've never done this before.  I can sit and plan for years and tinker with the concept forever and never actually build the structure.  With the looming deadline from the wife (not to mention egg delivery, incubation and the eventual hatching of chickens...in our living room), and the hole in the back yard, it's now time to make this work.
 
I ventured over to my nearest big box store to start pricing things out.  I knew that I needed to get concrete for the foundation and wood to form it.  Concrete can be purchased in a multiple of ways:  by the bag, by the truck, and individually by component.  Concrete is comprised of four basic components.  They being cement (glue), large aggregate (stones), small aggregate (sand) and water (catalyst).  Mixed together in different ratios and sometimes with admixtures (extra ingredients for slowing the chemical reactions) yield different strengths.  For a chicken coop, that's more than enough information without sidetracking to the engineering side of things. 
 
Purchasing by the bag, at the time of construction, was the most economical.  The other methods were either too costly (by the truck) or overly cumbersome (by the component) for my needs.  However, if one were to price compare, realize that by the truck method has two options.  Either, buying a minimum of 3 cubic yards from a drum mixing truck (typical concrete truck) and throwing away whatever wasn't used; or, hiring an onsite truck mixer which humorously sounds like a Willy Wonka machine.  The onsite mixer can deliver any quantity to your project, but the dis-advantage is the higher cost and a limit in cubic yard production, which honestly wouldn't be reached for a chicken coop.  Buying each component individually, combining them in the right proportions each time was just too cumbersome for a placement as large (small?) as my project.  Purchasing by the bag with all the ingredients mixed together already in the right ratio in bags that all weighed the same worked out just perfectly.
 
I was lucky enough to stumble upon a long-term sale at Home Depot for 80 pound bags of Quickcrete.  Quickcrete is a premixed bag of all the necessary components (minus water).  The sale had the bags at $2.88 each!  Normal pricing in my area is around $4 to $5 for each bag.  My Jeep can handle only so much weight so I could only purchase 10 to 11 bags at a time.  I computed the quantity of concrete needed, which at 0.60 cubic feet per bag required in excess of 50 bags.  Over the next few months, I purchased 60 bags making roughly 6 trips.  We returned the bags that we didn't use (probably should have kept them due to the affordability... oh well).
 
Next, I needed to form out the foundation for the concrete to be placed within.  I purchased about 10 sheets of OSD board and cut them to shape.  The below photo as the perimeter of the formwork installed.  I placed a width template made from a 2x3 with two OSD sourced scrap to make a hook.  The template kept the outer walls at a fixed distance while erecting. 
 
Side note, the Honda Odyssey's cabin is coincidently the perfect size to lay a full size 4'x8' sheet of plywood flat.  Just incase your looking to purchase a family vehicle and your wife doesn't consider a pickup truck as a "family" vehicle...

Due to the slope in my backyard, I also purchased six 8"x48" sono tubes (seen above).  Sono tubes are typically used as a cylindrical footing for decks or perhaps even small barns.  Dig a hole slightly larger than the sono tube with a post-hole digger to the depth required (for me, roughly 4' to 1.5' depending on location), insert the sono tube, place a couple inches of stone for drainage at the bottom, then concrete.  For my application, I wanted some additional support due to the slope of the yard.  Overkill, perhaps, better safe than sorry, right?


With the sono tubes and formwork in place, I put stone along the bottom of the form and compacted with a heavy rod.  I placed braces (they look like an upside down "L") around both perimeters.  The bracing was measured for the height of the form plus an extra foot to pound into the ground.  It was made up of 2"x3" lumber purchased with the OSD boards.  In hindsight, I should've made the bracing much stronger; concrete is heavy and the form will want to move as it is filled.  


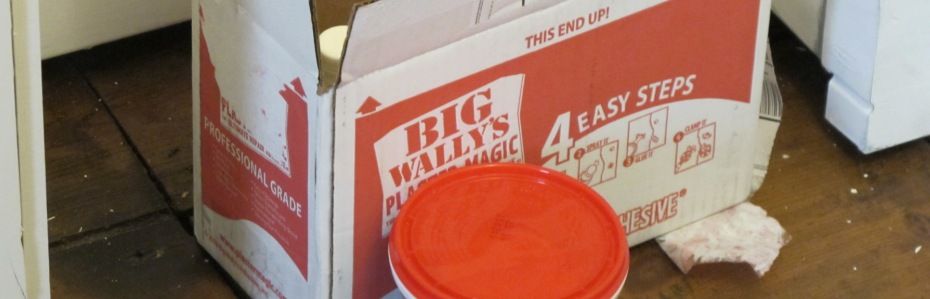
As cost effective as it was to purchase the bags of concrete (seen under the blue tarp), renting a concrete mixer from them was a nightmare.  The tool department does not make reservations so first come first serve.  On a Saturday morning, these mixers apparently go rather quickly.  I arrived and was unable to rent the large sized mixer, instead, I was given a smaller one.  I didn't fret to much about it, I figured its better than mixing by hand.  Freshly mixed concrete has a limited time; it starts to cure as soon as it is mixed.  Within a couple hours, it sets up and becomes very hard to work with.  Having a mixer saves on the time.
 
After roughly 20 bags, the mixer died.  Not wanting to loose time, I pulled out my wheel barrow and started mixing by hand.  My wife called Home Depot's rental department and I had to relay the issue while I was mixing and pouring the next load.  The gentleman (let's call him what he was, the manager) said that there are no other mixers on reserve.  He drove out to my home and proceeded to diagnose the mixer as inoperable.  I helped him load it back onto the Home Depot rental pickup truck that he drove to our home and he proceeded to leave.  As he was leaving, he asked how long I used if for.  Despite the hardship I was about to endure, the manager felt compelled to charge me a half day's rental, instead of a full day as initially rented.... gee, thanks Mr. Manager, how kind.  I didn't finish my little pour until 12 hours after starting with the mixer. 


By night fall, I was done.  Along he way, I inserted 12 anchor bolts, troweled the exposed top level and smoothed over everything for a clean finish.  I washed up my tools, placed the wheel barrow and horses as support for the tarp, covered the concrete, showered and passed out.

The next morning...it rained.


The following week was very humid and muggy... PERFECT weather for the concrete to slowly cure to full strength.  Typically, you can wait 24 hours to remove the formwork, however, with the amount of moisture in the air, the concrete was too "green".  The form needed to stay in place until the concrete reached that pale gray color.  Besides, I had plenty of time before the flock moved in, so I waited until the following weekend to strip the forms.
 
Here are shots of the form in place just before being stripped.  In the following photo, you can see that the form did move slightly out of square due to the inadequate bracing used.  This would eventually lead to a slightly out of square coop.


Tuesday, March 21, 2017

Chicken Coop... The Design/Breaking Ground

So it's been a few weeks now and progress has been slow.  Being a "weekend warrior" means that I only have 24 hours at most over a weekend to work on the coop design and construction.  As the weather improved slightly, the ground thawed just enough to start digging out a foundation on February 28, 2016.  My plans are not yet complete, but I knew that I needed to dig down for stability and security.

My property is on a slope, roughly 13o. This means digging deeper on one end of the structure's base to level the foundation.  Since everything is dependent on a sound foundation, time is being spent to ensure a proper footing is in place. Once dug out, the area will be leveled and formwork will be added in preparation for concrete.  I know what you're thinking:  "Concrete?  Really? Isn't that overkill?"  My response is only that I have to make sure that the coop will be stable in strong winds and be able to keep out critters that will kill the flock.  Those critters include ones that burrow under fences.  A concrete base will help mitigate that potential.

So far, I've managed to dig down roughly two feet at the east end and one foot at the west of the coop base.  In doing so, I've come across two layers of "trash", compressed over the decades/centuries.  It's quite intriguing finding broken porcelain dishware, glass bottles of varying sizes, wrought iron components, an older version of a spark plug (I think) and yes, even a coin (1911 wheat back penny)!  We're considering getting a metal detector to find more "treasure" (as my son had called it).  We've also found discarded architectural details from our home:  a stone fireplace lintel, similarly as found in our parlor (seen here).  Another find was what I can only assume to be the daily meal of my home's former occupants.  Oysters and clam shells were found in extreme quantity throughout the trash layer with random bovine bone fragments.  My father, forever the pessimist, has kept fretting over my property being condemned for finding human remains... hasn't happened yet.


The coop/run design will have a footprint of roughly 12 feet by 6 feet and orientated west to east.  At the east end, an elevated coop "living" area will be built.  It will be 6 feet wide, 4 feet long and will be 2 feet above the ground.  The height of the coop will vary from roughly 4 feet to 5 feet.  The idea for it being elevated is to give the chickens a shaded area under the coop while in the run as well as making it harder for predators to gain entry into the more secure coop at night. The roof of the coop portion is still being considered.  I'm weighing the pros and cons of using asphalt versus cedar shingles.  The extra expense of cedar is just too hard to ignore, but cosmetically, more appealing.

The run potion of the design will be open on all sides not taken up by the coop to take advantage of as much fresh air as possible.  The roof will be either a clear corrugated panel system allowing sunlight to enter yet stopping rain and snow, a solid metal panel for strength or a plywood/shingled roof.

Conceptual views using Google's Sketchup CAD software (free download here):


A general list of materials being used will be ready-mix concrete bags for the foundation, embedded concrete anchors, Douglas-Fir 2x4s, pressure treated 2x6s, corrugated polycarbonate roof panels (maybe), CDX plywood sheeting, roofing nails, felt and shingles, exterior grade construction screws and washers, wood weather protectant stain, door hinges, vinyl flooring, masonry sand and pine shavings.  There are also miscellaneous wood components and hardware needed for the hatch and ramp (to be made from scrap).

Next up, the build.

Wednesday, March 2, 2016

Chicken Coop... the Beginning

It's been my wife's ambition over the last few years to have a chicken coop installed in our back yard.  After the birth of our son, the idea had started to percolate.  When she was diagnosed with Lupus, our priorities changed drastically.  After her health stabilized, our second child was born.  Things have been rolling along smoothly (well, as smoothly as possible with a 3 year old and baby), when one of my wife's co-workers brought in a carton of fertilized chicken eggs from their home.  She called me VERY excited and asked, no, correction, she stated that we are getting chickens.  There wasn't any point in arguing, her voice was unapologetically happy.

So the research was restarted.  Chicken habitats, housing, feed, water, predators and winter protection were revisited.  I contacted our Town Hall's Building and Engineering Department to inquire about any issues.  I'm glad I did.  There is a permit required for having an accessory building, which a chicken coop classifies as (I suppose it's the same as a garden shed).  Regarding a location for the coop, there are no regulations limiting owning chickens in our town, so long as the accessory structure is located behind the back plane of the house, at least 10 feet away from the property line and is less than 200 square feet in size; a permit consists of $50 with a one page application (name, address, description = Chicken Coop) and a plot plan was all that was required.  

The Town Planner was excited about the prospect of chickens, yet realizing that people like to complain; the following advice was given from her experience, not due to any current regulation requirements, but just as a courtesy.

1.  Avoid getting roosters as they tended to be the main complaint that the inspectors get.
We don't want a wild cock chasing us around our own property and didn't see the need to have fertilized eggs on a regular basis, so that aspect wasn't an issue.

2.  Place the coop in the center of the property, as far from neighbors as possible.
The location, however, is an issue.  From our research, chickens need a certain amount of sun light for egg production.  There's no sense in having chickens that don't produce eggs, so consideration for sunlight overshadows (haha) the neighbors' needs/wants.

3.  Hide the coop using landscaping (bushes, trees, etc).
If there are funds left over, I don't mind beautifying our property.

We sat down and considered the sunny and shaded areas around our property as well as distance from our neighbors.  We took to forums and have found that the three main concerns with the location (after installing the coop) were long walks during the winter, flooding and utilities (water and power).  It would seem that most owners placed the coop as far as possible from the home and did not consider the need to maintain the flock year round.  Access to the coop during the winter and heavy rain is important for feeding and collecting eggs.  Also, an area in the property with a high water table can lead to flooding of the run and potentially health problems for the chickens.  Power is highly recommended for providing minimal heat to keep water liquid for the chickens during the winter and running water would be for cleaning out the coop on a regular basis.  Which, by the way, seems to be the cause for any smells from the coop.  A periodic cleaning should keep the coop comparatively smell free, thus negating the need for the coop being as far as possible from the home.  So, we chose a location that was in partial sunlight, near our rear door and has access to a powered receptacle for an extension chord as well as a water spigot for cleaning out the coop.  The location is also not in a watery area and not at a bottom of a hill.

Plot plan somewhat as submitted to Town Hall
The plot plan was approved February 17, 2016, by the Town Planner.

With the location settled, we looked into various other coop designs to find the one that best suited our needs.  We do not have a fully fenced in back yard.  As much as we would like the flock to roam freely, for their safety, we would have to keep them secured in the run. 

If you are new to this venture, the coop is where chickens sleep, roost and lay eggs.  The run is a protective enclosure for the chickens to somewhat run around in outside of the coop.  Chickens need to be protected from predators such as hawks, eagles, raccoons, foxes, etc.  There are a number of installations that help in preventing predators from harming the birds.  These range from using concrete blocks around the perimeter of the base, a poured concrete foundation, gravel and hardware cloth.

The size of the run and coop both depend upon the number of chickens that you plan on keeping and the type of chicken species as well.  I've also found that it is recommended to plan a little bigger on the coop/run just in case.  As far as the size goes, the square footage varies from one source to another; where one source will indicate ten square feet per bird and another will say that four is a general rule.  Whether or not the chickens free range is important as they'll need more or less room in the coop/run.

Looking at BackYardChickens.com, we had hoped to find detailed plans indicating "what and how much".  Unfortunately, such plans are nearly impossible to find unless you're willing to settle for a lousy shack or pay for the several advertisements available.  If we were so inclined, we could also purchase a kit and assemble it.  As easy as that would be, I'm not too keen on paying $500+ for a kit with lower quality wood.

Continuing our search for samples, we came across a couple that built an impressive coop/run combo.  The couple manage a website called steamykitchen.com.  They called their coop design the Palace Chicken Coop and they detailed the construction of it here:  The Palace Chicken Coop.  They have a link for a Google Sketchup plan (very useful) and plenty of photos showing how they built it.  My wife and I do like the appearance and the size.  However, the issues that have me somewhat concerned are Scott's justifiable disclaimer (being not an architect nor an engineer) and their location, Florida.  Reading their posting and the numerous comments that followed, I was concerned that living in Florida would have a vastly different weather cycle than living in New England, where we are.  Their foundation was also not very deep, practically at ground level, which would lead to frost heaving issues in the north.  The lack of snow in Florida also has an impact on the structural supports were it to be in our area.  This is not a negative to Jaden and Scott, the post creators, they live in an area that is completely different than our own and likewise, our coop would have to be modified to reflect that.

SteamyKitchen.com - The Palace Coop
So, using the conceptual plan from steamykitchen.com, we know which way we'd like to go for our flock.  Due to our different locales, I've tasked myself with fully designing the coop and run based on my location, taking into account the snow and wind forces that are common in New England.  I also felt sorry for my unused, old and dusty engineering manuals from college and thought, why not?

Future postings will update the design and construction phases of our Chicken Coop.


Thursday, February 18, 2016

Lead Abatement and Remediation

December, 2014...
After numerous blood tests, a few scares and bouts of depression, I've finally succumbed to the realization that an abatement/remediation is necessary for continued residence within our home.  As I write this, the process has been somewhat completed and our bank accounts as well as our emergency savings have been completely drained of whatever funds we had left.  We're now trying to recover financially....  I really should create a "Donate Now" link...

In a prior post (Abatement Contractors and Lead Testing) I mentioned four painting contractors who were invited to give an estimate for the interior abatement/remediation of our home.  Of the four, the fourth was selected based on the information at hand.  The company had worked on a more prominent non-profit historic house locally and was recommended by two reputable sources (a paint supply store as well as a prime contractor who have both used this contractor in the past).  The others either didn't return communication, were a bit "out there", or their pricing seemed too open ended for our comfort level.  So, needless to say, I had but one option available.

We had negotiated a start date that coincided with my wife's work schedule so that she can be away for an extended period of time so as to alleviate the need to have her move into a local hotel.  This start day was Friday, December 19, 2014.  That same day, my pregnant wife and toddler left for my parent's home in NJ.  I stayed behind to man the home, work and deal with the contractor on a daily basis while attempting to review their work. 

A few days before the start date, the contractor wanted to meet with me to remind him what work was to be done.  It was a bit annoying that after giving him a printout of the XRF scan results months earlier, he would ask me what needed to be stripped.  I drew up a detailed plan of our home and transcribed the locations where the lead was per the scan.  The contractor didn't really seem to give a rats ass about it.  He commented on it in a positive light, but I later realized he never used it as I found it left on a table under plastic. 

The following two images are our home's floor plan with the locations indicated by our lead inspector that have failed.  The more green tags, the more lead was found.  In the red boxes, I've given the contractor a to-do list of what needed to be done.... most of which was ignored.


The pre-start meeting ended with a rather un-nerving final conversation.  After organizing and planning my wife's departure, packing and preparing our home with furniture relocated and negotiating with our jobs for time off, the contractor  gave me a final "oh-by-the-way" comment.  He said that his abatement license had lapsed due to some oversight.  He then asked me what I wanted to do.  He was concerned that I would turn him into the authorities for working on our home without a current abatement license and was considering cancelling the entire project.  He assured me that he was in the process of renewing the license and he should have it in a couple weeks.  With that information being said, he waited for me to respond.  With a deposit in his hand, scheduling set, a son who's lead levels had recently spiked, stress levels at an all time high, money saved for a year and moved around in anticipation, work notified; I was left without any other option but to continue.

So, December 19 came and the contractor's crew (all of whom did not speak English very well if at all, of course) started working.  The plan was for me to sleep in my son's room with our cat (and his litter box) while the crew worked on the lower floor.  Once they progressed to the second floor, I would then relocate to the living room (old kitchen). 
 
The first day was spent stripping the odds and ends (window and door frame in kitchen as well as the splat of paint on the column in the living room.  While the rest of the crew placed plastic down on the floors and doorways to the rear of the home.  All of our ground floor furniture was relocated to the family room (formerly the keeping room).  The second floor furniture was relocated to the rear room (office).  That evening, the crew placed a product called Peel-Away on the trim in the dining room.  The smell in our home that first night was so strong that I got a headache.  Opening my son's window (in winter) was my only salvation.

Each day onwards, the crew moved at a pace determined by the level of difficulty to strip the paint.  Some days were very productive, most were very slow.  They stored the bulk of their materials in our dining room and I had previously loaded the parlor with the doors that I had removed from nearly every room.  The doors would remain in the parlor for the next eight months....(wife was not happy).

As I came home from work each day, I took a quick glimpse around to see the progress.  In the first week, a hole had been made in one of the containment systems with a streak of dust entering the "clean" side of the system.  Upset, I communicated with the owner.  It was his opinion that this is a natural occurrence and happens quite often.  I'm not sure how true that is, and if so, that would mean the containment systems should be checked daily.  He indicated that his crew does check each day, however, I never saw them do such a thing as I was home while they were still working and when they left.
 

The contractor and I agreed that he would be responsible for the removal of paint and though he said he could repair the plaster that was cracked in every room, I told him that I would take care of it (I didn't trust that he would do it properly).  I purchased the contractor pack of Big Wally's Plaster Magic, a protective suit and a lead vapor mask.  I spent each night from when I came home around 4 PM until 1 or 2 in the morning patching each visible crack.  This went on nearly every night and on weekends as well throughout the project.  I also toured the home with the contractor twice to mark locations missed after I complained to him that there were areas still visible of leaded paint after his crew had "stripped" it.
 
Most days, the crew either used a heating plate or a chemical to soften the paint and scrapers/sandpaper to remove it and clean the surfaces.  Communication was difficult and misunderstandings happened.  It was explained to the contractor that it was my wish to maintain a level of preservation for the original woodwork in the home.  He said that it would be difficult to have everything perfect since the tools used will, at times, gouge the surface so marks are to be expected.  This didn't phase me, I figured it would just add to the character of the home, which they do.  However, placing a sander to a piece of wood and removing not only the remnants of paint but also the original detailing hand planed over 250 years ago is not agreeable.  This occurred in our bedroom on one of the decorative post casings.  The contractor claimed that it was like that in the beginning.

In another event, I came home one night to find the decorative dental molding in the parlor splintered and broken into a several pieces with original hand made nails protruding out of it.  Irate, I called the contractor and asked him what the F#$% happened!  He said that I had told him to remove it, for which I explained that only if it was not original and only to make it easy for him to abate.  He said that he never saw the molding and that his crew member had called to ask him if the owner (me) was sure "that he wanted it removed since it is really hard to get off".  It was really hard because there were 5-inch long spikes securing it to the beam and it was recessed behind the original plaster ceiling.  Upon finding the wooden trim on the floor, there was also a 6-inch gaping hole in the ceiling where the molding had formerly been.  The contractor had said that he'd patch the hole and help find someone to replace the molding.  The area is still bald...
 

When doing any sort of abatement, preparation takes time.  A part of that prep work is to lay down 6-mil plastic sheets to cover and protect the floor.  After which, the crew is to vacuum the floor, wet mop it, carefully roll it up and then dispose of the plastic as hazmat waste.  This is per RRP rules.  The crew used painters tape on the wood floors then applied a heavy duty red colored duct tape on top to secure the plastic to the floor.  This made sense since the painters tape is more gentle on the surfaces than the duct tape.  However, it didn't work out that way.  The painter's tape didn't stay attached to the surface.  Eventually, it nearly all peeled up, which detached the plastic from the floor along the edges of the rooms.  The picture here has the 6-mil plastic covering completely detached from the red duct tape, exposing not only the floor, but the baseboard heating hardware.  This is my son's bedroom.  The   leaded dust from the scraping the windows landed in the exposed areas, going into the baseboard heating and also under the floors.  I was told that it would be cleaned up...
 
Another problem with the tape was during the cleanup process.  I had warned the contractor to protect the floors since tape does pull up the finish if not done so properly.  I had instructed him to use a hairdryer to heat the surface before SLOWLY removing the tape.  This would potentially leave a sticky residue but the finish would remain intact.  My request was ignored.  I now have a 2" wide boarder of missing finish from all but one room as well as the front stairs.

Nearly every wall surface was touched.  All wallpaper was removed, the underlying surface was primed.  The priming process was not very successful.  The crew rolled the primer on the plaster and ignored the paint chips being flaked up.  The final appearance was suppose to be a blank wall for me to apply a final paint scheme to.  However, the actual appearance was quite literally a mess.  Paint chips were imbedded into the primer and spread throughout all the walls.  I'll spend the next few months also applying joint compound so hide all the ridges.
 
Paint removal continued for several weeks, longer than the initial two week estimated time frame.  Christmas came, then New Years.  It wasn't until the middle of January that my family was forced to travel back to our State for work and medical appointments.  However, once the leaded surfaces were abated, the contractor, per abatement rules, is required to clean.  Having taken the RRP course and after our prior issues with this project, I was curious as to how the contractor was going to complete this important aspect of the project. 

He proceeded to explain that he uses a "tried and true method" of two buckets and one mop.  His crew made a TSP (powdered tri-sodium phosphate) cleaning mixture in one bucket and kept the other bucket empty.  His crew dipped the mop the first bucket, wiped the floor, then rinsed it in the second bucket, then wet the mop in the first bucket, wipe the floor, etc.  Per RRP, this is borderline acceptable for cleaning a home of lead-based paint dust.  Doing so potentially spreads the leaded dust from one highly contaminated room to the entire house as the mop is reused continually.
 
I recalled from my RRP training that the best method is to use a wet swifter pad (or similar) that was white in color and wipe the floor with it.  One wipe was limited to cleaning a twenty square feet area.  When done, you compare the "dirty" side to a white sample card (provided in the RRP class).  If the white pad is darker, do it again.  Repeat until the whiteness of the pad basically stays white.  Once done, throw the pad away, get a new one and start with the next twenty square foot area.  Yes, it takes longer than the two bucket mop method, but it's done once and its guaranteed to be clean.  The contractor didn't agree citing the costs of buying the pads and continued to use the mop and buckets...EVERYWHERE. 

My pregnant wife, mother and son had arrived back in CT anticipating coming home.  I had to explain that they could not come home as we had to test to make sure the home was clean of lead dust.  We arranged for a hotel locally.  Later that day, on his dime per the contract, the contractor hired a lead inspector to test the floors.  Twenty-four hours later, the results were in.  The results were... nearly every room failed, with one room exceeding 300 mg/SF.  The next day, the contractor came back with boxes of wet wipes and his crew proceeded to hand wipe the floors.  After that level of attention, the floors were so clean that they squeaked from my sneakers.  The lead inspector came back and tested again, this time (another 24 hours later), the results were, for the most part, a zero reading and the contractor stopped shitting bricks.  My family, after 4 days in a hotel, were back home.  It's now past the middle of January.
 
Per a verbal agreement, the contractor took all our window sashes and stripped them elsewhere.  He brought them back later in the week.  The stripping was OK, but not the best quality as paint was still visible in certain areas. The painters did not mark the windows when they were removed from the rooms, so the hardest part when they were returned was figuring out which sashes matched each other, and with which frame.  To this day, I still don't have them back in the right openings. 
 
Pricing was also an annoyance.  First, obviously, this was not affordable.  The contractor does not take a credit card, we really did not want to increase our mortgage and our insurance provider laughed at us, literally.  Grants and such were previously discussed in another post (Lead Poisoning), which we did not qualify for.  It took us a very long time to save up the cash, no vacations, no extravagant spending.  A second annoyance was the contractor's inability to name a price.  Each time something happened where work may cost more, he would ask me, "How much do you think it's worth?"  I felt like I was being hustled.  If I had been in the mood to be brutally honest, I would've told him to owe me.
 
Final cost (not counting my supplies or equipment which added another ±$3,000):
 
$3,000 deposit on 12/18/14
$4,000 payment on 12/24/14
$4,000 payment on 12/31/14
$4,900 payment 01/07/15
$2,000 final payment on 01/20/15
$17,900

Regarding the abatement license, at the conclusion of the project, I requested a copy of the abatement license so that I may have it for my records.  I reminded the contractor that he indicated he would renew the document.  He admitted that he was no longer pursuing the license as he plans on combining companies with another person and didn't want to waste the $600 (he says) on the renewal.  Well, what a shock...., instead gave me the expired license, the one that became invalid a few months before his crew set foot on my property.  A photocopy was left on my back deck and a photo texted to me as seen here.

More before/after photos to come...

Monday, August 31, 2015

Refinancing...

When we purchased our home, the mortgage that we locked into had a rate of 4.375%, a conventional loan lasting 30 years.  Since we did not put down 20%, the dreaded PMI was tacked on.  Our mortgage broker told us that in two years we can get rid of it.  What a fat lie.

Private mortgage insurance is an insurance that the bank takes out against you because you failed to put down 20% of the purchase price as a down payment.  If we were able to put down the full 20% of the sale price with the bank covering the remaining 80%, should we default on the loan, the bank would sell the home and make back their 80% AND gain our 20% deposit.  Now, as we did not have that 20%, the bank takes out that insurance on us to make up the difference in case we default.  Per our broker, after a two year period, we make a call to the bank, tell them it's been two years and they'll get rid of the PMI portion of our mortgage.  In our specific case, it's $100.04 per month or $1,200.48 per year.

Makes sense?  No, it's still confusing and a waste of money for us.  So where's the "big-fat-lie"?  It's been 3½ years since we purchased our home.  I contacted the bank and naively asked for the PMI to be taken away.  The bank said, "Hold on a second, not so fast....you have to prove the value of the house is high enough to surpass the debt to value ratio of 80%."  "How do we prove that?" was my response.

The answer is annoying.  The bank will hire a real estate appraiser (who we pay for) that will compute the value of our home.  Take the balance of our mortgage principal (the amount left on your mortgage) divided by the value of the home (per the appraiser).  If the number you get is equal to or less than 0.80, then you've surpassed the 20% threshold and the PMI can be taken away (assuming that 2 years have passed, of course).

Ok, so how does this look for us?  Well...

We purchased the home for $275,000.
We made a down payment of $30,000 (10.9% of the purchase price).
The loan from the bank covered the rest at $245,000.
Since we were less than 20%, the bank charged us PMI at $100.04 per month.
It's been 3½ years, so we are past the minimum 2 year "wait" period per the bank.
 
After 3½ years of mortgage payments, we've paid approximately $83,000 to our bank. 
 
Breakdown:  $21,000 was for property taxes, $4,200 went to PMI, $24,200 went to the principal and $33,600 went straight into the trash (I mean interest charges). 
 
After paying $83,000, our mortgage dropped from $245,000 to $220,800, that's it.  Our home would have to be worth $281,250 today for the debt to value ratio to be 80% or less.  If not, I would have to pay more to the principal to make up the difference or walk away and continue paying the mortgage as is.

Now here's the point of this post.  If I get rid of the PMI and I refinance the mortgage from a 30 year down to a 15 year term, since the interest rate is much smaller than our current rate, we would save approximately $160,000 over the course of 15 years while paying roughly $300 more per a month than what we are paying now.  Doesn't that just sound awesome?!  I've started dreaming in my head.

The process for refinancing the mortgage is very similar to the removal of the PMI (which is how this whole process came to light).  I searched for banks with the lowest rates and found a small local bank offering 2.89% on a 15 year mortgage.  I contacted them, filled out the mortgage application, spoke with the broker who asked that I pay $410 for an appraiser to appraise our home.  With a refinance, the bank needs to see how much we're asking the bank to cover versus how much our home is worth now.  We paid the fee and prepared for the appraiser to come.  I made a list of all the work done on the home since our arrival.  I was shocked to realize that we've spent $45,000 on repairs and upgrades since 2011 (tack that onto what was paid to the mortgage and you can see why these homes are money pits)!  I also included a list of our area's attractions, after all, real estate is all about location, location, location, right?.....WRONG!

When the appraiser came, we gave our list to him, he toured our home, took a few lousy photographs and left.  The whole encounter lasted less than 30 minutes.

About a week past by before the appraiser submitted the all important number.  The whole time waiting for him, the interest rates hadn't changed, that is, until he submitted his documentation.  By this point, the rate had jumped to 3.0% (gee... thanks for taking your time).
 
Drum roll.... the appraiser "computed" our home's official value at $276,000.  Yes, that's right, its worth only $1,000 more than what we paid for it in 2011 (appraised then at $283,000).  Dumping in another $45,000, I was hoping our home's value would've been around the $300k mark.  What a major disappointment.  The bank told us that we'll have to pay $4,200 to make up the debt to value ratio.  I can't get rid of the PMI nor can I even refinance without dipping into our last bits of savings.  After our recent lead abatement (future post), you can imagine angst.

I just have no luck.

If a banker and/or an appraiser happen to read this blog, please consider these factors:

1.  Make sure the appraiser is from the area that the home is located.  It doesn't make sense to have an appraiser totally unfamiliar with the area make an appraisal.

2.  When appraising, if the local inventory of HISTORIC PROPERTIES is limited, perhaps you should open the field to get a better understanding of the home values around the entire region, not just a pin point on a map.

3.  Don't use the ONLY historic home that sold recently as a basis for my home's value.  These homes vary greatly in condition and with a limited inventory, using only one valuation is not a true indication of value.

---------------------------------- two weeks later -----------------------------------
 
So we sat on this for a couple weeks or so.  I was, quite frankly, pissed.  The appraiser took his time, the rates had surpassed 3.0% and we would have to pay several thousands of dollars to avoid the PMI.  Once I got over it, I checked the rates again.  They had dropped.  With the FED doing their usual dancing and freaking out the markets, I was pleasantly surprised that the rate dropped a bit.  My wife and I discussed our finances and decided to continue with the process.  We locked in the new rate, moved money around and now have a 15-year refinanced mortgage. 

Current mortgage is as follows:

Term:  15-year, 180 payments
Rate:  2.89%
Loan:  $220,800.00
Total Due at Closing:  $7,704.98 (includes down payment to remove PMI, escrow startup, legal fees and bank fees)

Home Insurance was removed from the mortgage (per the bank's policy, weird), restructured and paid on an annual basis.  Altogether, the home insurance dropped.  The new biweekly mortgage amount became $966.41 with an anticipated end date in 2028 (yes, that's less than 15 years, exciting!). 
 
Can't wait to be mortgage free...

I've updated our Expense page to reflect the new mortgage.


Side Note:
I've got an old high school friend working "on Wall Street".  That is to say, he works in NYC with the financial markets.  He advised me that paying off the mortgage is a bad idea.  I would be loosing out on the annual tax deduction and I could make more money in the markets instead of putting the cash towards the mortgage.  To all of you whom feel compelled to say the same thing to me, here's my response:
 
1. I suck at investing, I obviously live in a "money pit".  Though as much as I try to learn anything in finances, I only win by pure luck rarely and fear loosing money all the time.  So going into the markets isn't an argument for not getting rid of the mortgage. 
 
2. Taxes... really?  I'll be honest, my wife and I receive roughly $2,000 to $3,000 a year of our own money back from Uncle Sam.  If our mortgage was $2,000 a month and is now paid off, I would be saving $24,000 a year (minus property taxes) of, again, our own money.  I'd rather loose the annual tax rebate from our mortgage interest and gain an extra $20,000+ in cash every year (which I can place into investments, home repairs, add to retirement, etc).  Opportunity costs being what they are, we're still putting money into our retirement accounts as well as college savings for our children.
 
3. When our mortgage is paid off, my wife and I will be in our mid to late 40's, my son will be almost 18, his sister 15.  I'll need to prepare for their college education as well which I estimate will be $30k to $50k per year (if they're not going to Harvard/Princeton/MIT/etc).
 
I hope my logic makes sense to some.