Welcome!

How we came to purchase our home.

WPA Photo

A Works Progress Administration photo offers a glimpse of our home's past.

Reproduction Windsor Chair

Finally, a dining room set.

No Power, No Heat.

Our first snow storm and it's aftermath, October, 2011.

Lead Poisoning

Updates to our son's lead levels.

Bit By Bit

My wife's blog on being pregnant, giving birth and raising our first child with all the complications, hardships and joys that life throws our way.

Showing posts with label Bathroom. Show all posts

Friday, March 23, 2012

Vent Fan Up and Running

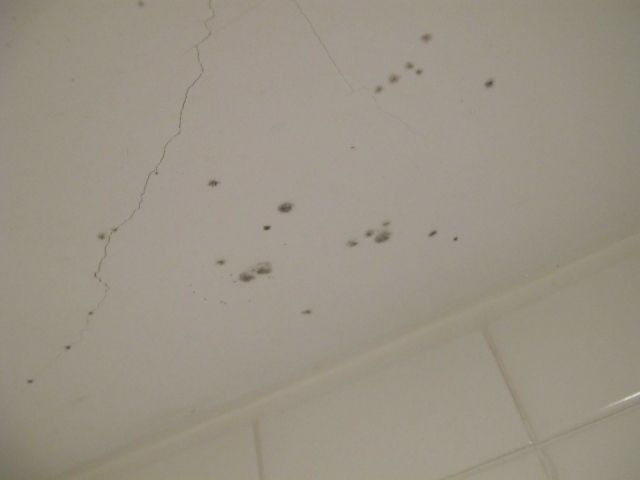
Mix a bunch of humidity in a confined space with no where for that moist air to go and you get mold... lots of it.  In a previous post, I mentioned that my lovely wife just loves her hot showers.  With no ventilation, mold builds quickly, especially when I have the window covered with a plastic seal to stop any drafts.

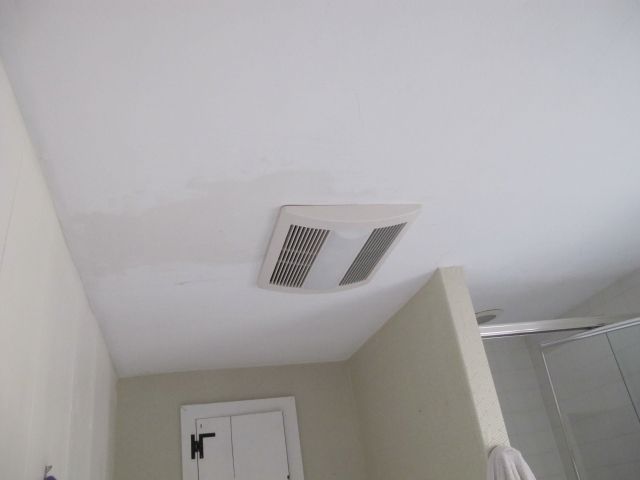
Several months ago, I researched out the best vent fan for the bathroom.  Overwhelmingly, I found that Panasonic was the brand to go after.  Beyond venting the bathroom, I also wanted to improve the lighting and add heat.  The undersized baseboard is just not large enough to heat our bathroom.  So the top-of-the-line Panasonic FV-11VHL2 was the fan to go after.  With a retail price at $502, it is not cheap but I'll rarely settle for retail pricing.  Searching online found the best price, namely, Amazon.com (pricing may vary).  For $251.00 with free shipping (of course) this rather large bathroom vent fan was in my home.

Installing it was a bit difficult only because of my inexperience and it's an old house.  There are two options for installation, both of which required cutting a hole in either my siding or my roof.  With no ladder (yet), I needed to enlist the help of a co-worker who moonlights as a handyman (for a fee).  As I have a mild fear of heights, I thought it best to have him aide me with the roof installation.  The roof install was our chosen method since I wanted to minimize any changes to the home's exterior looks, as a roof install would not be seen from the street.  Not only did he aide me with the roof install, he also took over the entire instillation.

Side Note:
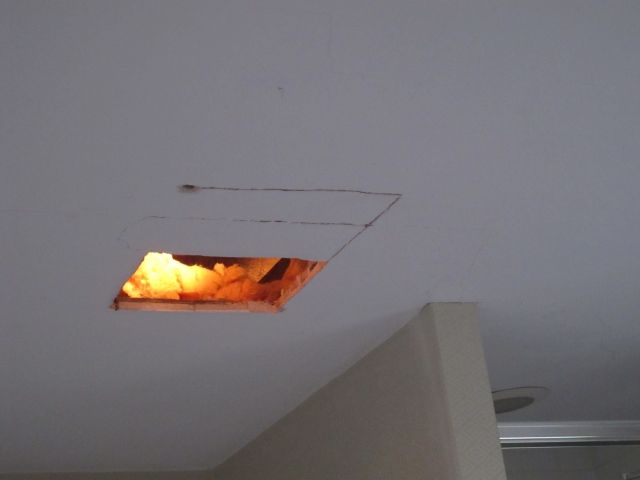
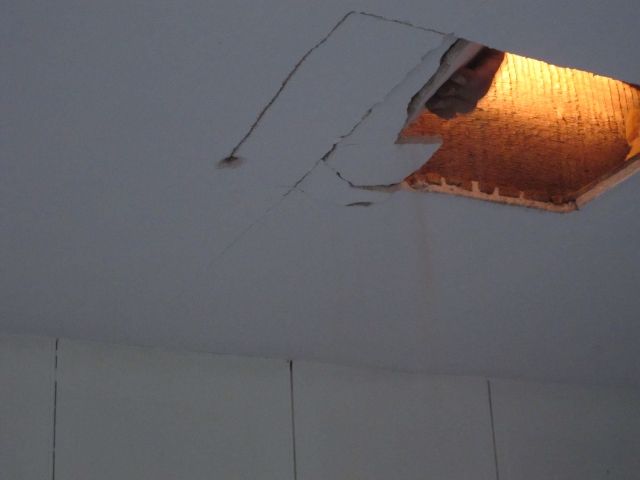
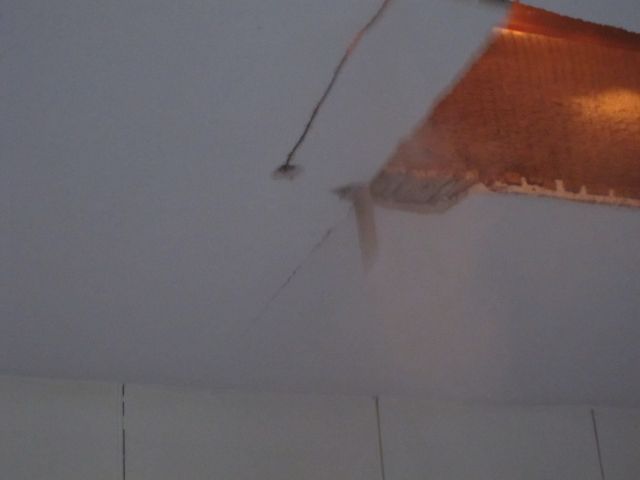
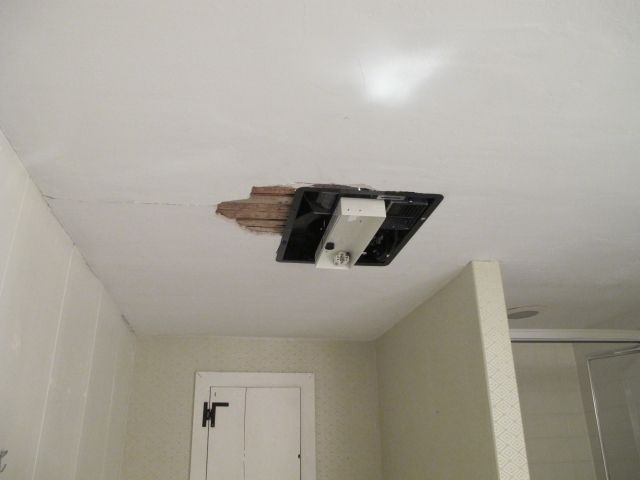
It's not always a good idea to get "hired help" from a co-worker/friend.  I wanted to replace an existing smaller lamp in the bathroom with this much larger unit.  In order to do this, we needed to make the ceiling opening larger.  My co-worker friend decided to get the job done with a power tool.  Not thinking, I fetched it for him.  He used his "sawzall" from the attic side down to cut apart my 250 year old plaster ceiling.  For those of you not familiar, a "Sawzall" is a reciprocating saw that shakes the crap out of what ever is near it.  I have to admit, I was pretty upset by the sight of a one square foot piece of plaster crumble and fall to the bathroom floor.  Being a co-worker and a friend, I didn't have the heart to verbally beat him up for it.  He did take the blame for it and, over the course of a few months (yikes!), patched it.  The work started November 20, 2011, and ended this past Friday night, February 17, 2012.  Of course, most of the work was completed on November 20th.  The remainder of the time was spent juggling schedules, cancellations, etc. while waiting for my co-worker friend to come back and apply the plaster patch in three layers.

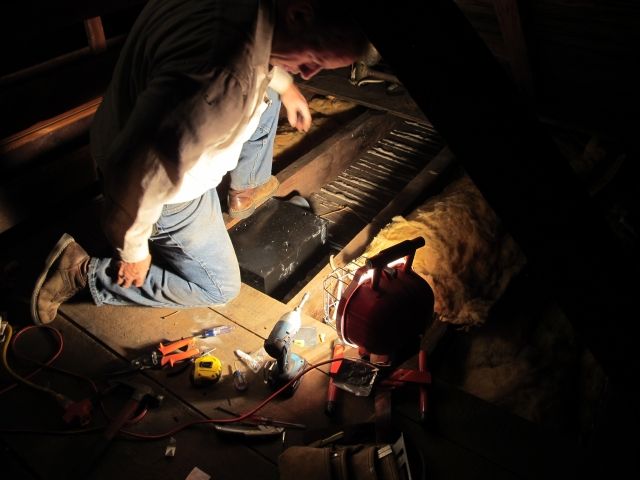
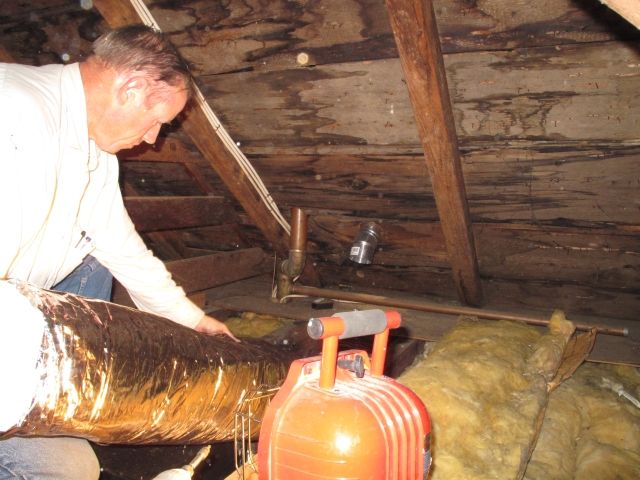
The following are photos during the installation of November 20, 2011.


Now that the vent fan is in place, its time to route power and the exhaust duct to the roof.

A little insulation around the exhaust helps to avoid condensation during use.

While walking through the attic, we noticed that there was a junction box labeled "extra".  Inside were four free lines.  We had hoped to connect the heater to one of those lines since it required a dedicated line straight from the electrical panel.  My friend connected a breaker-finder tool to the wire and went to the electrical box to find which breaker the line went to.  No breaker was found.  The conclusion at that time was that the wire may have terminated in another junction box.  

With perhaps the 10th hour that we've been working approaching, my friend needed to get on with life.  We called it quits after making a temporary connection to the existing lighting.  When the light switch was turned on,  so did the fan and the lights.  No heat since I wouldn't want to set off the breaker making everything useless.
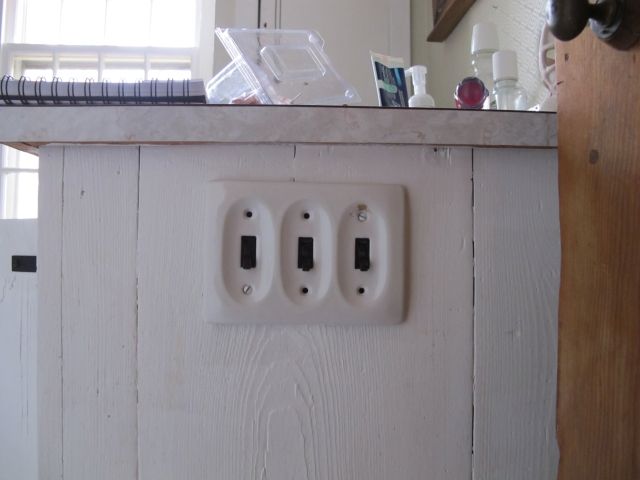

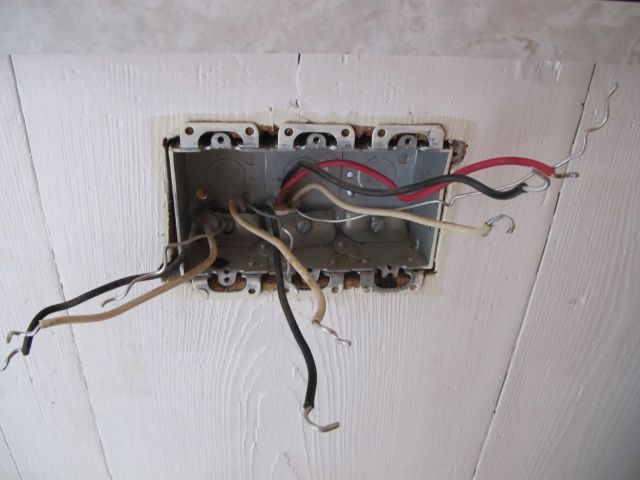
Over the next couple of weekends I dedicated my time to tracing the wires in the bathroom.  I turned off the breaker to the bathroom and took off the decorative switch plate revealing the wiring inside.
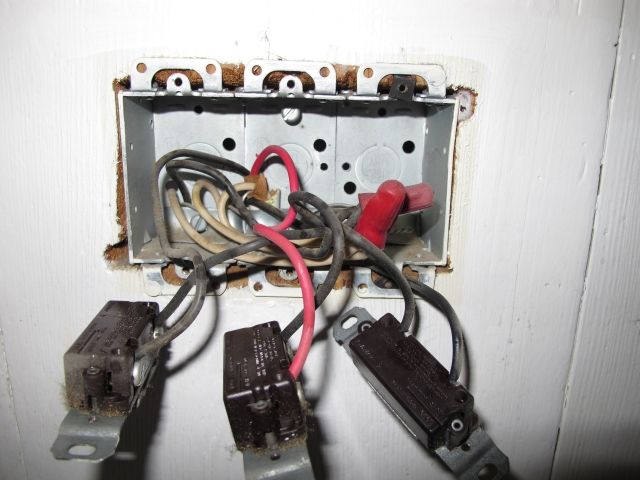

What a mess... I tried to organize the wiring into the individual conductors.  On the left is one line (one hot, one ground and one neutral).  In the center, pointing downwards is another line (one hot, one ground and one negative).  Pointing to the right is the third line (two hot, one ground, one neutral).

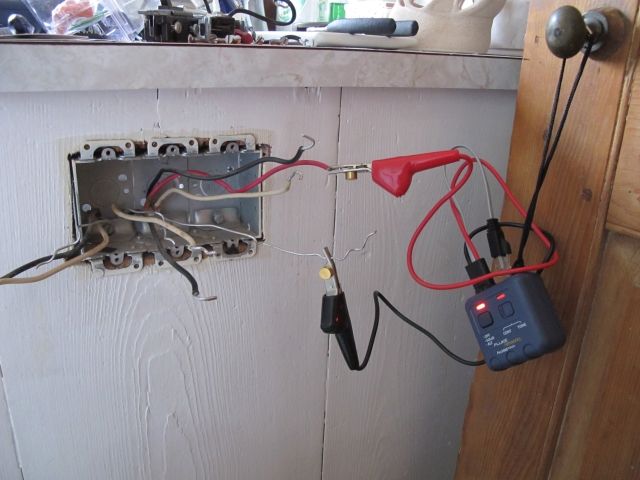
I then connected a tracer to each line and used the included probe to literally trace the connected wire back to the panel (or wherever it may lead).  The tracer was purchased from Amazon.com for a little under $80.
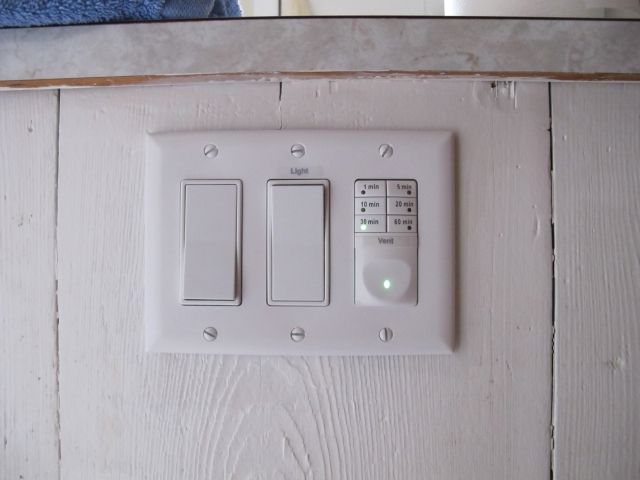
As it turns out, the left line went to a GFCI outlet, the middle one was from the panel and the right line went to the lighting.  The switches were wired in the most annoying fashion.  The left two switches controlled the GFCI outlet, why two I do not know.  It was more of an annoyance when my wife would plug in her hair dryer and it wouldn't work.  We would have to play with the two switches to get the outlet to work.
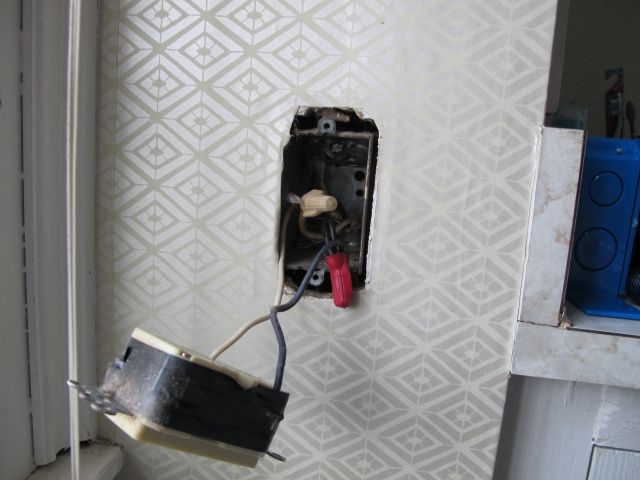

I straightened the wiring out removing what was originally installed.  I purchased two new 15 amp switches and one timer switch.  Identifying the source line, I hard wired the GFCI plug to be always on as opposed to on/off with a switch.  From that same line, I also feed the lighting and the new fan through a switch and timer, respectively.  In the photo below, the switch on the left is a dummy switch since the big name home improvement store did not have any blank plugs for the three switch plate.
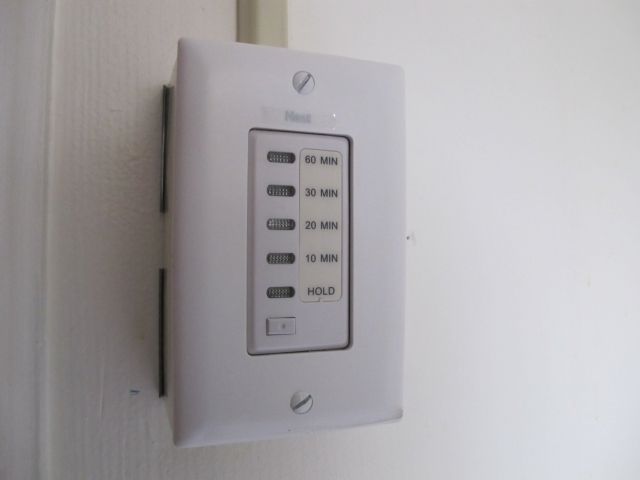
Now, the heater.  This was perhaps the hardest part.  The heating element required a dedicated 20 amp breaker.  Using the tracer, I was able to locate where the extra line in the attic terminated.  It ended up in the panel in the basement, just not connected to a breaker which would explain why my friend's breaker tracer couldn't find it (no breaker, no trace).  I purchased a 20 amp breaker for my GE panel (the name brand matters) and installed it in one of the empty slots.  At the same time I purchased wire mold chases and a switch box.  I also got a timer rated for the 20 amp circuit.


There's so much more to describe, and by the time I finish giving the details of everything, boredom would have passed and the point lost.

So what is the point?  Well, I bought a vent fan to remove the possibility of mold build up and to also help heat the bathroom on our cold winter nights.  After many months, it was finally done!


Update 02/08/15:  After having the vent fan installed and used for almost 3 years, the vent fan has not been the perfect unit as researched.  I have gone through one set of CFL bulbs (yes, they do eventually go out, but after only 18 months of use?) and the heater had stopped working.  I called into Panasonic to get a solution and was told that the unit is under warranty still (with 30 days left) and a new heating element will be mailed.  FOUR MONTHS LATER (must be on purpose).... the heater came in, I installed it and.... I still have no heat in the bathroom.  Damn thing still doesn't work even though there is power going to the unit.  This is another issue that I have to sort out in time, since I'm no longer under warranty.

Thursday, October 27, 2011

"Honey, what is that brown spot?"


I am giving my wife a hug in the kitchen a couple of nights ago and while she's looking over my shoulder spouts out, "What is that brown spot on the ceiling?"  I could feel the hairs on my neck standing up... shivers down my spine.  I know what's above us... and I KNOW what a brown spot on the ceiling means.  

I rush up the stairs, run into the bathroom, opening the vanity doors.  Inside, it was wet.  Small puddles of water on top of my wife's yet-to-be unpacked cosmetic items.  In the center of it all was a small generic brand of baking soda.  It was totally drenched with water.  You could squeeze it like a wet sponge.  Surrounding the baking soda box, the boards making up the bottom of the vanity were soaked too.

As in the mouse post, I took apart the floor of the vanity, coming to the screwed down board again.  This whole board was soaked as well.  Opening it up, I can see the lath below... wet.  Well, now I am seeing the "brown spot" from above.

So what caused this water staining on our plaster ceiling?  I can only make an educated guess.  You see, we took our showers in the morning, humidity remained in the bathroom, like it has previously.  We used the sink like we have previously.  Yet, the staining was seen at least 8 to 10 hours later on Sunday, after three full weeks of the same daily humidity levels.  There are no real leaks coming form the sink.  At least, none that could cause this level of staining.  I ran the water for several minutes on hot, cold and warm. I filled the basin up, allowing water to enter the over flow (as recommended by a forum).  No leaking.  Then I did a tissue test (also from a forum).  I ran the tissue around the valves, drain pipes, etc. as the water was running.  There was a small leak from the cold water valve, but honestly, if this were the cause of all that water, then I must have the biggest shut off valve in the world.  There's no way that a drip an hour (if that) could cause that much staining.  The photo below shows the water droplet forming under the valve behind the handle.

So what changed that could have caused this level of water accumulation?

Here's my educated guess.  My dear wife, wishing to rid the bathroom once and for all of the smell of death left by the home's former owner, purchased and placed a small box of baking soda under the vanity, directly over the screwed down board.  When the humidity built up in the bathroom, it super saturated the baking soda and as we do not have a vent fan to rid the moist air, the little box of baking soda did the best it could. It sucked all the moistness out of the air... until it could no more (poor little guy).  The wooden panel underneath the box began to absorb the moisture from the baking soda... then the baking soda started to pull more moisture out of the air... thus a cycle started.  Taking several hours, it slowly wetted the ceiling below causing the brown staining.


OK, seems a bit far fetched, but can you do better?


11/17/2011:  Update
Seems as though the valves under the sink are leaking, especially when they are on full open...  I have a tray under the sink to catch any additional water leakage, but so far none as I have turned the valves back to less than full open.

Tuesday, October 18, 2011

What is that smell?

My wife loves to take the hottest showers.  Sometimes, the water is so hot, her skin turns red making her look like a freshly cooked lobster.  Our lovely home did not come with a bathroom vent, aside from the window.  And since the weather in New England is starting to drop, that window "vent" is shut.  So it was likely, I suppose, that I assumed that when a rancid smell in the bathroom became noticeable, that it was due to mold.

The bathroom vanity counter is made out of a particle board laminated with, well, I don't know what it is really, but some sort of decorative laminate.  The sink is not sealed to the counter, in fact, if it weren't for gravity, it would float away.  Likewise, I also thought that with the excessive humidity, combined with water splashed from brushing our teeth and washing our hands, that the lousy particle board counter was beginning to rot.  Looking under the counter, I could see dark areas of prior water staining around the faucet (which does leak).

I started making plans to install a vent, as well as planing to post it's installation in here.  I began talking to the guys at work, getting ideas and taking measurements.  I began to also stress about poking a hole through my 250 year old roof....

Yet, each passing day, the smell grew.  It wasn't so obvious at first, but was growing exponentially.  The bathroom is next to our bedroom and after the second week the smell began to seep into our living quarters.  I began to worry that I had a major problem.

Much to my wife's chagrin, last Saturday evening, while we had guests due to arrive, I decided to source the root cause of the smell, hoping to find a patch of mold that I can easily eradicate with my top secret bleach/water formula.  I went to the bathroom, and became a blood hound.  I followed the smell... not the shower.... not the baseboard... not the toilet.  Vanity.  I opened the doors... a breeze of rancid air filled the bathroom.  This is one hell of a mold spore.  I took everything out of the vanity but couldn't find the mold.  The bottom of the vanity has tongue and groove boards, like they were recycled from an old flooring project.  Took them out.  Whoa... now it's stronger. 

In the back of the vanity, where the drain pipe leads into the false floor was a paper bag, with red writing on it.  The corner of the bag was torn off and a white powder was around it.  I saw it before, but since it looks like a coco bag, thought, well, the previous owner may of been a bit eccentric... drinking coco in the bathroom... geez.  Anyway, I took out the bag, read the bold red lettering.  POISON!  DO NOT EAT!  Maybe it's not coco.

Just below the entry into the false floor, where the poison pouch was, was a screwed hatch.  Curiosity held me captivated.  I unscrewed it... and... well I found the source of the rancid, putrid smell.  A fuzzy, brown mouse.  Well, to be more precise, a dead mouse.  For the next half hour, I wore a mask, grabbed my needle nose pliers, removed the carcass, vacuumed the mouse's former home, sprayed as much ammonia based cleaner as I could, dumped the carcass and vacuumed derbies as well as the paper towels used to clean the cavity into a doubled plastic bag. 

On my way down the stairs, wearing my mask, carrying my fresh carcass, I ran into our guests, made the very quick greeting and continued on to the trash bin.

Thanks to the former owner for this wonderful surprise.

PS, what cat owner leaves rat poison within their cats reach and also within the same reach as your buyer's cat.  I am quite offended by her carelessness.