



Welcome!

How we came to purchase our home.

WPA Photo

A Works Progress Administration photo offers a glimpse of our home's past.

Reproduction Windsor Chair

Finally, a dining room set.

No Power, No Heat.

Our first snow storm and it's aftermath, October, 2011.

Lead Poisoning

Updates to our son's lead levels.

Bit By Bit

My wife's blog on being pregnant, giving birth and raising our first child with all the complications, hardships and joys that life throws our way.

Showing posts with label Windows. Show all posts

Thursday, February 18, 2016

Lead Abatement and Remediation

December, 2014...
After numerous blood tests, a few scares and bouts of depression, I've finally succumbed to the realization that an abatement/remediation is necessary for continued residence within our home.  As I write this, the process has been somewhat completed and our bank accounts as well as our emergency savings have been completely drained of whatever funds we had left.  We're now trying to recover financially....  I really should create a "Donate Now" link...

In a prior post (Abatement Contractors and Lead Testing) I mentioned four painting contractors who were invited to give an estimate for the interior abatement/remediation of our home.  Of the four, the fourth was selected based on the information at hand.  The company had worked on a more prominent non-profit historic house locally and was recommended by two reputable sources (a paint supply store as well as a prime contractor who have both used this contractor in the past).  The others either didn't return communication, were a bit "out there", or their pricing seemed too open ended for our comfort level.  So, needless to say, I had but one option available.

We had negotiated a start date that coincided with my wife's work schedule so that she can be away for an extended period of time so as to alleviate the need to have her move into a local hotel.  This start day was Friday, December 19, 2014.  That same day, my pregnant wife and toddler left for my parent's home in NJ.  I stayed behind to man the home, work and deal with the contractor on a daily basis while attempting to review their work. 

A few days before the start date, the contractor wanted to meet with me to remind him what work was to be done.  It was a bit annoying that after giving him a printout of the XRF scan results months earlier, he would ask me what needed to be stripped.  I drew up a detailed plan of our home and transcribed the locations where the lead was per the scan.  The contractor didn't really seem to give a rats ass about it.  He commented on it in a positive light, but I later realized he never used it as I found it left on a table under plastic. 

The following two images are our home's floor plan with the locations indicated by our lead inspector that have failed.  The more green tags, the more lead was found.  In the red boxes, I've given the contractor a to-do list of what needed to be done.... most of which was ignored.


The pre-start meeting ended with a rather un-nerving final conversation.  After organizing and planning my wife's departure, packing and preparing our home with furniture relocated and negotiating with our jobs for time off, the contractor  gave me a final "oh-by-the-way" comment.  He said that his abatement license had lapsed due to some oversight.  He then asked me what I wanted to do.  He was concerned that I would turn him into the authorities for working on our home without a current abatement license and was considering cancelling the entire project.  He assured me that he was in the process of renewing the license and he should have it in a couple weeks.  With that information being said, he waited for me to respond.  With a deposit in his hand, scheduling set, a son who's lead levels had recently spiked, stress levels at an all time high, money saved for a year and moved around in anticipation, work notified; I was left without any other option but to continue.

So, December 19 came and the contractor's crew (all of whom did not speak English very well if at all, of course) started working.  The plan was for me to sleep in my son's room with our cat (and his litter box) while the crew worked on the lower floor.  Once they progressed to the second floor, I would then relocate to the living room (old kitchen). 
 
The first day was spent stripping the odds and ends (window and door frame in kitchen as well as the splat of paint on the column in the living room.  While the rest of the crew placed plastic down on the floors and doorways to the rear of the home.  All of our ground floor furniture was relocated to the family room (formerly the keeping room).  The second floor furniture was relocated to the rear room (office).  That evening, the crew placed a product called Peel-Away on the trim in the dining room.  The smell in our home that first night was so strong that I got a headache.  Opening my son's window (in winter) was my only salvation.

Each day onwards, the crew moved at a pace determined by the level of difficulty to strip the paint.  Some days were very productive, most were very slow.  They stored the bulk of their materials in our dining room and I had previously loaded the parlor with the doors that I had removed from nearly every room.  The doors would remain in the parlor for the next eight months....(wife was not happy).

As I came home from work each day, I took a quick glimpse around to see the progress.  In the first week, a hole had been made in one of the containment systems with a streak of dust entering the "clean" side of the system.  Upset, I communicated with the owner.  It was his opinion that this is a natural occurrence and happens quite often.  I'm not sure how true that is, and if so, that would mean the containment systems should be checked daily.  He indicated that his crew does check each day, however, I never saw them do such a thing as I was home while they were still working and when they left.
 

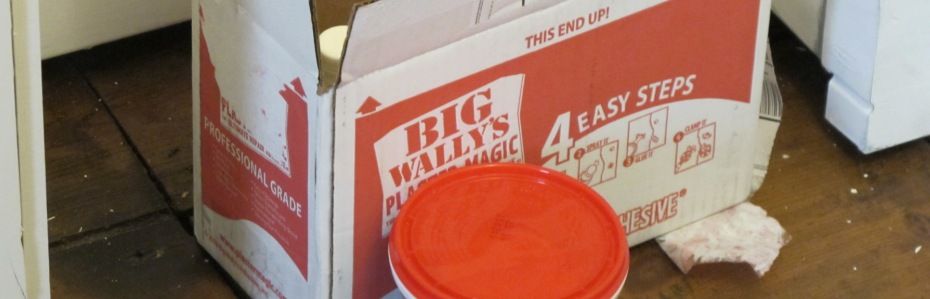
The contractor and I agreed that he would be responsible for the removal of paint and though he said he could repair the plaster that was cracked in every room, I told him that I would take care of it (I didn't trust that he would do it properly).  I purchased the contractor pack of Big Wally's Plaster Magic, a protective suit and a lead vapor mask.  I spent each night from when I came home around 4 PM until 1 or 2 in the morning patching each visible crack.  This went on nearly every night and on weekends as well throughout the project.  I also toured the home with the contractor twice to mark locations missed after I complained to him that there were areas still visible of leaded paint after his crew had "stripped" it.
 
Most days, the crew either used a heating plate or a chemical to soften the paint and scrapers/sandpaper to remove it and clean the surfaces.  Communication was difficult and misunderstandings happened.  It was explained to the contractor that it was my wish to maintain a level of preservation for the original woodwork in the home.  He said that it would be difficult to have everything perfect since the tools used will, at times, gouge the surface so marks are to be expected.  This didn't phase me, I figured it would just add to the character of the home, which they do.  However, placing a sander to a piece of wood and removing not only the remnants of paint but also the original detailing hand planed over 250 years ago is not agreeable.  This occurred in our bedroom on one of the decorative post casings.  The contractor claimed that it was like that in the beginning.

In another event, I came home one night to find the decorative dental molding in the parlor splintered and broken into a several pieces with original hand made nails protruding out of it.  Irate, I called the contractor and asked him what the F#$% happened!  He said that I had told him to remove it, for which I explained that only if it was not original and only to make it easy for him to abate.  He said that he never saw the molding and that his crew member had called to ask him if the owner (me) was sure "that he wanted it removed since it is really hard to get off".  It was really hard because there were 5-inch long spikes securing it to the beam and it was recessed behind the original plaster ceiling.  Upon finding the wooden trim on the floor, there was also a 6-inch gaping hole in the ceiling where the molding had formerly been.  The contractor had said that he'd patch the hole and help find someone to replace the molding.  The area is still bald...
 

When doing any sort of abatement, preparation takes time.  A part of that prep work is to lay down 6-mil plastic sheets to cover and protect the floor.  After which, the crew is to vacuum the floor, wet mop it, carefully roll it up and then dispose of the plastic as hazmat waste.  This is per RRP rules.  The crew used painters tape on the wood floors then applied a heavy duty red colored duct tape on top to secure the plastic to the floor.  This made sense since the painters tape is more gentle on the surfaces than the duct tape.  However, it didn't work out that way.  The painter's tape didn't stay attached to the surface.  Eventually, it nearly all peeled up, which detached the plastic from the floor along the edges of the rooms.  The picture here has the 6-mil plastic covering completely detached from the red duct tape, exposing not only the floor, but the baseboard heating hardware.  This is my son's bedroom.  The   leaded dust from the scraping the windows landed in the exposed areas, going into the baseboard heating and also under the floors.  I was told that it would be cleaned up...
 
Another problem with the tape was during the cleanup process.  I had warned the contractor to protect the floors since tape does pull up the finish if not done so properly.  I had instructed him to use a hairdryer to heat the surface before SLOWLY removing the tape.  This would potentially leave a sticky residue but the finish would remain intact.  My request was ignored.  I now have a 2" wide boarder of missing finish from all but one room as well as the front stairs.

Nearly every wall surface was touched.  All wallpaper was removed, the underlying surface was primed.  The priming process was not very successful.  The crew rolled the primer on the plaster and ignored the paint chips being flaked up.  The final appearance was suppose to be a blank wall for me to apply a final paint scheme to.  However, the actual appearance was quite literally a mess.  Paint chips were imbedded into the primer and spread throughout all the walls.  I'll spend the next few months also applying joint compound so hide all the ridges.
 
Paint removal continued for several weeks, longer than the initial two week estimated time frame.  Christmas came, then New Years.  It wasn't until the middle of January that my family was forced to travel back to our State for work and medical appointments.  However, once the leaded surfaces were abated, the contractor, per abatement rules, is required to clean.  Having taken the RRP course and after our prior issues with this project, I was curious as to how the contractor was going to complete this important aspect of the project. 

He proceeded to explain that he uses a "tried and true method" of two buckets and one mop.  His crew made a TSP (powdered tri-sodium phosphate) cleaning mixture in one bucket and kept the other bucket empty.  His crew dipped the mop the first bucket, wiped the floor, then rinsed it in the second bucket, then wet the mop in the first bucket, wipe the floor, etc.  Per RRP, this is borderline acceptable for cleaning a home of lead-based paint dust.  Doing so potentially spreads the leaded dust from one highly contaminated room to the entire house as the mop is reused continually.
 
I recalled from my RRP training that the best method is to use a wet swifter pad (or similar) that was white in color and wipe the floor with it.  One wipe was limited to cleaning a twenty square feet area.  When done, you compare the "dirty" side to a white sample card (provided in the RRP class).  If the white pad is darker, do it again.  Repeat until the whiteness of the pad basically stays white.  Once done, throw the pad away, get a new one and start with the next twenty square foot area.  Yes, it takes longer than the two bucket mop method, but it's done once and its guaranteed to be clean.  The contractor didn't agree citing the costs of buying the pads and continued to use the mop and buckets...EVERYWHERE. 

My pregnant wife, mother and son had arrived back in CT anticipating coming home.  I had to explain that they could not come home as we had to test to make sure the home was clean of lead dust.  We arranged for a hotel locally.  Later that day, on his dime per the contract, the contractor hired a lead inspector to test the floors.  Twenty-four hours later, the results were in.  The results were... nearly every room failed, with one room exceeding 300 mg/SF.  The next day, the contractor came back with boxes of wet wipes and his crew proceeded to hand wipe the floors.  After that level of attention, the floors were so clean that they squeaked from my sneakers.  The lead inspector came back and tested again, this time (another 24 hours later), the results were, for the most part, a zero reading and the contractor stopped shitting bricks.  My family, after 4 days in a hotel, were back home.  It's now past the middle of January.
 
Per a verbal agreement, the contractor took all our window sashes and stripped them elsewhere.  He brought them back later in the week.  The stripping was OK, but not the best quality as paint was still visible in certain areas. The painters did not mark the windows when they were removed from the rooms, so the hardest part when they were returned was figuring out which sashes matched each other, and with which frame.  To this day, I still don't have them back in the right openings. 
 
Pricing was also an annoyance.  First, obviously, this was not affordable.  The contractor does not take a credit card, we really did not want to increase our mortgage and our insurance provider laughed at us, literally.  Grants and such were previously discussed in another post (Lead Poisoning), which we did not qualify for.  It took us a very long time to save up the cash, no vacations, no extravagant spending.  A second annoyance was the contractor's inability to name a price.  Each time something happened where work may cost more, he would ask me, "How much do you think it's worth?"  I felt like I was being hustled.  If I had been in the mood to be brutally honest, I would've told him to owe me.
 
Final cost (not counting my supplies or equipment which added another ±$3,000):
 
$3,000 deposit on 12/18/14
$4,000 payment on 12/24/14
$4,000 payment on 12/31/14
$4,900 payment 01/07/15
$2,000 final payment on 01/20/15
$17,900

Regarding the abatement license, at the conclusion of the project, I requested a copy of the abatement license so that I may have it for my records.  I reminded the contractor that he indicated he would renew the document.  He admitted that he was no longer pursuing the license as he plans on combining companies with another person and didn't want to waste the $600 (he says) on the renewal.  Well, what a shock...., instead gave me the expired license, the one that became invalid a few months before his crew set foot on my property.  A photocopy was left on my back deck and a photo texted to me as seen here.

More before/after photos to come...

Thursday, February 26, 2015

Parlor Renovation, Part III - Water Leak Repaired

November, 2013...

The hole in the wall had become larger due to my eagerness (see Part I).  I had contracted with Sunderland Period Homes to repair the south facing parlor window.  As promised in Part I, the following are the procedures that were taken to repair the window frame:
Sunderland Period Homes

The crew of two started with the removal of the siding. Each board was removed, numbered and stacked in the front yard. The boards were scraped for a clean edge while the paper around the window was torn off.  A product they had called "ice and water" (branded as Protecto Wrap) was used as a first layer of defense around the window.  The product is a tacky tar-like membrane that helps secure the joint between the clapboards and window frame from water.  It came in a roll and was placed first along the bottom of the window, then the sides which overlapped the bottom and finally across the top of the window, overlapping the sides.
Siding removed, "ice & water" partially installed, storm window being removed. 
Rotted wood on the frame was marked for removal.  The marking delineated an area that was easy to cut and replicate. A scraper was used to remove paint to expose the wood's surface.  A straight edge was then used to complete the mark out.
Scraping the paint off the damaged area.


Using a straight edge for mark out.  


Once the area to be removed is marked, it is then removed using a router.  
The depth of the router is adjusted prior to the removal.

Starting from the outside edge, the carpenter carefully routers the wood to the indicated shape.


A stock piece of wood slightly thicker than the area being patched is used.  It is laid against the frame and the cutout is traced onto the stock wood.  A jigsaw was used to cut it out.
Scrap of wood being cut using a jigsaw.  Note the clapboards on the sawhorses.


Perfect match.

 With the patch ready, time to install.  The carpenter recommended that a 3x construction adhesive be used instead of stronger adhesives (such as the 8x) as the stronger varieties tend to be too gritty for this application.
Construction adhesive, 3x strength.

The application of the adhesive into the cut out.
The previously sized stock piece of wood is squeezed into the fresh adhesive.  The carpenter pre-drills screw holes and secures the patch with stainless screws.  Once the adhesive sets, the patch is planned flush with the original frame.
Pre-drilling for the screws.
This process was repeated several times around the perimeter of the window's frame.  Once complete, the crew moved on to the siding.  
Patchwork complete.  Note the Great Stuff insulating foam in between the planked wall boards.


It was suggested by the carpenter that while the siding is off, we should fill the gaps between the planks with foam.  What an excellent idea.  Now, I realize this is not going to be anywhere near as efficient as R15 insulation batting; however, compared to having no insulation versus this sprayed into the one inch cavities to help button up our home, I was all too eager to go out and purchase a whole bunch for the crew.  I was told to purchase the blue bottle for windows and doors.  This is because, per the carpenter, it was formulated to fill the spaces around windows and doors without making them un-plum.  The regular red can applies more pressure to the surfaces it comes into contact with which can cause alignment issues.  
Great Stuff, Window and Door.


Felt paper is now installed as a secondary wind and rain barrier.  It's installed with small siding nails.
Felt installed overlapping each other.

Siding nail.


Flashing installation is done in the same manner as the "water and ice" except the flashing needs to be scewed into the side of the house.
Flashing is installed over the "ice and water" membrane and under the frame's lip.  It is secured through the window frame.


The flashing is installed similar to the "water and ice" membrane starting at the bottom, overlapping the sides onto the bottom and then the top overlapping the sides.
A clear caulk was then used to seal the perimeter of the window.
Clear caulk.


Once caulked, the clapboards were re-installed with new pieces being added where needed.


For the next couple of days, this is how the side of my home looked.  The work finished within a week with the installation of lead flashing above the window (sorry, I ran out of vacation time, no photos of that installation).  The remaining clapboards were replaced and the work was done on the outside.  However, in the estimate, Sunderland Period Homes specified rosehead nails for the siding, the carpenter used regular siding nails.  It was a deviation that was very disappointing.  Upon pointing this oversight to Edward, he ordered the correct nails and had his carpenter install them.  His reasoning for not using it was because even though he wrote it down in the estimate, the existing nails in the siding were regular nails so he didn't think that he needed to install the more expensive rosehead nails.

On to the inside...
Interior face of the south exterior parlor wall before any repair work.
Sunderland himself worked on the plaster patching.  He took a sample of one of the window's trim and had it replicated exactly.  He also did the same with the sill.  Both of the components were damaged by yours truly in my feeble attempt to "fix" the window.
Plaster placement in progress.

Plaster material used.

Done.  Plaster and trim completed.


Once Edward and his crew were done, now, it was my turn to fix the cracks in the walls.

Big Wally's Plaster Magic, Contractor's Pack.


So the total cost for Sunderland Period Homes was:  $3,450.00 (does not include the Plaster Magic).  Pricing included an extra $250 due to there being more plaster repair than Edward had initially thought.  I don't yet know how much a 50 pound bag of Structo-Lite costs, but I doubt its anywhere near that price.

This truly was very expensive.  I have to admit that towards the end of this project, I lost my temper with Edward.  He tended to want to do 'this' and 'that', seemingly pull numbers out of the air and make me feel quite idiotic on a continual basis.  He didn't realize that we are not one of his wealthy clients that are restoring their vacation house.  This is our home, we live here and we only have so much money to spend.  I snapped at him one evening and told him that I just cannot afford him.  With his posh attitude, he didn't seem to care and we haven't spoken since.

Now with that being said, he was able to stop the window leak, perfectly duplicate the trim and do a decent job of plaster repair.  He also did not mind that I was asking questions of his crew most of the time and also did not mind the photographs.  Would I hire him again... eh, simply because of the expense, I think I'll shop around next time.  At least I was able to get a decent idea of how to seal a window.  I thank Chris, the lead carpenter, for being so educational.

Future plans are to prime the exterior surfaces left exposed and continue working on the interior of the parlor myself with paint removal and crack repair.

Sunday, April 20, 2014

Parlor Renovation, Part II - Window Sashes

A continuation from Parlor Renovation, Part I.

It was agreed that I would strip the window sashes to save on cost in preparation for the work to be done to our southern parlor window.  It was a simple task (isn't it always?).  I purchased paint stripper, a scraper, a dust suite and a lead vapor rated painter's mask.  I setup my area in the driveway placing a disposable plastic tarp on the pavement, two horses atop and dawned my space suite attire.  I retrieved the sashes from the back porch and while carrying them to my work area, one of the rails loosened and nearly fell off.  Well, there goes stripping them...
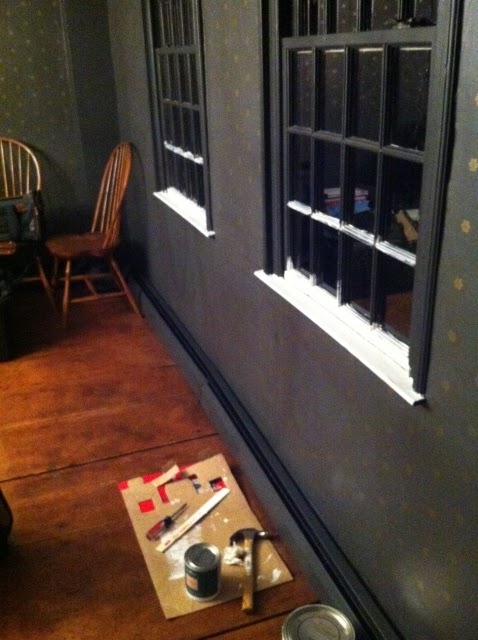
Turns out, the bottom rail on one of the sashes was rotted at the joint and had come loose.  My tail between my legs, I called Sunderland and requested his opinion.  He felt that it was an easy fix of a job costing roughly $300.  As usual, I wanted to make sure I was getting the best price.  After he explained what that cost entailed (replacing the bottom rail and re-glazing the three bottom panes).  I told him to never mind the whole window altogether and simply focus on repairing the rot and water issue with the frame.  I sought to replace the window sashes outright.

I searched online and came across Caroline Sly of Ashfield, MA.  She is a one-woman shop and claims to make windows by hand (among other wooden assemblies including stringed musical instruments) and after contacting her, she offered to stop by and show a sample of her work.

Prior to her arrival, we exchanged emails.  We spoke of early expectations and I learned just how affordable she is.  As my readers will recall, I always say that money is a matter of perspective, so what does affordable mean?  Well, if Sunderland Period Homes was willing to repair my one lousy reproduction window sash from the 1960's for $300 plus another $400 to weatherstrip with vinyl/plastic strips both sashes; Mrs. Sly was hand-making TWO sashes, with antique glass from the 19th century and weatherstripping of a similar nature for $425 (un-painted).  $700 to repair one reproduction versus $425 for a new period reproduction.  

I'll take your silence as a nod of approval.  She's a godsend when dealing with a constant barrage of high prices.  Mind you that pieces from Mrs. Sly are a custom one, so what may be of one charge for my home, could be different for yours (meaning, you should contact her for specific applications).  Here is her site: www.CarolineSly.com.

Her work speaks for itself.  Is it perfect, no.  Is it affordable?  For us, yes.  There are little issues I have with her work, details that would annoy me tremendously if Sunderland had done it, especially with his level of pricing.  She gave her opinion with details and listened to our desires.  It took her a week to create the pair of sashes, glaze them and deliver them to our home.  The glazing was still pliable when she dropped them off.

I was hesitant on informing Mr. Sunderland of my purchase.  After all, he is working on our home and has the means and methods of creating windows.  I would not want to offend him by taking business away.  I tried to keep things simple and simply asked that we did not install the weatherstripping on the old sashes and that I'll deal with them later.

But Mr. Sunderland kept on badgering me about the window, that it needs to be repaired or it will not function correctly, etc.   He was right, of course, yet, his pricing is just out of reach for my sanity.  In the end, I relented and confessed the real reason for foregoing the repair of the old sash.  Once my secret plan came to light, Mr. Sunderland really didn't say much.  He didn't seem to mind at that time and I invited him to examine the new sashes. 

Sunderland Period Homes strives for perfection in the details, at least that's the impression.  So, it wasn't until several weeks later that Mr. Sunderland felt compelled to give his full opinion of the sashes.  He examined the window and began pointing out all the inconsistencies in workmanship as well as the structural integrity of the window.  He said that the rebates for the glass were too shallow and that the panes of glass would fall out in time.  He added that the sashes were over tightened while being assembled which warped the sash.  He continued on for a short while, honestly aggravating me quite a bit.  I cannot afford to have Mr. Sunderland do as he pleases on my dime.  I'm not a wealthy person, I'm simply a family man paying my bills with an interest in historic homes.  So, with whatever little extra income we have goes towards our home.  If the expense is too great, something has to give.  I'm not a bottomless pit...

In retrospect (and I'm not an expert) I find it a bit hard to believe that a joiner from the 18th century would have made such perfect sashes by hand with wood sourced from one's backyard that would've passed Mr. Sunderland's critique.  It's been a while since that discussion and I am still annoyed by it.  I'm sure he's also annoyed at me for telling him that he's just too damn expensive for us, literally.

These sashes may not be perfect, but you be the judge.  Do they live up to your expectations?  Here are some closeups as they looked when Sunderland saw them:


The left sash is as Mrs. Sly delivered it, fingerprints and smudges from the glazing process present (so what?).  The right sash was cleaned and prepped for painting.  I think I am satisfied.

Mrs. Sly is due to come back to install the weatherstripping and fitment within our frame.  As of this posting, our agonizingly slow repair is as a result of yours truly having other priorities (a.k.a. LIFE) getting in the way.  As an update can be made, I'll post it up.

UPDATE:
Miscommunication, one of the most annoying things in life.  Between the window sash ordering, scheduling, dealing with Sunderland Period Homes, the lead problems; I must've misunderstood Mrs. Sly when she and I discussed installation.  She was unable to install the window sashes due to age (70+ years to her credit).  So I sit here completely beside myself since the promised windows were delivered without weatherstipping pending installation (hence my assumption of her installing them).  Well at least the price of the window, as is, is still more affordable than a repaired replica.

Tuesday, August 13, 2013

Lead Poisoning

My son, a walking, talking little bundle of joy reached his first birthday on June 27.  The following week, we visited our pediatrician for his first annual check up.  It was at this time that a lead test was given for daycare and perhaps per state regulations.  A finger prick was all it took for the screening.  A reading of 5.4 micro grams per deciliter was found.  The fact that anything came back was a shock since we had thought there wasn't any lead in our home.  With a reading of 5.4 mg/dL, we began to panic.

The Environmental Protection Agency (EPA) had a "level of concern" for any child under the age of 6 years who's blood lead level (BLL) was above 10 mg/dL.  In 2012, that level was reduced to 5 mg/dL.  A full blood test was ordered for our little man the following Monday.  A couple days later, the results were in.  His actual BLL was at 11 mg/dL.  The doctor actually apologized to us because she said she would have to inform the State.  We had no idea what that meant.  Could it mean that the State will come and take our child away?  Are we horrible parents for wanting to live in an old house?  Could we go to jail for child endangerment?


While waiting for "something" to happen, we went out and purchased over $100 worth of additional lead test kits to locate any source we could.  We purchased the following:

3M's LeadCheck Instant Test Swabs $9.97 for 2 test pack (times 3).
Klean Strip's D-Lead Paint Test Kit $28.97 for 6 test pack (times 2).
PRO-LAB Lead Surface Test Kit $9.98 for 6 test pack.
First Alert's Premium Water Lead Test $10.67 for 1 test pack.
Klean Strip's D-Lead Paint Surface Cleaner $6.97 for a 32 oz. bottle.

I wanted to find every trace of lead that I could find.  With the above tests, however, the following was discovered:

The keeping room was tested extensively.  It was the main room where our son spent the majority of his time.  The walls, ceiling, floor nails and random splats of paint came back negative.  I used the D-Lead Paint tester for all painted surfaces.  I then used the LeadCheck sticks for random spots.  I didn't have enough for everything, but I tested what I could with those.  The only light fixture in the room was tested, and boy did it come back positive.  Some of the black painted surfaces had chipped away and exposed the tin underneath.  The theory was, since the light was located in the direct path of the A/C, dust either on the lamp or being blown by it, becomes leaded and rains to the floor.

I made it a priority to remove that light.  A run to my local big box store was made, purchased a lead-free replacement and exchanged the two.  I removed the old light by first gently wrapping it in a plastic bag, unscrewed the decorative plate from the ceiling, detached one wire at a time placing a nut on it for safety relocated it to the porch should the State require it for any reason.  I then used the D-Lead cleaner to wipe down the ceiling and floor beneath just in case.

The replacement light was installed rather easily and actually doesn't look that bad.  It even has the ability to point up or down; currently it's pointing up for maximum light.


As noted in a previous post (Lead Testing), our exterior paint is leaded.  The interior was not, as far as I could tell at that time.  I traveled around the house, this time, taking more samples using the above swabs and sticks.  The original hardware in the home, i.e. door latches, came back positive for trace amounts of lead.  The HL hinges as well.  A lamp in our old kitchen, highly positive.  Who would've thought?

Concerned, I started calling many agencies, offices, and contractors.  I knew that lead abatement is not cheap but learned that there are programs that can assist a home owner.  That was my goal:  finding assistance in locating the source and eliminating it.

I Googled lead testing companies.  These hired groups use a hand held scanner called an XRF device that can scan down through 36 layers of paint, locate lead and calculate the concentration.  I received estimates from $800 to $1,200 to scan my home plus the cost of additional types of tests like dust swabs.

One company, a prospective lead inspector, mentioned a financial assistance program existed at the Connecticut Children's Hospital called LAMPP.  He had suggested that I try contacting LAMPP since he'll get their business anyway and perhaps because he can charge the full rate as opposed to an individual rate for me.  I did not care what went on behind the scenes, we were worried for our son but if the scanning can be done for free, why not? ... So I thought.

LAMPP is a grant based assistance funded by HUD for lead abatement.  Being a grant, our out-of-pocket expense would have been minimized or none at all, according to the inspector.

I became quite excited.  I called the LAMPP program director but no answer. I called another number and left a message and I waited for a call back...

Meanwhile, I received a call from a doctor at the Connecticut Children's Hospital.  She was called by our pediatrician to help answer our questions since this particular doctor was an expert in lead poisoning.  Our conversation was long and we learned that the majority of lead was found in the form of dust, not paint chips.  She told us to stop vacuuming as it may spread the leaded dust around and to wet mop our floors weekly.  Every weekend now we use a wet swifter mop to wet mop our 200+ year old floors. I mentioned the LAMPP program to the doctor on the phone. She personally knew the director and said she'll have him contact me.
Within 10 minutes, he called.

The director had plenty of knowledge of his program, as he should.  He essentially said that I do not qualify for assistance as I did not match the majority of the eligibility criteria:

1. Have a child under the age of six.  
Check!

AND

2.  The home would have to be built before 1978.  
Double Check!

AND

3.  The home is located in a pre-approved city/town.  
My town is not listed.

AND

4.  For a family of three, the combined income must be less than $58,500 ($65,000 for a family of four).  
I guess I'm too rich?

AND/OR

5.  Have a child on Medicaid.  
He's not and we're also not on welfare.

OR, IGNORE ALL THE ABOVE AND:

6.  Be in Section 8 housing, earning a combined maximum income of $38,500 for a family of three.  
See Nos. 4 and 5.

Needless to say, I wasted days of research and phone calling for nothing.  I am too "rich", located in a "prosperous neighborhood", able to afford our own health insurance and own our own home without any government assistance.  I pay into the system so that other's can take advantage of it...

HOWEVER....

My wife was able to get somewhere with the State's Health Department.  We were directed to our town's own "Registered Sanitarian".  Honestly, I thought I was communicating with a licensed garbage man?  I never thought such a title ever existed.

I contacted this "Sanitarian" thinking that perhaps, since he's from our town, we may be able to find assistance for abatement (this ended up being a mistake).  He requested a copy of our son's blood lead levels and wanted to conduct a walk through with his supervisor.  Great, we thought!  We're making progress.  Perhaps we can get a grant to get rid of all the lead!

They came, and pointed out the gaps in our floors.  They started to explain lead dust and that a packet of sugar sized lead dust is enough to cause permanent brain damage.  Imagine my wife's dismay... They added that we should purchase an EPA certified HEPA vacuum (around $500).  And were warning us that official testing for lead could lead to unintended consequences.  What does that mean?

Our parlor is in the midst of repair with damaged plaster and a window off it's frame (it's an ongoing project that I'll have to elaborate in a later post).  They saw the window framing exposed, the planks as well, and started indicating that I was poisoning my son.  They also started to roll their eyes when I described my job:  engineer currently working near bridges being painted = assumed lead paint.  It's really a brand new bridge, for the record, so no leaded paint.  They left after a 15 minute tour then promised to come back a week later to swab for leaded dust.  Before they left, however, they asked me to seal the parlor up, just in case.

Their return was witnessed by my wife who saw them take a sample from the floors of the old kitchen below that old leaded lamp (since replaced - see below), the parlor, the dining room and our son's bedroom floor.  They also swabbed one window sill in the dining room.  The window swab was more of a proof that the lead is infiltrating into the home from the outside.  The sanitarian proceeded to open and close the sash, then swabbed the sill.

Upon inspection when I got home that day, there's a white layer of paint underneath the horrid dark green/blue present on the sill.  There was also tiny pigments of pink and sky blue.  These were all in a track of peeled up tape from our weatherization routine (Getting Cold...).

For the record, I've never tested that particular window sill for lead, just the similarly colored trim around one of the two doorways in an area most frequented by my son, the keeping room.

A week later, the swab tests came back.  Any concentration of lead particulate above 40μg/sf equates to a red flag (that's 40 millionths of a gram of lead per a square foot):

Dining Room        less than 20.0 μg/sf (undetectable)
Baby Room          less than 20.0 μg/sf (undetectable)
Front Entry        less than 20.0 μg/sf (undetectable)
Old Kitchen                  22.0 μg/sf
Parlor                       39.5 μg/sf
Window Sill                 505.0 μg/sf

OK, we're all now freaking out!  The Sanitarian gave us a warning.  We have to wet sand all the chipped window sills and repaint them to seal any leaded paint present, simple, but a temporary solution.  We'll also have to possibly replace our 250+ year old window frames and sashes should the leaded paint remain detectable after being painted over (insane and also another post to come).

Once these hopefully idle threats are over, I plan to strip all the trim in the house and eventually the exterior paint.  Please, Mr. Sanitarian, GO AWAY!  Your temporary fixes are temporary and your idle threats will bankrupt us!

We're waiting to hear back from our doctor regarding our son's latest lead test.  If his numbers are very small (or hopefully nill), then we know our methods of wet moping have been successful and the Sanitarian can just.... go away (as politely as I can write here).  

Lesson learned:  Do not ask for assistance from the government.  I love my son and do not wish him harm.  But I've been reading and hearing horror stories form owners whom have gone bankrupt or lost all their savings after being forced to replaced windows, siding, etc.  Let me deal with this on my own terms since I am obviously not wealthy enough to hire a certified lead abatement crew to abate our home entirely, nor do I qualify for a government handout.  I can't even sell the home because of our knowledge of lead being present (not that I want to, mind you).  I hope this temporary fix for the State will suffice and I can get on with stripping each window clean, as a cost effective permanent solution, over time.

UPDATE:  
My son's latest BLL results are in.
*July 3, 2013: Screening = 5.4 mg/dL 
July 8, 2013:  BLL = 11.0 mg/dL
July 15, 2013:  BLL = 10.0 mg/dL
August 7, 2013:  BLL =  9.0 mg/dL
October 14, 2013:  BLL = 5.0 mg/dL
December 30, 2013: BLL = 3.0 mg/dL
June 25, 2014: BLL = 4.0 mg/dL
--January, 2015: Int. Abatement/Remediation--
*June 29, 2015: Screening = 9.5 mg/dL
June 29, 2015: BLL = 3.0 mg/dL
December 5, 2015:  BLL <3.0 mg/dL (un-measureable) 
 
*Screenings are worthless.