Welcome!

How we came to purchase our home.

WPA Photo

A Works Progress Administration photo offers a glimpse of our home's past.

Reproduction Windsor Chair

Finally, a dining room set.

No Power, No Heat.

Our first snow storm and it's aftermath, October, 2011.

Lead Poisoning

Updates to our son's lead levels.

Bit By Bit

My wife's blog on being pregnant, giving birth and raising our first child with all the complications, hardships and joys that life throws our way.

Friday, November 23, 2012

Woodworking, Part I

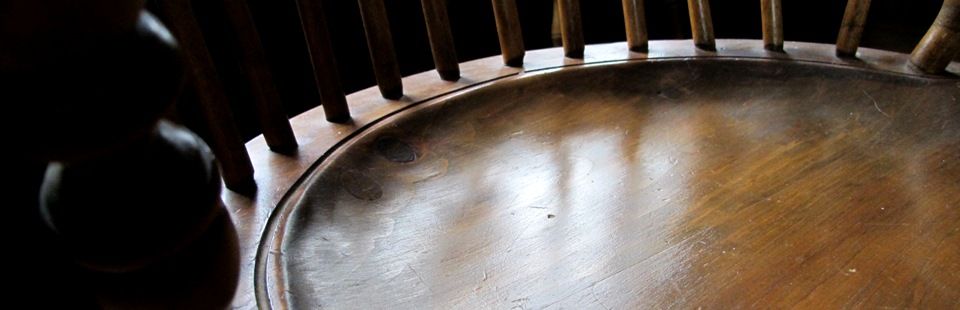
I wouldn't say I have a fear of loud noises, but when I hear the power come on a table saw or even the vacuum, I become paranoid.  In fact, my wife spooks me while I am vacuuming.  Putting psychology aside, I've come to appreciate the hand made creation of our home and the furnishings from it's time period; so much so that I would like to get my hands dirty, so to speak.

In a prior post, I mentioned a company called D.R. Dimes (A Lack of Furniture).  As if it weren't already apparently obvious, given a new child (our first) and a "money pit" of a home, purchasing reproduction furniture of such a high price tag will not be possible.  Instead, and I am going out on a limb here, my future plans are now to make the furniture pieces myself.  After talking with my fellow co-workers, I received that look.  We've all seen it (or given it).  The look only a sympathetic parent can give to their struggling child, "...oh isn't that nice" with an underlying meaning of "yeah, good luck with that, ha!"

My lovely wife has gone along with my new ambition.  For my birthday this past October 19, she purchased a woodworking class at the Connecticut Valley School of Woodworking.  The class was called Practical Handtool Joinery with Will Neptune.
The basis for all joinery is the ability to work to layout lines with saws, chisels and planes.  To do this, your tools must be properly prepared and sharpened.  If you are frustrated with the results you get with hand tools or doubt that you can improve the fit of machine cut joints then this is the class to improve your skills and take your woodworking to the next level.
In this class you will learn a controlled and repeatable method for sharpening edge tools that will cut end grain cleanly and accurately.  We will tune up and adjust rabbet and router planes so they can be used for accurate joinery.  Then in a series of bench work exercises, beginning with accurate layout techniques, you will learn how to work from reference surfaces to hand cut accurate joinery, usually more quickly and accurately than you could by machine.  These exercises include half laps, bridle joints on curved rails and housed tapered (sliding) dovetails.  This is a chance to practice working with chisels and planes and hand saws with one of this country's master furniture makers.  You will need certain tools - including a rabbet (shoulder) plane and a standard size router plane.  The full tool list can be seen on the school's website.  Don't let handtools continue to frustrate you - sign up today.
-From the Connecticut Valley School of Woodworking, Section 102712A description.
Prior to the class, I purchased a set of four Stanley Sweetheart Chisels, a Wood Is Good 18 oz. Mallet and thanks to my enrollment at CVSW, 10% off a Lie-Nielsen Router Plane.  As it turns out, the Lie-Nielsen company is your Mercedes of wood working tools, not very cheap, but a quality tool.

 The class was truly enjoyable.  I learned how to make the joints mentioned above.  The instructor, Will Neptune, is a fascinating teacher.  I highly recommend this class should the reader wish to travel down my path.  However, due to time restraints, not all components of the joints mentioned were completed with hand tools.  But I was really excited and convinced my wife to allow me to buy more tools while I dove into reading and watching articles/videos on making other joints.

A fully fledged dovetail joint was not apart of the class, but it was the one joint that all woodworkers aspire to master.  A dovetail is the joint most often seen on the sides drawers from 18th century furniture and the corners of boxes that often distinguishes quality from everything else.  Here's an example from Boston's Museaum of Fine Arts (from Newtonwoodworking.com).  


After the class, I purchased a dovetail kit from Woodcraft (which also gave a 10% discount due to the class) and found numerous how-to videos on youtube.  Combining them with the techniques I learned from the class, I made my first attempt at hand made dovetails:


Not perfect, but doable.  Next step is to simply make a box.  Then progress from there to eventually make a dinning room table and then reproduction windows in our home... but patience is key, stepping stones are important.

$ 99.00 Stanley 78 Rabbet Plane (new vintage from eBay, info on plane)
$791.29 Ouch!

I'd better stop buying tools for the time being and make something for my wife.

Saturday, November 17, 2012

Overwhelmed.

It has been a little over a year since we've moved into our home.  Has it been a great year?  No, not really.  Are we ready to call it quits?  No.  I will not let our 260 year old home get the better of us.  I am, however, just now beginning to feel overwhelmed.  

It's simply impossible to blog of all the events that have transpired in this year, so in a quick synopsis:  Windows, insulation, grass, leaves, money, wood, spiders, egg sacks, trim, molding, mold, heating, drafts, cracks, lighting, floorboards, furniture, decorations, the mid-life crisis motorcycle "gang", tools, money, contractors, crying baby, my lovely yet nagging wife, wind, a hole in the wall, money, a meowing cat in the middle of the night, vehicle maintenance, my know-it-all father, groundhogs, a pulled back (times 2), work, cobwebs, time, vent fan, trees, electrical, kitchen, washer timer, dryer timer, fireplaces, grubs, visiting family, plaster, foundation, the punk with the annoyingly loud low octave muffler, cooking stove, mice, beams, water leakages, neighborhood vandals, mega snow, heating oil, ghosts, oh, and money.  

There are so many things to do and so little time to do it in.  With our child and our jobs... now the clocks are set back, days are shorter.  The weekends are filled with other errands and our home sits patiently waiting for this and that.  


I look at our home with sadness.  It deserves better.  I say that because I lack the experience and knowledge to do the job right.  I dream in fear of repairing one aspect of this home only to have it worse off than before I touched it.  And the list of things to do increases each time I look around.  I am so hesitant to do anything except the little things that a weekend warrior does... realistically, that's cutting the grass and raking leaves... yey...


But honestly, I can read dozens of books on this and that and still be hesitant on completing any task.  Sometimes I feel as though the weight of this house is on my shoulders, like a growing elephant in the room.  Forgive the juvenile irony and insensitive humor of the photo, throwing political correctness out the window, I couldn't resist. While being gloomy all weekend, it made me smile.

So here I sit, counting the cracks, making wish lists and watching our checking accounts.  I know full well that what ever I think I want to complete, may not be.  It's not motivation, it's fear.  So, I'm putting it out there, right in the open.  I NEED HELP.  I feel as though I've been driving with my wife; thinking I know where I am going, gloating at that fact even.  Until, that is, I realize that I have no idea where I am, and am forced to ask for directions.

I need a mentor, a guide.  Someone who doesn't expect financial gain by helping a fellow lover of antique homes.  Someone experienced and wanting to share in the "love" as it were.  I don't know where to start... what tools are needed... materials to use... resources to collect.... contractor to hire... stores to visit.  Like many, I would hate to waste money on doing things wrong or paying the price for a "specialist" contractor.  I don't mind doing the work myself, but I just don't know what to do.

So I ask of my readers, if your honestly an experienced expert willing to mentor, use the comment form below or email me at confessionsofanantiquehome@gmail.com.  What is ironic about this is that most of you reading this are just like me... so I am preaching to the choir.  My fellow readers, I am not giving up!  I am venting at the frustration that has been this year.

Friday, October 19, 2012

You Are Never More Than 10 Feet From a Spider.

Ever since I was a child, I've hated spiders.  This angst could have been from my mother's fear that I inherited or perhaps my own experiences over time.  Regardless, the truth still remains that I hate spiders.  They are quite horrific looking and with thousands of species on our planet, there are many different nightmares to go around.  There are big ones, small ones, hairy wolf spiders, jumping spiders, hanging spiders, spiders that have many eyes, some that have only a few and then there are colorful ones, some with patterns that if  anywhere else could be considered beautiful.

During our home inspection, we discovered that the previous home owner had our home sprayed annually for spiders.  This was the reason she cited as why there wouldn't be any bugs (in general) in the home.  Not that it mattered since obviously this home had a bug problem in the past (see here).  It really did not sink in as to why she would've sprayed for spiders only... until our first summer.

After our son was born, we kept seeing a spider here and there.  Nothing out of the ordinary.  It's bound to happen in any home, but we started to notice that we weren't killing spiders on monthly basis, it was daily.  Actually, throughout the day.  Walking down the servant staircase, we would walk though thin cobwebs.  Sometimes an eight legged arachnid would swoon in mid-air in our path.  We would find them on our ceilings constantly, around the windows, throughout the kitchen and even in our cars.  We killed these pests quickly and often.

The culmination of our experience wasn't until a couple short weeks in August.  While my wife was breastfeeding our little one, a spider descended onto her breast.  Imagine her surprise!  This happened a couple of times.  Shortly after, in the middle of the night, I felt a pin prick on my leg, waking to the itch, I rolled over and went back to sleep.  The next morning, my wife freaked out when there was a rather large dead black spider squished on my back.  That's it!  I called an exterminator.
Our baseboards were filled with various mammalian hairs, dead insects and egg sacks.
Spider sack safely secured between fins.
First came the exterminator... then came Dyson.  The exterminator showed up and sprayed a mist on all the baseboards and used an aerosol in the attic and basement.  He made a total of two trips.  Though the exterminator's misting killed many of the adult spiders, the egg sacs are protected by their silky enclosures.  Hence why cleaning out the baseboards was necessary.  For the next couple of weeks, I spent nights and weekends opening up the baseboards and vacuuming out all the dust, cobwebs, pet hair, granny hair, dead insects and their various egg sacs.  We were warned by the exterminator that by October, the sacs would hatch and to remove them as soon as we could.  So I went at the baseboards.  I rotated off the cover panels by pulling the bottom outwards revealing a disgusting tangle of hair and dust.  Our Dyson vacuum was well used.  It's powerful suction pulled out all of the debris with exception to the spider egg sacs.  I used a paper clip that I had un-bent to poke at the silken sac while the vacuum was on.  The babies had no chance.  Just of note, the mother spider is a protective beast.  It's best to ensure you've gotten rid of her prior, that's what the exterminator did.

One last bit regarding spider removal.  We've found out that spiders hate lemon scents.  Apparently, in the movie "Arachnophobia," lemon scented Pledge as well as a heat gun were used to move the spider actors.  This method was used by a "bug wrangler" called Steven Kutcher who was hired for most Hollywood films involving insects until most recently when the digital age took that need away.  I used lemon scented pledge on all the baseboards and their coverings as a deterrent for spiders.

All fins are now clean and shiny!
When questioned as to how we're to cease the large population of spiders living in our home, the exterminator suggested we get rid of all our mature tress surrounding our home.  Spiders live in the trees and vegetation during summer, then descend to the roof and eventually inside the home as the seasons change.  Removing these beautiful trees is not going to happen!  Of all the retarded things to suggest... we joke that this exterminator has been sniffing to many of his chemicals.

Yellow Sac Spider
My wife did photo comparisons and identified the eight legged monster invading our home.  The yellow sac spider is a hunter.  It scurries around the home searching for prey.  It doesn't create a web to catch an insect, instead, it prowls like a lion, except being the size of a dime.  It's bite is said to be poisons yet spider experts claim otherwise.  Its two front legs are longer than the rest, for what I assume enable it to scurry faster than I can jump onto a chair.  Spider lovers (yes, they do exist) claim that a spider will capture more insect pests than birds and bats combined.  That sounds really fascinating, if your an arachnophile, but I'm more of an anti-Christ when it comes to bugs.  So, if you're a virgining arachnophile, then get your kicks out of this:  Wikipedia and Discover Magazine, I'm done.

Saturday, September 1, 2012

Groundhogs Breed Like Rabbits

Baby Groundhog Posing
Have you ever seen the cute furry overgrown hamsters in people's backyard and thought, "Aw, their so cute!"? Sure, a groundhog (also called a woodchuck) can be cute (and funny, as in the GEICO commercial from a couple years ago:  Woodchuck Chucking) until these furry critters begin treating your backyard, garden, deck, and foundation as if they were a wedge of Swiss cheese. And they breed like rabbits too! We saw one in the beginning of Spring, then by June, we had SEVEN cute furry babies and mama eating the grass and various other plantings that my wife and I were caring for.  They managed to dig at least two dens which may possibly be linked together.  The entrances of these dens are huge compared to the size of the fur balls.  One entrance was in a large patch of poison ivy. Good, I thought, though I think these things are immune to the effects of the poison as a scare tactic. The other entrance was under a loose stone retaining wall in the back yard.

Mama groundhog being watchful of the weird human taking photos of her babies

I first tried moth balls. A wives tail surely, but people did swear by it. Our groundhogs did not like them though they did not get rid of our uninvited guests. Instead, our ingenious earth dwellers simply pushed the balls out of their dens or buried them. Now our backyard smells like an older person's closet. Our next option was to get a quote for a "professional" to remove them. Speaking with the pro, it was learned that there are two ways to rid our yard, death or relocation. He described what he did for relocation, setting out 7+ traps for a day and coming back. For a fee that was per a trap set, and per an animal captured. With seven groundhogs, the price would've escalated dramatically.

There had to be a better alternative. We did not want to go around placing poison on our property nor shoot each one. Searching online found that there are "groundhog sanctuaries" in our state. Who would've thought? In fact, one is run by the Audubon Society. We got excited and my wife called up the Audubon Society in the neighboring town who quickly quenched our plans to relocate the hoard. After calling several others, we came to the conclusion that nobody wanted to truly "save" the groundhog, just birds, despite sites advertising it. My wife called Town Hall who suggested a relocation in a local park. Done, we'll take that deal. We really didn't have the heart to kill off the family and getting a quote of around $600 to remove the lot was too excessive for our budget.

For $24.57 (taxes included), we were able to rent a Havaheart trap from Ace Hardware's rental section. At $119 retail ($45 on Amazon.com), it's roughly half the online price for one week rental.  In the first couple of hours we caught THIS MAMMA:
Mama groundhog CAPTURED

A half hour later, this little guy was captured:
First of many baby groundhogs CAPTURED
So what do they like to eat?  Aside from all our plantings, romaine lettuce, sliced apples, old fruit, etc.  We used left over foods from our cooking like the previously mentioned ingredients.  In the first two days, we caught at least two a day, eventually catching six cute furry monsters (with one being the mother).  One last monster was elusive and eventually got the hint when his/her siblings kept disappearing.  The aforementioned sibling woodchucks were released two miles away at the nature preserve/walking trail park WITH permission from the town's park commissioner.

Sunday, August 19, 2012

Lead Testing

Warning:  This test kit has an expiration date!  It must be checked prior to purchase.  Solution 2 needs to be checked regularly to ensure it is still active.  A negative test result will occur if the solution is inactive!

My wife and I have a newborn.  We have a very old house.  Lead is guaranteed to be present.  I purchased a lead test kit in hopes of identifying which rooms have lead.  As our child grows and starts to go places, as well as restoration efforts continue, I need to ensure that my child's safety is first.

The lead test kit I purchased initially from my local hardware store is called D-Lead by Klean Strip.  The kit has an expiration date on it as I realized too late.  A new test kit purchased from a home improvement store will cost you around $30.  My kit specifically was $30.81 after tax.  This product is one of two or three kits approved by the EPA for the homeowner to use to test for lead based paints (as seen here: EPA - Approved Lead Test Kits).

The kit is a miniature chemistry set.  There are two chemicals enough for six tests, a razor blade, a brass paint capturing tool, a plastic plunger, paper for collecting samples, surface preparation wipes and  a disposal bag.  There is also a set of test indicator strips for double confirmation of a negative result.

The test seemed confusing at first, but the directions were simple enough (once read).  The process took 15 minutes the first time, much less for successive tests.  First, using the included wipe, the surface to be tested is cleaned as are the utensils used to capture the sample.  The brass capturing tool is then placed on the spot with a paper collector underneath to capture what isn't captured by the tool.  Either a light tap with a hammer or pressure twisting by hand cuts through the layers of paint.  What doesn't easily fall out onto the paper below is pushed out of the tool by the plastic plunger.  The sample should be smaller than a pea-sized circular cut.  Using the razor blade, the sample is cut into quarters, poured into the clear bottle of solution one and shaken for 10 seconds.  Five drops of solution two are added and the mixture is shaken again for 10 seconds.  Wait 10 minutes to ensure breakdown of paint.  If lead is present, the color will be darker than the sample color on the solution 1 container.  If lighter, then there's no issue.

If the sample is not black, but not clear, you are now in a "gray" area.  Comparison to the color on the solution one bottle is simply one's interpretation and the test results, personally, I would consider invalid.  Don't risk your family.

I took a sample from the parlor's south window and wall as well as the baby room's window.  Here is my result (there were many sample vials, these are typical):
Negative Lead Result


The yellowing is the additive from Solution 2 as opposed to the initially clear vial.  The brown rectangle is the Test Standard.  If the mixture in the vial is darker than the Test Standard, you are positive for lead, if lighter, then you're negative.  I was excited to find negative results thus far.  The test indicator strip was used to test the quality of Solution 2.  Placing one drop of Solution 2 onto the indicator strip would result in a black coloring for "good to go" and clear if there is an issue with solution 2.  A number is provided by Klean Strip should the that arise.

I then tested the exterior paint.  The original color of our home was most likely white, at least that what the paint chips indicate.  And that color can be seen as the current paint is bubbling and peeling off.  Seeing how other aspects of this home were dealt with, I assume that the surface was not prepared prior to painting.

A sample was taken from the exterior paint and trim around the windows separately.  I mixed both the existing paint color and the underlying white paint together, not because I am lazy (though I can be), but because it was impossible to separate.  Here was the result:
Positive Lead Result


Positive for Lead.  Bummer.