Welcome!

How we came to purchase our home.

WPA Photo

A Works Progress Administration photo offers a glimpse of our home's past.

Reproduction Windsor Chair

Finally, a dining room set.

No Power, No Heat.

Our first snow storm and it's aftermath, October, 2011.

Lead Poisoning

Updates to our son's lead levels.

Bit By Bit

My wife's blog on being pregnant, giving birth and raising our first child with all the complications, hardships and joys that life throws our way.

Showing posts with label Reviews. Show all posts

Friday, March 6, 2015

Parlor Renovation, Part IV - Paint Stripping

March, 2014...

The parlor is coming along.  It is a mess right now, but still, I can picture the final look in my head.  My wife, though she tries, is more annoyed with the time it has taken to get to this point.

I keep bouncing between different aspects of the room.  Plaster repair, wallpaper removal and paint stripping have been tackled at the same time.  For this post, I'd like to focus on the paint removal from our paneled wall.

The wall was unpainted when our previous owner moved in.  After hiring an interior decorator, the two decided (perhaps in a drunken stupor) that a dark green colored room would be best suited for the Asian themed Americana home (see here for photos before we purchased the home).  As with previous posts, it now becomes my task to undo their horrid decisions.  The panel was painted with a primer and a coat or two of that green/gray paint.  For several months I chipped away using an Amazon.com sourced paint scraper for detail work.  The results were pretty decent.  As I became cocky with my scrapping, I began to gouge the surface damaging the wood.  It didn't matter what the profile was, one slip was all it took to make the scar.  Knowing that the surfaces were painted in the last 20 years, I was confident that there was no lead in the room.  I took a test just to be sure; the result was negative.

I was about halfway through this job when I began researching lead paint removal for a future project.  This would've been for the exterior yet would also work on any painted surfaces.  The contraption discovered was called a Speedheater.  The company's advertising can be seen on youtube and on their site:  eco-strip.com.  It's a $499 tool that heats the surface, much like a heat gun or a heat plate would, except, the temperature is much less.  Since lead vaporizes above 1000degF, this contraption heats the surface to 200 to 400 degrees, just enough to bubble the paint.  Since this temperature range is far less than the vaporization point of lead, it makes sense as a lead removal tool.  They also sell a scraper kit for an extra $99.  The combined kit, for the most part, does a decent job but is not perfect.

Where the scrappers from Amazon.com were simple, effective tools; one slip and the surface was gouged.  With the Speedheater, the surface sizzled and bubbled during a 20-second exposure.  The bubbled paint came off very nicely with no gouging of the surface.  However, there were times when the process did not work.  Instead of making large bubbles that peeled away easily, the Speedheater created small bubbles that made the surface tacky and extremely difficult, if not impossible, to scrape the paint off.  Additionally, if one leaves the Speedheater on the surface for too long, it does burn the wood.  Several times, my wife would poke her head into my work area and comment, "why's it so smoky in here?" Eventually, the tacky areas, the mildly burned spots and the gouges gave way to a good sanding.  I took my finishing sander and loose pieces of sand paper and went at it.  I hated doing it, having had the desire to keep any semi-original finish, but after realizing that large portions of the paneled wall were a more recent reproduction, my objective changed to a clean, fresh surface.  I worked on the entire wall over the next few months, nearly the entire surface was bare except the dental molding.  Becoming annoyed with the tedious paint removal of the molding, I ventured to other painted surfaces.  I had previously tested the plaster walls, wood paneled wall and windows with the D-Lead lead test kit, all coming back negative.  I started removing the paint from the window trim...

...June, 2014...

It was around this time that our son had his next periodic lead test.  To everyone's surprise, it was slightly higher than last time (see here).  Everything STOPPED.  As a precaution, I washed down every surface immediately at our front entrance, washed down my tools and sealed the room.  I looked at the lead test kit I used previously and noted that the kit was defunct!  It was either expired (though it was in-date on the package) or tainted.  I have to stop this insanity, I give up!  It's my child's health at risk.  I called in three lead abatement certified painting contractors and am awaiting estimates... I'm done with the "Parlor Renovation"  ...to be continued...

Thursday, February 26, 2015

Parlor Renovation, Part III - Water Leak Repaired

November, 2013...

The hole in the wall had become larger due to my eagerness (see Part I).  I had contracted with Sunderland Period Homes to repair the south facing parlor window.  As promised in Part I, the following are the procedures that were taken to repair the window frame:
Sunderland Period Homes

The crew of two started with the removal of the siding. Each board was removed, numbered and stacked in the front yard. The boards were scraped for a clean edge while the paper around the window was torn off.  A product they had called "ice and water" (branded as Protecto Wrap) was used as a first layer of defense around the window.  The product is a tacky tar-like membrane that helps secure the joint between the clapboards and window frame from water.  It came in a roll and was placed first along the bottom of the window, then the sides which overlapped the bottom and finally across the top of the window, overlapping the sides.
Siding removed, "ice & water" partially installed, storm window being removed. 
Rotted wood on the frame was marked for removal.  The marking delineated an area that was easy to cut and replicate. A scraper was used to remove paint to expose the wood's surface.  A straight edge was then used to complete the mark out.
Scraping the paint off the damaged area.


Using a straight edge for mark out.  


Once the area to be removed is marked, it is then removed using a router.  
The depth of the router is adjusted prior to the removal.

Starting from the outside edge, the carpenter carefully routers the wood to the indicated shape.


A stock piece of wood slightly thicker than the area being patched is used.  It is laid against the frame and the cutout is traced onto the stock wood.  A jigsaw was used to cut it out.
Scrap of wood being cut using a jigsaw.  Note the clapboards on the sawhorses.


Perfect match.

 With the patch ready, time to install.  The carpenter recommended that a 3x construction adhesive be used instead of stronger adhesives (such as the 8x) as the stronger varieties tend to be too gritty for this application.
Construction adhesive, 3x strength.

The application of the adhesive into the cut out.
The previously sized stock piece of wood is squeezed into the fresh adhesive.  The carpenter pre-drills screw holes and secures the patch with stainless screws.  Once the adhesive sets, the patch is planned flush with the original frame.
Pre-drilling for the screws.
This process was repeated several times around the perimeter of the window's frame.  Once complete, the crew moved on to the siding.  
Patchwork complete.  Note the Great Stuff insulating foam in between the planked wall boards.


It was suggested by the carpenter that while the siding is off, we should fill the gaps between the planks with foam.  What an excellent idea.  Now, I realize this is not going to be anywhere near as efficient as R15 insulation batting; however, compared to having no insulation versus this sprayed into the one inch cavities to help button up our home, I was all too eager to go out and purchase a whole bunch for the crew.  I was told to purchase the blue bottle for windows and doors.  This is because, per the carpenter, it was formulated to fill the spaces around windows and doors without making them un-plum.  The regular red can applies more pressure to the surfaces it comes into contact with which can cause alignment issues.  
Great Stuff, Window and Door.


Felt paper is now installed as a secondary wind and rain barrier.  It's installed with small siding nails.
Felt installed overlapping each other.

Siding nail.


Flashing installation is done in the same manner as the "water and ice" except the flashing needs to be scewed into the side of the house.
Flashing is installed over the "ice and water" membrane and under the frame's lip.  It is secured through the window frame.


The flashing is installed similar to the "water and ice" membrane starting at the bottom, overlapping the sides onto the bottom and then the top overlapping the sides.
A clear caulk was then used to seal the perimeter of the window.
Clear caulk.


Once caulked, the clapboards were re-installed with new pieces being added where needed.


For the next couple of days, this is how the side of my home looked.  The work finished within a week with the installation of lead flashing above the window (sorry, I ran out of vacation time, no photos of that installation).  The remaining clapboards were replaced and the work was done on the outside.  However, in the estimate, Sunderland Period Homes specified rosehead nails for the siding, the carpenter used regular siding nails.  It was a deviation that was very disappointing.  Upon pointing this oversight to Edward, he ordered the correct nails and had his carpenter install them.  His reasoning for not using it was because even though he wrote it down in the estimate, the existing nails in the siding were regular nails so he didn't think that he needed to install the more expensive rosehead nails.

On to the inside...
Interior face of the south exterior parlor wall before any repair work.
Sunderland himself worked on the plaster patching.  He took a sample of one of the window's trim and had it replicated exactly.  He also did the same with the sill.  Both of the components were damaged by yours truly in my feeble attempt to "fix" the window.
Plaster placement in progress.

Plaster material used.

Done.  Plaster and trim completed.


Once Edward and his crew were done, now, it was my turn to fix the cracks in the walls.

Big Wally's Plaster Magic, Contractor's Pack.


So the total cost for Sunderland Period Homes was:  $3,450.00 (does not include the Plaster Magic).  Pricing included an extra $250 due to there being more plaster repair than Edward had initially thought.  I don't yet know how much a 50 pound bag of Structo-Lite costs, but I doubt its anywhere near that price.

This truly was very expensive.  I have to admit that towards the end of this project, I lost my temper with Edward.  He tended to want to do 'this' and 'that', seemingly pull numbers out of the air and make me feel quite idiotic on a continual basis.  He didn't realize that we are not one of his wealthy clients that are restoring their vacation house.  This is our home, we live here and we only have so much money to spend.  I snapped at him one evening and told him that I just cannot afford him.  With his posh attitude, he didn't seem to care and we haven't spoken since.

Now with that being said, he was able to stop the window leak, perfectly duplicate the trim and do a decent job of plaster repair.  He also did not mind that I was asking questions of his crew most of the time and also did not mind the photographs.  Would I hire him again... eh, simply because of the expense, I think I'll shop around next time.  At least I was able to get a decent idea of how to seal a window.  I thank Chris, the lead carpenter, for being so educational.

Future plans are to prime the exterior surfaces left exposed and continue working on the interior of the parlor myself with paint removal and crack repair.

Saturday, May 31, 2014

4-Poster Bed

Since moving into our historic home, so much time has been spent on the physical structure that very little has been devoted to furnishing it (we still have a couple empty rooms).  Our bedroom has a hand-me-down dresser from a college friend that is packed full of our necessities, a solitary night stand from a recycling yard and a metal bed frame sourced from Craigslist.  Rather sparse for a modern bedroom yet my wife has been content (at least that's what I thought).

After two-plus years, my wife had enough.  Her birthday was arriving and when I asked for her preference, instead of the usual textile items, she blurts out FURNITURE!  My wife's wish for her birthday was a piece of furniture for our bedroom.  Having looked through sample sales of period furniture, she gave me a limit of $3,000 (as my wife and I share approval in our expenses, we do not make purchases without the other's approval).  She said that it was time we got something and whatever it was, it had to be for our bedroom.  

We sat there each night scouring EBay and other sites for authentic period pieces.  For decent period pieces, even at our limit, it was just a little out of reach.  Not to mention fears of potential leaded paint and, along the same lines, protecting an $8,000 dresser from a hyper toddler.  We decided to shy away from true antiques.

We moved on to our bed frame.  A year or so prior, our bed and box spring sat directly on the floor.  It was a habit from our former days of apartment living when buying furniture for a year-long rental wasn't needed.  Also, our cat loved clawing the underside of the box spring (even climbing inside).  Then, however, our cat matured and as being on the floor invited spiders crawling over us at night (ew), we purchased a basic metal frame and elevated our bed away from the arachnids.  Now, it was time to have a formal bed frame, no more low-rider beds in cahoots with spiders and manic cats.  It's time for a mommy and daddy bed.

$3,000 is a lot of money for most people (it's a lot of money for us as well).   I realize that we do not live centuries in the past, but I would like to stay true to the appearance of the past and there is an associated cost with that level of quality.  There really isn't any sense in owning an 18th century American home and filling it with modern Japanese art (like our previous owner).  In my opinion, for a home that a person owns, their furniture should compliment it.

In a prior post, I commented on D.R. Dimes.  Though beautiful furniture, their pricing was just out of reach.  So I searched online through various vendors for reproduction furniture.  I came across quite a few and many having the same prices close to D.R. Dimes or of mass produced varieties that just look too "modern" for our home.  I finally came across a furniture maker who's pricing is much less than that of D.R. Dimes, but still of a quality equal to the of the famous maker.

Out in Lancaster County, PA, is a furniture maker with an impressive inventory of reproduction pieces.  Their site, GreatWindsorChairs.com, shows off their collection of period pieces for every room of a historic home.  They are not IKEA-like furniture with particle board components.  Like with many things, authenticity and quality do not come from low-cost chains.  I ventured to their site, found their bedroom furniture and noted a little highlighted blurb about discounts being available.  I submitted a questionnaire through their site and soon received a call... that's when I met Michael Rice.

Michael was patient with me.  I was flopping back and forth with choosing between the available tiger maple or cherry wood construction (trivial:  both were the same price, another differential from D.R. Dimes).  In the end, I settled on the tiger maple with a canopy shipped to my living room.  Pricing was great.  Michael described to me that the discount applied to their current inventory only and returns were not possible.  They had a tiger maple king size canopy bed in stock at 10% off their regular pricing.  Shipping was through an outside delivery service for an extra fee.  All together, $2,990.50 was charged to my credit card.  Within two weeks, the bed was in my home and I came in under our budget.

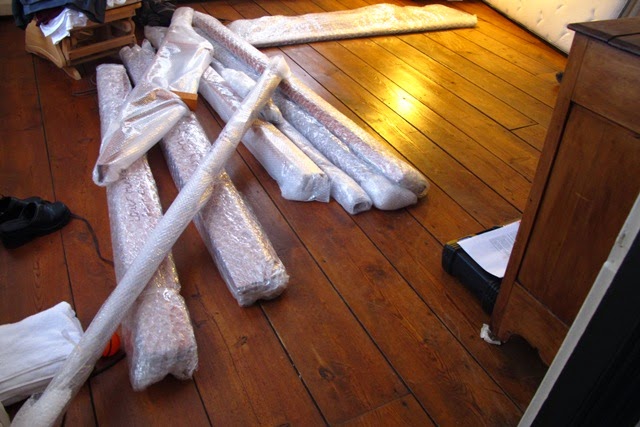
It took roughly 2 hours to assemble as each part was nicely wrapped heavily in bubble-wrap.  Unwrapping the parts was time consuming.  Once all exposed, assembly went quickly.  It's easier with two people (per the directions), but with the other able-bodied person caring for our little one, this was a one-person job.  Besides, it was her birthday...

All the parts came wrapped in bubble wrap, held together with tape.

Each bundle was labeled making it easier to grab the right part during assembly, eliminating the guess work.
Unwrapped headboard and corner posts.  I used the bubble wrap as padding.
Bolts that secure the posts to the rails.  They came with a tool to aide in installation.
Final assembly of the parts.  I had to use books to support the rails during the "two-person" stage while attaching the bolts.

The partially assembled bed.  I couldn't place the canopy on top because the finials that attach the bars are too tall for our room.

Being in an old home with (plus or minus) 7-foot ceilings, a four poster bed with 7'-4" posts was not going to fit.  Discussing the height issue with Michael, I learned that the finials can be easily trimmed.  They are basically a decorative peg about 6 to 8 inches in height that support the canopy.  No screws, no bolts; just a solid piece of maple, turned on a lathe.  I measured the clearance that the finial needed for installation above the canopy.  It's simply the length of the peg from the bottom of the finial.  That distance was measured on the top of the finial.  I drilled a hole into a price of squared scrap wood to hold the finial.  I then used a miter hand saw to cut off just enough from the finials to fit our ceilings.  The final appearance is more sedate than the original form, I actually like it better.

Removing the top of the maple finial using a common hand miter saw.

A cut finial compared to it's former size.  The removed top allows just enough room for the installation and it's appearance actually looks quite attractive.
I am very pleased with the bed frame from Great Windsor Chairs.  The quality is impressive.  It is solid maple and the "tiger" finish is absolutely gorgeous.  The bed as a whole is not 100% hand-made.  It's a hybrid of machine and hand tooling.  Considering the much greater expense with a completely hand made piece (and with a toddler around), I'm OK with a hybrid approach to the construction.  Having said that, what really is quite exciting are the details that a lay-person may over look.  On the flat surfaces such as the head board and even the canopy frame are the tool marks from the hand plane used to flatten the components!  I realize that reads a bit dorky, but those "imperfections" just add to the quality of this piece.  It truly is an heirloom to pass down and money well spent.  It also satisfied my wife.  Take a look at some of the details below:

Photographing very fine details in wood is harder than I thought.  The light has to be just right to reflect the undulations for the camera lens to capture.  Above, the bottom bar of the canopy support show the marks left by the hand plane.  Simply awesome.

Finial installed a top a corner post with canopy bars.  I think it looks great!

Lamb's Ear detail of the corner post.

Bolt cover detail.  Some manufacturers offer metal covers for an added expense, these were included and pre-installed.

Rope hole detail.  For an added touch of authenticity, a large diameter rope can be added to mimic a rope bed.  

Headboard closeup.

The king size canopy bed from GreatWindsorChairs.com.  With the cost of the bed being what it was, there was no more room left in the budget for a quilted colonial blanket.

Disclaimer:  I have not been reimbursed by Great Windsor Chairs, nor by Michael, for writing this entry.  I have received a 10% discount which is readily available to any consumer when Great Windsor Chairs advertises a sale.

Thursday, April 25, 2013

Reference Book: Early Domestic Architecture of Connecticut


Here's another exciting reference book that I've come across.  Early Domestic Architecture of Connecticut by J. Frederick Kelly.  The previous owner had left it for us in the home though I don't believe she used it much, more like she kept it around as a coffee table book.  Regardless, this paperback book is an in-depth look at 17th and 18th century architecture.  Written initially in 1924, with reprints in the 60's and later decades.  For any true colonial home owner, this book is a must have.  

Inside this wonderful collection of photos and drawings are formal descriptions similar to a thesis in language.   However, getting past it's formality, the information contained herein is vast.  You want to know how clapboard was made and installed or perhaps why windows were made a certain way in a home of the 1600's versus the late 1700's.  Perhaps it's the interior paneling that you are seeking, or even still, the entire frame work of our homes including the different joint types.  If you're a lover of these homes, the information within is thought tantalizing.

As of this post, Amazon.com is selling Early Domestic Architecture of Connecticut for around $23 (and qualifies for free shipping).  Google books has a sampling of pages with several images, check it out here

Saturday, May 12, 2012

Review: Big Wally's Plaster Repair Kit

Watching the PBS program "This Old House", I saw contractor Tom Silva use Big Wally's branded plaster repair kit on a rather large crack.  The process looked simple enough and having plaster everywhere in the home with every wall having some sort of crack, I decided to buy a small pack to try out.


In our future baby room, where a closet was built (circa 1960's), are a series of exposed cracks on the west exterior wall.  This area will eventually be covered by a closet system, so I figured I can't make it look any worse.  You can see the previous owners attempts of sloppy repair along the corner.


Following the directions, I drilled my first hole near the crack to locate the lathe behind.  With a set spacing between each lathe, I drilled along the crack keeping far enough away not make it bigger, yet close enough for the process to work.  I believe the directions said about an inch to two away.  I vacuumed each hole to clean it of all dust and you'll also want to vacuum the floor and other nearby items, plaster dust gets everywhere.


Once this was complete, the holes are primed with a chemical within a squeeze bottle, left to sit for 15 minutes, then the glue is pumped into each hole using a caulk gun.  The directions stated that one full pull of the caulk gun's trigger is needed per each hole or until the glue pops out of the hole.  That may be overkill.  On a series of drilled holes, I found myself squeezing two to three pulls of the trigger with no glue being forced back out of the hole.  I must have hit a pocket or found a void between the lathe.  Either way, the purchased kit was stated at repairing 9 linear feet of crack.  I believe you could get more out of the kit once you get used to it.  The kit isn't cheap, so making it effectively last is an excellent goal.

After filling all the holes, a special washer was screwed into selected holes which, when screwed in, pulls the lathe and plaster back together again while the glue cured.  


The directions said that I should give time to allow the glue to dry; I waited a week, just to be sure.  Then  I removed all the washers with a putty knife.  Did a little sanding and applied joint compound on the surface to fill the drilled holes and cracks.  I let it dry, sanded and repeated until the wall was smooth.  After I painted the surface, the final product looked amazing!  See the special note at the bottom of this post.


The kit came with glue, special washers, primer, gloves and directions.  Extras needed were a drill, masonry bits, vacuum, scraper (to pry off the washers), joint compound and a plaster knife/trowel.  But these are tools that every handyman (or woman) should have laying around.

The entire process is messy mainly because of the joint compound, plaster dust, glue and my inexperience.  Gloves are included in the kit, and thinking that I was a tough guy, I didn't bother with them.  Use them, the glue does sting if you have any cuts on your hands.  Protect your floors too and don't be a tough guy.

Total cost was $79.00 for the small nine foot kit with shipping being an extra $17.50! (in 2012).  As pricing becomes more affordable per foot once you buy in bulk, I may consider going after the larger Contractor kit.  However, it is still on the expensive side for my budget.  I will admit, that without trying any other kit, Big Wally's does what is should and was relatively simple to complete.

For more information, see Big Wally's site:  http://www.plastermagic.com/

Here is the video from "This Old House" that inspired this repair:
How to Repair Plaster Walls with Tom Silva

Note:  No, I have not been paid in any way to review this product.  Though I have to say that I had to pay them to try it.

Special note regarding painting:
1.  DO NOT assume the paint the previous owner labeled innocently enough as "White Interior Paint" on an attached post-it note is not (in actuality) yellow tinted white exterior trim paint.

2.  DO NOT forget to open the only window in the room for ventilation.

... and this one is really important...

3.  DO NOT assume 1. to be true, conduct 2. and forget that the storm window is closed.

Friday, March 2, 2012

Reference Book: Antique Houses: Their Construction and Restoration

I am always on the lookout for educational books regarding historical homes and their restoration.  I did a quick search on Amazon and found an out-of-print book with a horrible blurry photo.  The book is called Antique Houses:  Their Construction and Restoration.

A reviewer (the only one) wrote: 
I lived through the making of this book, demolished portions, moved and restored many of the homes depicted herein and even handled aspects of the legal to get this book publised.  My father is/was the author and lived a passionate life completely devoted to the 18th Century.  He even wore a tricorn hat!  I could write a book on that subject alone.  This book was originally slated for release in 1976 the Bi-Centennial year and contained current pricing - it was conceived as a DYI to empower others to save these old structures and preserve them properly - kind of the "This Old House" of its day.  Sadly, due to politics in publishing (which I won't rant about here) the project was shelved for over a decade.  Very few realize how visionary and purist Edward P. Friedland was regarding historic preservation and teh techniques and techicalities of moving and restoring 18th century houses.  It was a privilege to be part of this process.
With only one review, and a horrible photo of the book, I didn't think it was worth going after.  I learned that my local library had a copy and after checking it out, I was very impressed.  So impressed that I purchased the copy from Amazon.com!  The price was right around $30 plus shipping with other prices available from $8 to over $100 depending seller/condition. 

The book is not very large but is impressively filled with details going over different types of antique homes, their various non-secret construction (pun from a previous post:  Structural Repairs, Part II) as well as hints and suggestions from the author who rebuilt many antique homes like mine.  The author also cites anecdotes relating to discoveries he made while deconstructing and reconstructing these homes.

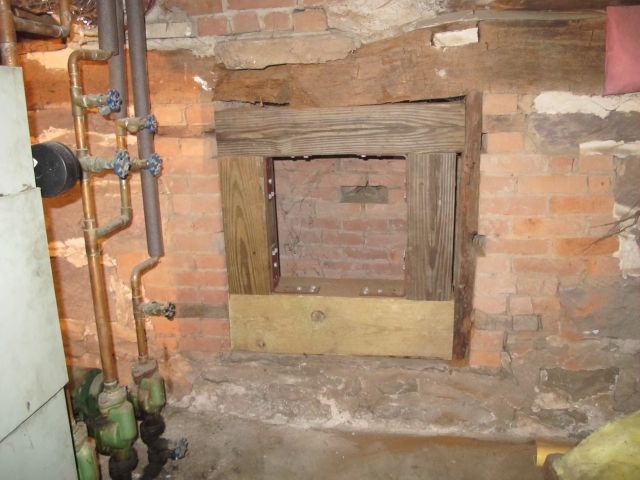
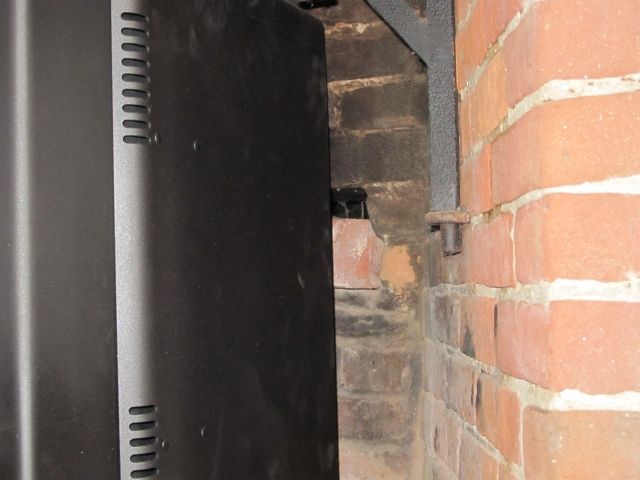
One of these stories in particular relates to the fireplace.  In our old kitchen fireplace, there's a small rectangular opening.  The previous owner placed bricks in it for what I can assume was to thwart her cats from climbing into it.  The opening is still there, the bricks are removable but for the life of me I could not figure out why it was built into the fireplace.  That is until I read this book.

From Pages 37 and 39 of Antique Houses:  Their Construction and Restoration:
In the base of many a chimney stack is a hole about 1 1/2 feet square leading into a large chamber within the base itself.  There is no door on this hole and no evidence of ashes at the bottom of the cavity.  On close examination, it will be found that there is a small flue  (about 8" x 8") leading from the top of the cavity and coming out in the back wall of the kitchen fireplace.  Often the small hole in the rear of the fireplace has been sealed by brick or stone, but originally it had a wood or sheet-iron slip-in door that could be removed.  What was the purpose of this elaborate system?  Almost invariably I have heard people talk of their ashpit.  But never an ash at the bottom can  be found.  Actually, I stumbled on the answer one cold day.  The three fireplaces of the John Palmer house had been restored and were ready to be tested for how well they drew the smoke.  All the doors and windows in the house were closed  when I lit all three fireplaces and the bake over.  I was astonished that in a few minutes all the fires began to throw smoke into the rooms - the chimneys were just not drawing at all.  I thought that the mason had done something wrong, although he had followed to the letter the original dimensions.
In the rear of the kitchen fireplace, about halfway up to the lintel height, I had noticed a small piece of charred wood, which upon opening had led to a small flue.  At the time of discovery I had made a note of the opening and had replaced the door, thinking that surely this was an ashpit of some sort.  Now, coughing and with eyes watering from the room full of smoke, I remembered the strange little door and opened it, not knowing what else to do to stop the billowing smoke.  As soon as the door had been removed, the fire sprang to life and smoke stopped pouring into the room.  The fires in the other rooms began to burn better almost at once.
In the winter, when the windows are closed and the fireplace is lit, there is not enough air in the home to sustain all the fireplaces.  That opening allows the large fireplace to draw air from the basement!  I'd hate to sound juvenile, but that's just awesome!

This book will find its way to my bookshelf, with information that I can constantly refer to over the years.  I recommend this book for the beginner, to learn how these homes were constructed and how they can be restored.  Though it is more of a general covering of every component of the home, it does cover everything.    Meaning, the information that you need to know to get started is there along with little details that make reading it worth while.