Welcome!

How we came to purchase our home.

WPA Photo

A Works Progress Administration photo offers a glimpse of our home's past.

Reproduction Windsor Chair

Finally, a dining room set.

No Power, No Heat.

Our first snow storm and it's aftermath, October, 2011.

Lead Poisoning

Updates to our son's lead levels.

Bit By Bit

My wife's blog on being pregnant, giving birth and raising our first child with all the complications, hardships and joys that life throws our way.

Showing posts with label Cellar. Show all posts

Sunday, December 16, 2012

Boiler Efficiency and Home Heating

This is a long post so I put a quick summary in the beginning.

Edit: I have made corrections to my initial post on Boiler Efficiency from 10/21/2012 as a misunderstanding in heating terms has resulted in invalid information. My apologies to my readers and thanks to Lou of Cromwell Energy, Inc. for pointing it out to me.  The following has been re-written entirely to account for the misunderstandings.


SUMMARY

Our boiler was recently rated at 72% combustion efficiency.  New boilers start at 85% AFUE efficiency and high-tech units are at 91+% AFUE. Thermal efficiency does not equate to AFUE. Much older systems do not have an AFUE rating so one must be approximated in order to compare an older unit to a brand new one. Our boiler is currently running at 61.2% AFUE (est) with an output of 185,200 BTU/hr.  One must compute the heat-loss for a home to properly size a new boiler. I've computed 78,410 BTU/hr using a program called Hydronic Explorer (see below for details).  After sizing a new boiler, the pay back period is  around 7 years for a high end Buderus GB125BE/30.  There are numerous models to choose from and likewise, pricing will vary accordingly resulting in much shorter pay back periods.  An Excel file was created to adjust different installation scenarios to find the best rate of return.


Background
Crane Sunnyday 5 Boiler Circa 1960's
Everything started on October 19, 2012, when we had a visit from our oil supplier.  We have a two year service contract included as an incentive to sign up with oil delivery from them and that day was our annual service visit.  The visit lasted roughly an hour as the technician performed the annual maintenance on the boiler.  The following were performed and noted on the receipt:

1.  Oiled Motors
2.  Oiled Circulator
3.  Cleaned Controls
4.  Cleaned Burner
5.  Cleaned Boiler
6.  Cleared Smoke Pipe
7.  Changed Nozzle
8.  Changed Oil Filter

Exhaust temperature was 540degF and the all important combustion efficiency at 72%.

Combustion efficiency is derived from a couple of temperature readings that the technician takes. The readings are taken while the boiler is running and turned into a ratio with the resultant number being a percentage.

AFUE is a more complex ratio which takes into consideration other factors.  Factors that represent a more real life efficiency.  While trying to understand the difference myself, I came across this article:  Cornell University, Home Heating Systems.  In it, the author, Mark Pierce, uses an analogy that easily allows the reader to comprehend the difference between what the technician tells you during the annual maintenance and what AFUE is.  He quotes the Consumer Guide to Home Energy Savings:

Combustion efficiency is like the miles per gallon your car gets cruising along at 55 miles per hour on the highway...(while)...AFUE is like your car mileage between fill-ups, including both highway driving and stop and-go-traffic (Wilson & Morril, 1996, p.58).

It's the AFUE rating that one sees most often when shopping for a new boiler.  But, I did not  know what the AFUE is for our boiler.  Being built in a time when such numbers weren't used, I was left searching the internet for comparisons   There were numerous articles and forums indicating that there are no equations to convert from the combustion efficiency percentage to the AFUE percentage since each is found through a different method.  However, this article from Cornell did reveal a simple equation for approximating the AFUE of an old system made before the AFUE rating became a standard number on modern units.  The equation is this:

(Combustion Efficiency) x (0.85) = AFUE est.

I am curious to know if any of my readers know their actual AFUE and have had their Combustion Efficiency revealed during a recent service.  Do the math, see if the above theory is valid.  I hope it is because the remainder of this post is based nearly entirely upon that one simple equation.  Fingers crossed...

Since I have a combustion efficiency of 72%, the estimated AFUE of my system is:

0.72 x 0.85 = 0.612 = 61.2%

My understanding of these percentages is that for every 100 gallons of oil used, 61.2 gallons are used for heating and the balance (38.8 gallons) escapes up our chimney in the form of heat and gasses.  New boilers run in the 84%+ range leading me to believe (and also from the opinion of the technician) that it is time to consider a new boiler.

First things first.  I need to have a heat loss calculation done on our home to find out what size boiler I would need.  Currently, our setup is a circa 1960 Crane Sunnyday 5 boiler with a direct water heater.  Meaning that when I turn on the hot water, the boiler turns on as if it were heating the home, yet only heating water for the faucet.  We have a single 275 gallon oil tank.  With the fuel economy from the technician,  we'll run out of oil after running the boiler for 183 hours straight.  It's important to remember that for every hot shower, regardless of how hot we make the temperature, the boiler kicks on.  When we wash the dishes, it's on, likewise, when we wash our son's soiled clothing, it's on.  After you turn off the hot water tap, the boiler still runs to replenish the hot water that is no longer in it's reserve.  The boiler's burner is much larger than a water heater's, so right there is an improvement I can make to save on oil.  As our current boiler is sized at 185,200 BTU/hr, lets see what size heating unit I need to just heat the house.


Scouring online found a free program from a manufacturer called the Slant/Fin Corporation.  They offer (or had offered) a downloadable program that will compute for you the BTU/hr heat loss of your home based on room dimensions, number of windows, what's above and below each room, etc.  It takes time to enter all the information in and you will need to do a lot of measuring to get the data for the program.  You can download the program from HERE (172 MB zip file containing the program Heat Loss Explorer 2 and two PDF files for product literature and a user guide for the program).  I only used the program for the information, disregarding the need for their product's literature.  For the Outdoor Design Temperature, I used the table from  Comfort-Calc.net.
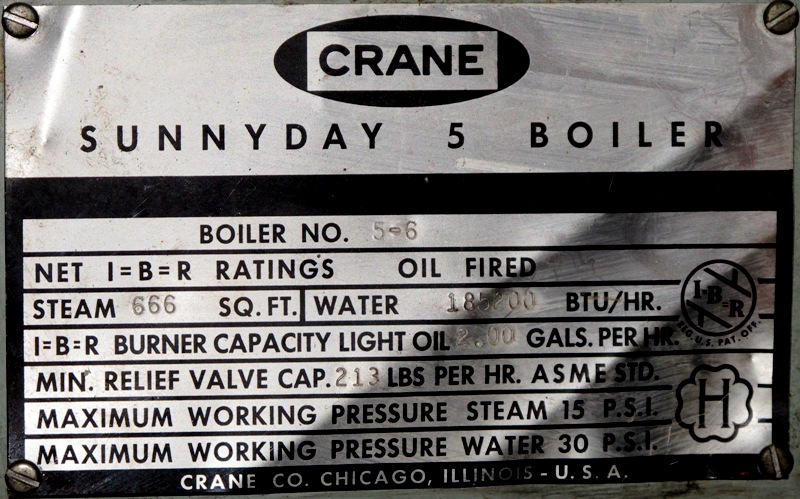
Crane Sunnyday 5 Boiler Specifications


The numbers from the program revealed that my home's BTU/hr heat loss is:  78,410 BTU/hr.  If we were to get the same exact type of boiler, one that has a direct water heater, then our new boiler would have to be in the 128,000+ BTU/hr size range.  Big difference, isn't it?  If this program is accurate, then our Crane Sunnyday 5 Boiler is way over sized at 185,200 BTU/hr.

Lot's of information so far.  We know that our boiler is antiquated, inefficient and over sized.  I have a lot of information.  I need to put it all together and figure out what our savings would be if we replaced our antique boiler and how long it would take to return on our investment.


Savings Calculation - WARNING, MATH OVERLOAD

As of October 17, 2012, the cost per gallon of heating oil from our supplier was $3.899 (compared to regular gasoline at $4.019).  New oil boilers have an efficiency at 85% with high end models pushing just past 93%.  Lets go crazy!  I want to see what our savings would be if we got the best of the best of the best.  Worst case scenario for upfront costs.  Given our 275 gallon tank, currently:

At 61.2% AFUE:
0.612 x 275.0 Gal. = 168.3 Gallons used for heating of the 275.0 Gallons purchased.
275.0 Gal. - 168.3 Gal. = 106.7 Gallons wasted.
106.7 Gal. x 3.899 $/Gal. = $416.02 thrown out the window (well, really up the chimney).

According to Energystar.org, the most efficient oil-fired boiler is the Buderus GB125BE (found on on this Excel list:  EnergyStar.org).  It's AFUE is at 93.4%.  Very impressive compared to our meager 61.2%.

At 93.4% AFUE:
0.934 x 275.0 Gal. = 256.9 Gallons used for heating of the 275.0 Gallons purchased.
275.0 Gal. - 256.9 Gal. = 18.1 Gallons wasted.
18.1 Gal. x 3.899 $/Gal. = $70.39 wasted.

From 61.2% to 93.4%, per a full tank fill, we would save:
$416.02 - $70.39 = $345.63 per full tank!

Last winter was a gift from mother nature.  The October snow storm (seen here) was a fluke, but the following winter was quite mild compared to previous seasons (according to the locals).  We spent a little over $4,053 heating our home and using hot water from October 2011 to October 2012.

OK, so let's say that we actually did purchase a Buderus last year.  How much would we have saved assuming of course that the price of fuel did not change?

$4,053 / $3.899 Gal. = 1,039.5 estimated gallons used.
1,039.5 Gal. x 0.612 = 636.2 Gallons actually used for heating and hot water.
1,039.5 Gal. - 636.2 Gal. = 403.3 Gallons wasted.

So, with the Buderus GB125BE installed:
636.2 Gal. / 0.934 = 681.2 Gallons purchased
681.2 Gal. - 636.2 Gal. = 45.0 Gallons wasted

The difference between the two wasted amounts would equate to the savings.  So:

403.3 Gal. - 45.0 Gal. =  358.3 wasted gallon difference.
358.3 Gal. x $3.899 = $1,397.01 savings per year!

When will I make my money back?  Finding out the price of these boilers is not easy, vendors don't like to reveal the costs of labor and parts.  So, going online yet again is my only source...

Buderus GB125BE with LT-Series Water Tank 

The Buderus GB125BE has an advertised priced online from one source (I am hesitant to post the actual site since I do not know if they're a reputable source) and I know that I need at least 78,410 BTU/hr to heat our home.  If I match the exact rating, the boiler will always be running, if I go too high, it'll use more fuel than needed to heat the volume that I have.  I'll need to over size the boiler slightly.  It was recommend that the over sizing is dependent upon the township/city that one lives in.  For my area, I believe that the over size is at 30% increase for permitting.  This would equate to approximately 102,000 BTU/hr. The closest matching Buderus is model GB125BE/30 at 100,000 BTU.  It is listed costing $6,018.95.  Wow, that is quite expensive.  Plus installation, right?  And since this boiler will not be directly heating the hot water at the tap, I'll also need a comparable water tank.  Let's just assume for argument's sake that the water tank will cost around $1,200, and the installation for the two units will be around $2,000.  Together, that's:

$6,018.95 (Buderus GB125BE/30)
$1,200.00 (est. water tank)
$2,000.00 (est. labor)
$9,218.95 (holy crap!)

So, how long will it take us to make our money back?

$9,218.95 / $1,397.01 = 6.6 years = rate of return.

Basically, a 7 year period of time is needed before I would start seeing a return on my investment.

Everything I've just gone through is speculation.  Sure, this can happen, and that; one may also have a relative that's licensed that's willing to install the boiler for free.  Because of all these variables, it is quite possible that the rate of return is much shorter.  As such, I've created an Excel data sheet that I can plug in all the information and have it spit out a payback period for various different scenarios. Below is a download link for the excel file should you like to play with it.

Download Here.
(If a password login page pops up, click cancel and the file should still open)

For now, I'm still on the mends as I try to find the best price for the most efficient boiler I can find.

Due to the amount of spam comments from oil service and repair companies that this one topic has generated, I am forced to turn off all comments on this post.  Should any reader wish to contact me, please do so on the "About Us" tab at the top of the page.

Thursday, August 9, 2012

Spirits and Bangs in the Night

At some point while running through the gauntlet of reality shows on cable TV, one comes across the unmistakable green washed image of night vision goggles being used on yet another episode of Ghost Hunters or Ghost Adventures or any other carbon copy series. You hear the homeowner's tales of encounters with the supernatural. Footsteps in the attic, a distant voice, perhaps even the levitation of various objects... ohhhh my (in a George Takei impersonation).

No, our kitchen cabinets are not opened by some mysterious force, just our mystgevious cat. No, the clanking sounds are just the plumbing pipes that were never perfectly suited for a home of this vintage. That rumble in the basement? Oh, that's the oil boiler doing its job in a not so efficient manner. The flapping sound in the attic is the recently installed bathroom vent cap flapping in the wind.

I tell you these things because I am aware and conscious of most of the sounds my home makes. I must, by now, as it has been several months since we moved in. So, what is this post about?

You must've guessed... surely I wouldn't have written all the above without hinting at some sort of paranormal ongoings.

Several months ago, I was sitting in the old kitchen (now our living room) watching TV when I heard a thump come directly below me in the basement. I like to think of myself as a manly-man; late at night, probably due to just completing an episode of Ghost Hunters, in the dark (no less), I was not to keen on entering the bowels of our home to investigate a bump in the night.

Upon the rising of the sun I had a sudden surge of courage to venture into the cellar. Here is what was found:

A part of a brick had "magically" popped out of a patched wall, attached to it was a piece of garment.  In the hole in the wall, was and still is a stuffed shirt, seemingly, stripped and a bit lacy as if it were feminine. Well, OK, it's not too freaky, I'll admit, until I heard of a story from the prior owner.

Several years ago, the story starts, the previous owner was hosting a party for a few friends and friends of friends.  Not knowing it at the time, two of the guests were mediums.  Upon the conclusion of the party, while leaving, the two mediums said to the previous owner, "We don't want to alarm you, and they're really quite harmless, but there are two women, other than yourself, living here."

I'll wait a couple seconds for the goose bumps to settle.....

Hearing this second hand didn't really phase me.  I mean, really, that sounds interesting, but she could have just been saying that, right?

My lovely sister-in-law made a visit last week to help us while we are adjusting to our new born baby.  She's a bit of an oddity when it comes to dreams.  At times, her dreams become reality or closely related.  Does that make her a medium, perhaps, perhaps not, but what she told me as a first witness account freaked me out.

While leaving our room after yet another crying fit from our little boy, crossing the second floor landing to the guest room, she closed the room's door and heard a woman's voice say, "Hi!".  Thinking it was her 8 year old son, she turned around to find him fast asleep.

She had a dream that night involving a few names one of which escapes me at this moment.  They were Maggie, Scarlet or Charlotte and a third.  I am curious to know if these are related to any prior inhabitant.

To any future visitor, don't hesitate a visit just because our home has (had) a history. My wife and I haven't seen any spirits nor are we on a T.A.P.S. waiting list. Our cat does get the scared-bushy-tale syndrome once in a while, but don't let that phase you either.  Our home is quiet aside from the usual banging, clanking and rumblings that all homes of this vintage make.

So come one come all, to ye olde home abode, and fear not thy bumps in thy night.

Monday, February 13, 2012

Structural Repairs, Part II


Our contractor was busy at work each day until the October snow storm. On most days, they called giving me an update. Most of the time, though, the update was to inform me of "something" they found. His phone calls eventually turned into a fear of answering the phone. I'll be honest though, after he would mention that "something", he would add that it'll be either a small fee or nothing at all. He said that he was once my age and he knew that it was hard on the pockets when buying the first home. That's nice and all, but it means nothing when that same person throws it in your face that he did "extra work" while also throwing a hissy fit after I gave him a two item punch list.

The freebies that he offered were the removal of the plumbing that interfered with the beam replacement (that he did not put back into service), removal of a concrete threshold under the coffin door (which he left for me to dispose of) and a couple of other things that at this moment escape me.

One major call was to notify me that an additional length of sill required replacement. A length equating to over $3,000 in additional work, that's $3,000 missed that his son, the estimator, did not account for during his walkthrough. As we're funding this work through negotiations from the seller, we have a fixed amount to spend based on what his son estimated. Anything additional, we pay for out of pocket.

The work was just about complete when the October snow storm hit. I notified the two man crew that they will be unable to work at our home since there is no power to run their equipment. They understood and requested an update when power was restored.

A day or so before the power was restored; I contacted them with news that I purchased a 5,000 watt generator (see No Power, No Heat.) which would allow them to continue working. Their reply was to give the power company another day, which coincidently, came on the following afternoon.

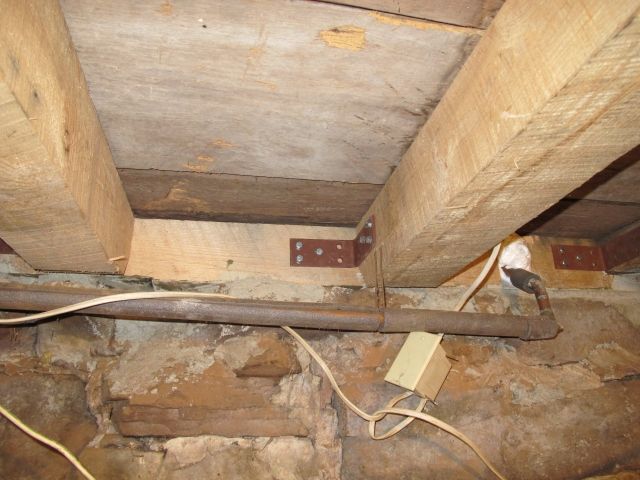
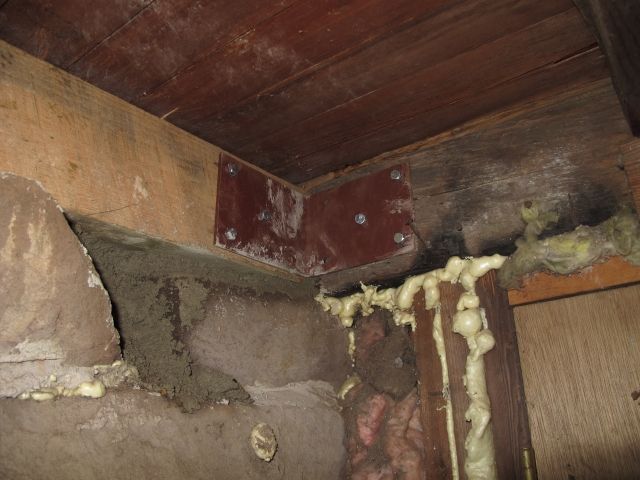
Work commenced and was primarily a finishing task. The final beams were placed and the sill mortared. Temporary support columns removed and angles with bolts screwed in to reinforce joints were installed.

I walked through the basement a couple nights before completion and noticed my oil tank still disconnected. The plumbing removed was not apparently going to be replaced. Specifically, plumbing required to fill and vent the oil tank as well as a spigot for the outside water. There was also an electrical box left unsecured (not really a big deal).


I sent an email to the owner to make sure that "we" didn't forget to put back what was taken down. After all, winter was approaching and the oil tank will need refilling eventually.

His response was not something I would have expected. He suggested that I should contact my oil supplier to re-install the pipe (which would cost me money) as he did not want to assume any liability for an incorrectly installed pipe that he removed. I obliged, contacted my supplier who replied that if our contractor would drill the hole through the sill, they'll re-thread the steel pipes and install them at no charge. The oil company added that they would assume the liability since they're making the connection. Otherwise, having the oil company do the whole job would cost me $100 to $200, plus tax. Having already paid thousands extra, I was running short on cash and wanted to reduce expenses. It made sense to have my contractor drill the hole. He's onsite with a drill. He is also familiar with the structure and would know precisely where to drill without affecting the structural integrity of a brand new sill that he just installed. Plus, his cost is negligible as he's already there whereas the oil company would have to mobilize to visit our property.

Playing the middleman, I relayed the suggestion to my contractor. Yet again I was surprised (perhaps I should stop being surprised...). My contractor lost his composure and literally began yelling at me over the phone. He must have misunderstood me as he became irate stating he (the contractor) shouldn't take the liability, that I should treat my contractors better, that we (the clients) are all the same, if we only knew the work that he did... etc. it was a very long winded, one sided conversation. The discussion became offensive with the contractor unwilling to reason. He then started to reveal a convoluted final thought.

According to his "professional" opinion, technically, I owe money back to the seller. Citing that (and this is the best part) the overall cost of work in the initial estimate was less than estimated so I ought to give 'X' dollars back to the seller. Wow... not that his son failed to properly estimate the cost of repair which forced my wife and I to pay out of pocket an extra $3,000 above the monies we received from the seller means anything...

Our phone conversations abruptly ended after that last call. By the time I got home from work, the contractor had packed things up and left.  Don't get me wrong, he was scheduled to leave that day anyway, but the remaining details showed their ill-placed frustration. The clapboard siding that was replaced lacked adequate caulking. A junction box by the coffin door was not secured properly. The interior wall by the coffin door was miss-aligned. The main power feed to the home was improperly secured after completing investigative work leading to the water in my electrical panel (see Water in my electrical panel). One section of flooring depressed in the old kitchen where they replaced the sill. Though our contract with him stated that we are responsible for waste removal, he told me (and I have it recorded) that he would remove the debris for us free of charge as our project is very small. I still have several construction bags in my backyard with wood, concrete, etc. inside after dumping quite a few already.

I hate fighting with contractors. I do it at work; I don't want to do it at home as well. I tried being the "bigger" man and mailed them a "thank you" card with the remaining balance due. I was planning on putting in two $100 bills for the father and son team as a "thank you" tip. After being treated the way I was with degrading comments and mild stupidity, I changed my mind.

If you're reading this Mr. G., you should treat your customers better.  You never know when they may be a repeat customer. I and my 250 year old home will not be.

Enough with the rant, so what was done and how much did it cost? 

Ah, yes, the important stuff…

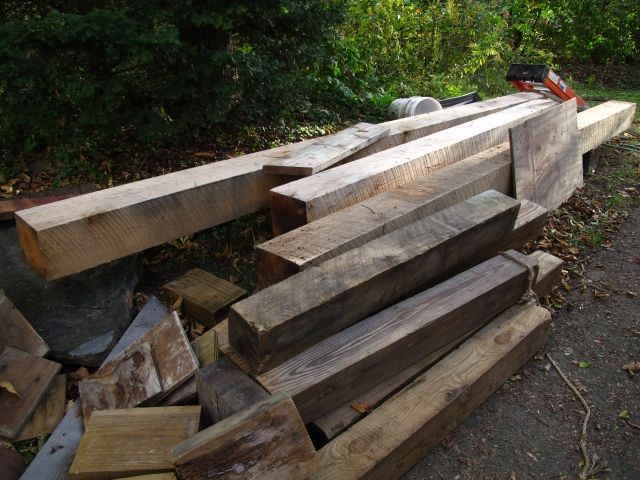
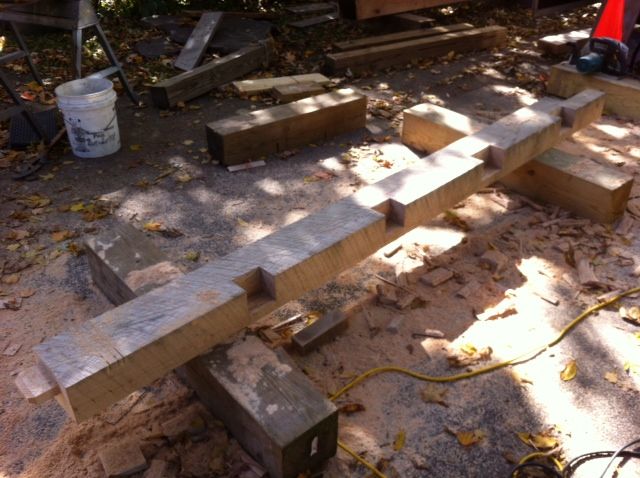
The two man crew did work long and hard while they were on site. Each piece of timber beam had to be custom fitted and hoisted into position. This is not like having a couple of 2"X10"'s nailed together and plopped into place. No, each beam and sill's depth was cut to fit into position. The sill is placed on top of an uneven stone foundation. Like a puzzle, each segment had to fit.  The home had to be lifted a fraction of an inch to allow the removal and installation of the new beams and sills. How they lifted the home is the secret as is how they lifted the heavy beams into place.  Mortise and tenon connections were also created.  The notches for the tenons were made using a circular saw and a large chisel.  Specifically how, must also be a secret.  Though to be quite honest, most methods can be researched online via youtube.com.

The initial estimate was $13,320.  For the:

1.      Removal and replacement of 26 linear feet of sill.
2.      Removal and replacement of 23 linear feet of beams at 6” x 6”.
3.      Remove temporary supports and replace with permanent Lally columns.
4.      Install a 2” x 6” oak to reinforce the beam under the old kitchen’s fireplace.
5.      Install additional horizontal and vertical support beams and posts on the right side of the chimney base.
6.      Reinforce the diagonal braces under the kitchen hearth.

The following was added:
  1. Additional sill removal and replacement, $3,135.00 (labor expense).
  2. Investigative work to explore a trouble area:  $85 for one hour of time.
  3. Additional material and Permit, $2,478.81.
  4. Additional material, $89.60 (clapboards).

So, this all cost a whooping $16,468.41.

But, how much did we pay?

We received three checks from the seller’s attorney totaling $13,320 based on the estimate.

We received a $250 discount for scheduling before a set date.

Out of pocket we paid $2,898.41.

Nothing in the attic was done.  No ventilation, no additional supports.  It was a disappointment for me, but I did not want to continue the relationship plus, having paid more than what we had expected to pay, our finances were short.  I’ll have to save the work in the attic for another day.

Wednesday, January 18, 2012

Radon MItigation

The radon mitigation is complete.  Well, it has been complete, I'm just now getting around to posting it up.  The installation took roughly a half day with two insertion points into the slab in the basement.  For those reading that are unfamiliar with Radon and it's importance, here's a quick synopsis.  

Radon is a radioactive gas that is colorless, odorless and tasteless.  It is an element that comes from the breakdown of uranium and can be found being given off from igneous rock, soil and sometimes well water.  It can lead to lung cancer and 20,000 cases of lung cancer a year are attributed to the exposure of Radon.  Radon is found everywhere, it's the level of your Radon exposure that matters.

The EPA set a standard reading of 4.0 pCi/L as a maximum exposure level before remediation.  This does not mean that Radon is harmless at or below 4.0 pCi/L, but that the government issues a certain limit for remediation to be considered.  What does 4.0 pCi/L mean?  Doing a little searching online found this comparison:
A family whose home has radon levels of 4 pCi/L is exposed to approximately 35 times as much radon as the Nuclear Regulatory Commission would allow if that family was standing next to the fence of a radioactive waste site.  (25 mrem limit, 800 mrem exposure).(Source:  http://radon.com/radon/radon_fact.html)
Now, doesn't that just scare the crap out of you!

During our home inspection, a Radon test was conducted and a reading of 5.0 pCi/L was found.  Through negotiation, we were able to have the seller pay for the remediation to reduce that amount to a more acceptable level.  The test was conducted in the basement where the seller had previously had a concrete floor poured over the original dirt floored basement.  Radon can seep through most materials, which includes concrete.  For each floor of the home, the Radon exposure is reduced in half.  So, the first floor would be 2.5 pCi/L, second floor would be 1.25 pCi/L, etc.  The only true way to get rid of this carcinogen is to pump it out.

The contractor selected came for a preliminary visit to discuss the installation of a sub-slab depressurization unit.  Our home's addition has a separate foundation from that of the original footprint.  Because of this division, two insertion points were required.  Each point is a drilled hole through the concrete slab that has a PVC pipe coming out of it that ultimately leads to an exterior mounted pump.  The pump runs 24 hours a day creating a negative pressure within the pipe that draws the air from underneath the slabs and out of the home, kinda like a bathroom vent fan, just more expensive.  I requested that the installer install the pump on the rear of our home so that the curb appeal isn't blemished with a large white pump and piping.

So what did this cost?  Each insertion point was $250.  So, after tacking in any applicable taxes, labor fees, pump cost and the insertion points, the total was $1,300.00.  Our Radon levels have dropped from 5.0 pCi/L to 0.7 pCi/L in the basement.

Thursday, November 24, 2011

Water in my electrical panel


My wife and I are getting ready for a trip back to our parents homes' for Thanksgiving.  After packing the car, I wanted to secure our home for our extended leave.  I locked the back door, then went into the basement to check the basement door.  We previously worked on the breaker box which was left uncovered from when we were installing the vent fan in our bathroom.  I wanted to re-attach the cover, so as I was re-attaching it, I am supporting the panel with my left hand, screwing in the second of six screws when all of a sudden water started to squirt out from the breakers!  I quickly unscrewed the two screws, pulled off the panel and was quite surprised to see most of the breakers covered in water.  First things first, the main was switched off.

"Honey, what happened to the power!" calls my wife.

With the main off, in the dark, I remembered that I had the business card in my wallet of the electrician that came to our home that day of the power outage in October.  I called him up.  I explained the situation, and he said, "If this were any other day, I would be right over, but unfortunately, I am with family and have a bird to take care of."  I understood, but he did a repeat of our first encounter.  He described to me how to correct the water issue:
  1. Turn off the main and each individual breaker.
  2. Take out each breaker by pulling it out from the center of the box towards the side it is on.
  3. Unscrew the wire leading into each breaker so that now the breaker is completely free.
  4. Get a can of WD-40 and saturate the breaker.
  5. Wrap the breaker in a thick towel and gently beat it.  The oil in the WD-40 will disperse the water in the breaker bringing it out of the casing.
  6. Get a can of compressed air and spray off any residual water/oil left.
  7. Repeat the towel beating and compressed air cleaning until there is no more water.
  8. The WD-40 will dry in about 30 minutes.  Re-attach the wire and plug the breaker back into its location on the panel.
  9. Repeat for all the wet breakers.
Took me a couple hours, but I completed the task and with my hands shaking, I turned on the main, then breakers 1... 2... 3........23.  Power was up and running.  We waited about half an hour to make sure everything was stable, then packed up the last of our belongings and left for the weekend.

The electrician said that water can get into the electrical box through the main conduit leading from the outside line.  It would trickle down the conduit into the home and directly into the panel.

A week later, before the next rain event, I took a look at the main power feed entering our home. The line attaches to the exterior wall at the roof line. It enters a conduit that then travels down the exterior wall to the meter.  From there, the conduit leaves the meter and goes further down the wall to the basement level where a bracket is installed.  Looking closely at the bracket, it is loose, rather unattached to the wall.  I found the source of my water leak.

Just of note, this is the same location where investigative work was undertaken several weeks prior by the structural company working in the basement.  They did such lousy finishing work on the exterior. Not only is that bracket not secured but there is also a lack of caulking.  I purchased a box of paint-able white exterior caulk from Lowes and went at that bracket. This could have been disastrous!  Imagine if my wife and I left and water continued to leak onto live breakers.  A fire erupts after a spark is created and my 250 year old wooden home burns up like a Thanksgiving bonfire.  I may sound like a "drama queen" to any contractor, but when it comes to my family and my investment, it's nothing to blow over. I have to watch future contractors like a hawk. I have to scrutinize their work as we'll be the ones living with their oversights.

Tuesday, November 15, 2011

Structural Repairs, Part I

As I sit here writing, I am torn between being brutally honest and abiding by my word.  You see, I made an agreement with the contractor who completed the structural repairs on our home.  My original idea was to document all the work being done with photos depicting the staged repairs.  I always believe in being honest with people and explained to the owner that I have a blog and would like to have his permission to post pictures of his equipment, etc.  My thoughts were, well, it's my home, I am vicariously paying for it and it's absolutely free advertising for their company.  I was a bit shocked to hear his response.  I'll paraphrase:

1.  Anything on the internet is there forever.
2.  We don't know how you'll depict our work.
3.  Our methods are proprietary.
4.  ...so is our fee schedule.

These are all valid points (I guess).  I responded to the owner saying that I agree with them 100% on the proprietary part.  They worked for 'X' number of years "perfecting" their methods, who am I to post pictures of their secret ways?  It was quite understandable, however, my goal with this blog is to be honest with all costs involved with the work on this antique home.  So, I made a compromise.  I countered saying that I will not post the name of the company or pictures depicting their means and methods.  The owner grudgingly agreed, with the exception of wanting to review my post as a courtesy on my part, which I can only gather for editing purposes. Like I said, I want to be honest about everything that occurred, but for reasons which are to follow, I will forfeit that courtesy and post away with my first amendment rights.  Mind you I will stick to my word.  The name of the company, the crew and their methods will NOT be discussed.  Regardless, brace yourself, this will be a long post.  I will try to break it up over a couple of posts.


On July 24, 2011, I came into contact with this contractor through a quasi government related group listing (really advertising) contractors working to rebuild and repair historic structures.  In the initial post, I described the issues with the seller; how she was unwilling to hire a proficient contractor specializing in post and beam repair.  When she finally caved in to hiring a qualified contractor, we split the cost for this particular contractor to come in costing us a combined $345. The contractor came in to produce an estimate of structural repairs in the basement.  This estimate would be used to negotiate with the seller.

The contractor was on site for a couple of hours where they and I went over the basement pointing out the locations indicated in the report from our inspector.  The support structure in the basement was covered with insulation but the contractor viewed what he could and took measurements.  I took him to the attic as I wanted him to produce a secondary estimate for vents to be installed (that I asked to be kept separate from the sellers estimate).

On August 13, 2011, the evening after the visit, the following was submitted:
1.      Remove and replace up to 12 linear feet of front left sill.
2.      Remove and replace up to 14 linear feet of left side front sill.
3.      Remove and replace two joists in this area that run parallel with the street (6x6x~12’).
4.      Remove and replace up to 9 linear feet of beam in this area (running perpendicular to the street).  Install footing and vertical where the new beam joins the old one.
5.      Set up supports and remove two existing screw jacks in the cellar near chimney. Dig new footings and install concrete filled lally columns.
6.      The beam on the back side of the chimney has sagged and there is separation between it and the beam it intersects with. Install 2x6 oak underneath it.  Dig two footings and install concrete filled lallys.
7.      The chimney beam on the right side is rotted and broken over the opening. We will attempt to replace but if it becomes apparent that this will cause damage, we will put a horizontal and verticals underneath it. 
8.      The diagonal members supporting the hearths have damage. Either sister or install verticals as needed.

The cost of labor for the above work is $10,680.00.  Materials and supplies are extra and should be about $2,640.00.  A deposit of $1,100.00 is required to be scheduled.  Payment is to be in two parts with final payment due in full upon completion.  See conditions.  Any damage to the chimney/hearths is not included and is the responsibility of the homeowner.
This work totaled $13,320.  A second estimate was given for the work in the attic:

1.      Install square gable end vent on each gable end of the house as discussed.
2.      Sister two tie beams in the attic. 
The cost of labor for the above work is $835.00.  Materials and supplies are extra.  Payment is due in full upon completion.  This estimate is only valid if done in conjunction with the structural work. 
Since we were dealing with the seller's money, I was unable to personally provide the full $1,100 deposit.  I suggested that instead, we use the labor cost of $835 for the attic work as the deposit since that work is coming out of our pockets.  They agreed and we were scheduled for an October start date.  Since we sent in our deposit before a set date, we were given a $250 coupon.


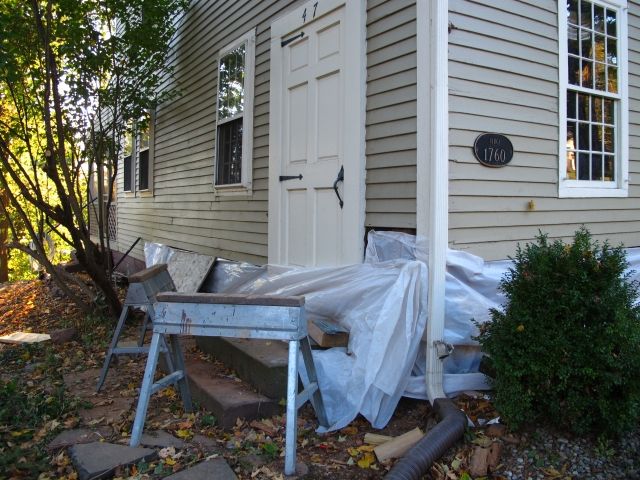
A couple weeks passed and I hadn't heard much from the contractor.  I took a couple photos of the home's exterior and emailed it asking if they wanted me to trim back the bushes or tree allowing them more working area.  Their response was simply that if we did not want to, they don't mind.  And only that the EPA requires a 10 foot plastic ground cover around all areas exposed to construction for lead protection.


By this point, however, I still haven't heard anything about a start date.  I was beginning to get worried that their schedule wasn't keeping in mind that I have checks made out in their company's name that have an expiration date.


(Name),

I may be mistaken but I don't think you told me when (company name) plans on starting.

Due to the negotiations and to make the bank happy, as well as to allow you full access to the property, (company name) has priority. And because of that, we'll have two other contractors waiting to start after you finish. All contractors are being paid via checks issued by our lawyer. Checks expire... So, please kindly advise me as to your anticipated start date.

Thank you,
Steve

I relayed this to them on October 12 and I did not hear back until October 17, when they wrote:

Hi,
We will be there Thursday morning. We will be bringing our trailer which will be staying there for the duration of the project. Please leave room for us to back it into the driveway. Thank you. (name)

I guess money talks...

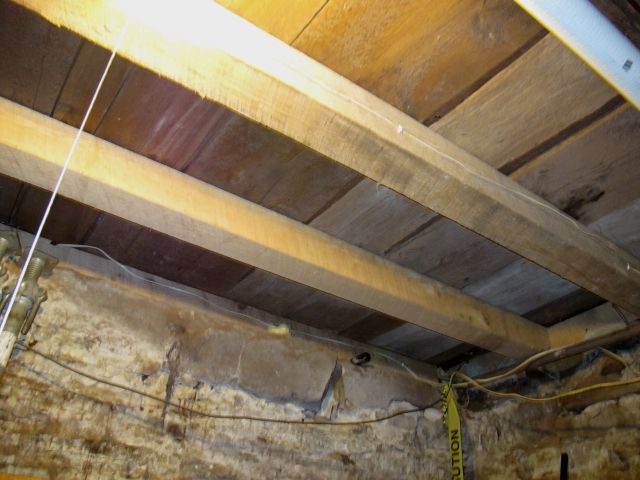
Here are photos of the condition of the beams in the basement prior to the contractor's work:

1.  Overall view of the floor structure below the future library, viewing southeast.

2.  Overall view of the floor structure below the future library, viewing south.

3.  Closeup of rotten and insect damaged joists, viewing east.

4.  Closeup of rotten and insect damaged joists, viewing northeast.

5.  Closeup of rotten and insect damaged joists, viewing east.

6.  Closeup of rotten and insect damaged joists, viewing northeast.

7.  Closeup of rotten and insect damaged joist connecting to the sill, viewing northeast.

8.  Closeup of rotten and insect damaged joists, viewing southeast.

9.  Closeup of rotten and insect damaged sill, viewing east.

10.  Closeup of rotten and insect damaged sill, viewing south.  Notice the rat poison white bag peaking out by the wire, behind the brick.

11.  Closeup of a prior repair showing the lally column supporting a hearth support beam and joist with the mortise and tenon visible, viewing east.

12.  Diagonal support for the old kitchen fireplace above, viewing south.

13.  Overview of chimney foundation showing existing lally columns, viewing northeast.  The black columns to the right are temporary supports.  Temporary really means non-existent.

14.  Overall view of the old kitchen fireplace supports, viewing northeast.

15.  An old exhaust flue or perhaps even a makeshift fireplace.  The wood beam above it runs through the brick/stone foundation as one solid piece of wood.  The beam is weakened and is sagging.  Viewing south.

Click HERE for Structural Repairs, Part II.

Saturday, October 22, 2011

Surprise in the Insulation

A couple of days ago, I tasked myself to prepare the basement for the arrival of some special guests.  From the negotiations with the seller, we were able to procure funds to make some structural repairs in the basement.  But, before the contractor arrives, I had to take down the insulation in the areas where they'll be working.  With an old home, you never know what you'll find.  My cousin mentioned to me that he still finds little surprises in his older home.  Well, funny ha ha, so did I.  

Taking down the insulation, I discovered mice... not one... or two, or even a few.  There was a mouse graveyard in the basement insulation with their fecal matter being stored in one area, a habitat in another, a food silo in yet another.  The little guys were organized to say the least.  Around the perimeter of the house, I found holes in the landscape... one can only guess where they led.  

After our special guests have completed their work, I plan on taking down all the insulation, cleaning up the mess and installing fresh new batting.  Is it expensive?  I have no idea, but I have to correct this problem.