Welcome!

How we came to purchase our home.

WPA Photo

A Works Progress Administration photo offers a glimpse of our home's past.

Reproduction Windsor Chair

Finally, a dining room set.

No Power, No Heat.

Our first snow storm and it's aftermath, October, 2011.

Lead Poisoning

Updates to our son's lead levels.

Bit By Bit

My wife's blog on being pregnant, giving birth and raising our first child with all the complications, hardships and joys that life throws our way.

Thursday, February 23, 2012

Discoveries in the Backyard


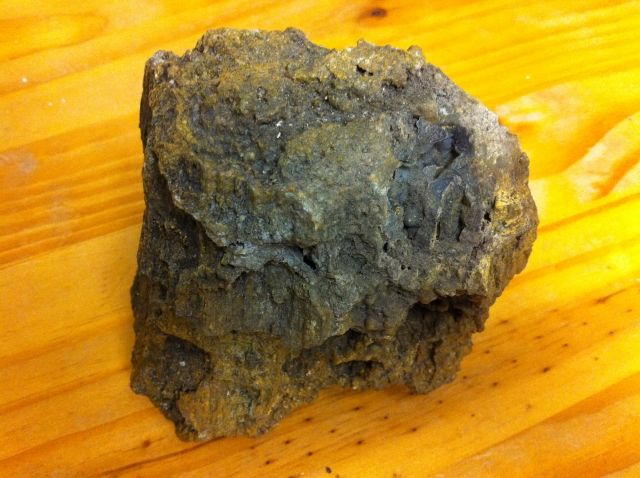
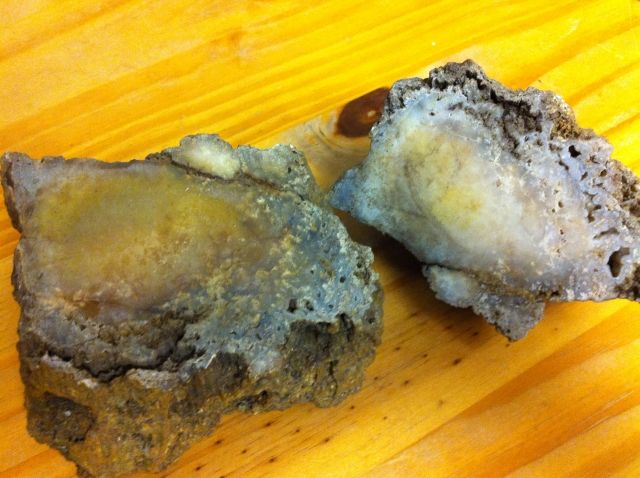
On the weekend of February 18/19, while tending to some yard work, I noticed something buried in a stone retaining wall.  It looked odd, not like the other stones stacked to form the wall.  When I took it out, it fell in two, so perfectly that it must have been previously cut.  Regardless, it looked like wood... old rotten wood, but was as hard as a rock, literally.  I knew what I thought it was, but I waited for my wife, the biologist, to come home and verify my conclusions.  Upon her arrival, I anxiously brought her over to it and asked her to identify this specimen.  She said, "Is this... no..., yes, yes, this a petrified piece of wood?!"


We both stood there astonished.  This hunk of stone, I mean wood, sat hidden in the retaining wall for at least 100 years, becoming, well, a hunk of stone (according to Wikipedia.com, wood takes a minimum of 100 years to become petrified).  Due to the clean cut, my suspicion is more that a previous owner had it on display in the garden, forgot about it where it was lost to time until, in my boredom, I dug it out of the wall.

Either way, my home is just awesome!  I find things in the backyard that are just amazing!

Monday, February 13, 2012

Structural Repairs, Part II


Our contractor was busy at work each day until the October snow storm. On most days, they called giving me an update. Most of the time, though, the update was to inform me of "something" they found. His phone calls eventually turned into a fear of answering the phone. I'll be honest though, after he would mention that "something", he would add that it'll be either a small fee or nothing at all. He said that he was once my age and he knew that it was hard on the pockets when buying the first home. That's nice and all, but it means nothing when that same person throws it in your face that he did "extra work" while also throwing a hissy fit after I gave him a two item punch list.

The freebies that he offered were the removal of the plumbing that interfered with the beam replacement (that he did not put back into service), removal of a concrete threshold under the coffin door (which he left for me to dispose of) and a couple of other things that at this moment escape me.

One major call was to notify me that an additional length of sill required replacement. A length equating to over $3,000 in additional work, that's $3,000 missed that his son, the estimator, did not account for during his walkthrough. As we're funding this work through negotiations from the seller, we have a fixed amount to spend based on what his son estimated. Anything additional, we pay for out of pocket.

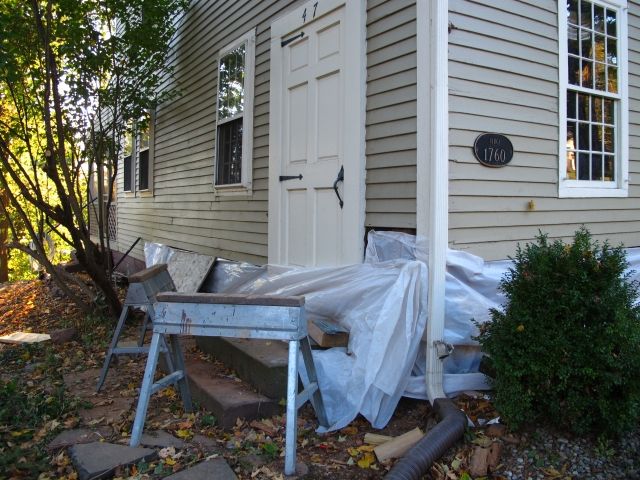
The work was just about complete when the October snow storm hit. I notified the two man crew that they will be unable to work at our home since there is no power to run their equipment. They understood and requested an update when power was restored.

A day or so before the power was restored; I contacted them with news that I purchased a 5,000 watt generator (see No Power, No Heat.) which would allow them to continue working. Their reply was to give the power company another day, which coincidently, came on the following afternoon.

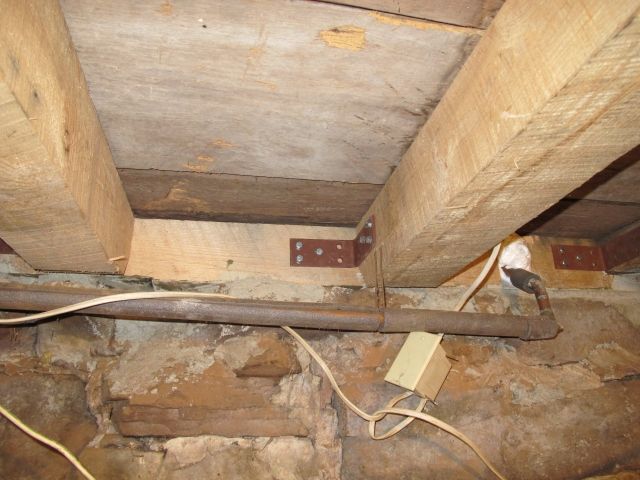
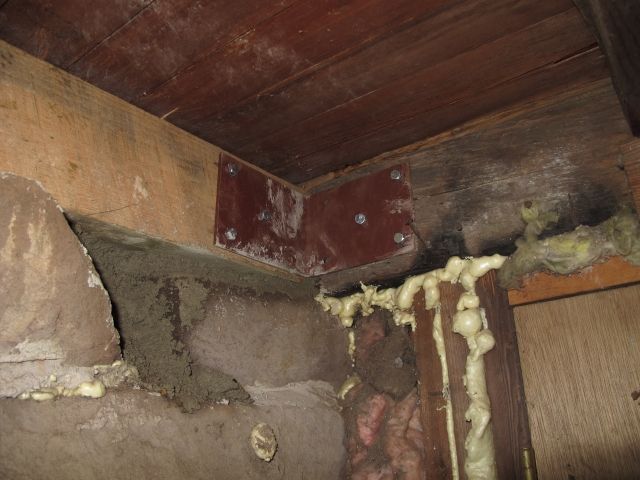
Work commenced and was primarily a finishing task. The final beams were placed and the sill mortared. Temporary support columns removed and angles with bolts screwed in to reinforce joints were installed.

I walked through the basement a couple nights before completion and noticed my oil tank still disconnected. The plumbing removed was not apparently going to be replaced. Specifically, plumbing required to fill and vent the oil tank as well as a spigot for the outside water. There was also an electrical box left unsecured (not really a big deal).


I sent an email to the owner to make sure that "we" didn't forget to put back what was taken down. After all, winter was approaching and the oil tank will need refilling eventually.

His response was not something I would have expected. He suggested that I should contact my oil supplier to re-install the pipe (which would cost me money) as he did not want to assume any liability for an incorrectly installed pipe that he removed. I obliged, contacted my supplier who replied that if our contractor would drill the hole through the sill, they'll re-thread the steel pipes and install them at no charge. The oil company added that they would assume the liability since they're making the connection. Otherwise, having the oil company do the whole job would cost me $100 to $200, plus tax. Having already paid thousands extra, I was running short on cash and wanted to reduce expenses. It made sense to have my contractor drill the hole. He's onsite with a drill. He is also familiar with the structure and would know precisely where to drill without affecting the structural integrity of a brand new sill that he just installed. Plus, his cost is negligible as he's already there whereas the oil company would have to mobilize to visit our property.

Playing the middleman, I relayed the suggestion to my contractor. Yet again I was surprised (perhaps I should stop being surprised...). My contractor lost his composure and literally began yelling at me over the phone. He must have misunderstood me as he became irate stating he (the contractor) shouldn't take the liability, that I should treat my contractors better, that we (the clients) are all the same, if we only knew the work that he did... etc. it was a very long winded, one sided conversation. The discussion became offensive with the contractor unwilling to reason. He then started to reveal a convoluted final thought.

According to his "professional" opinion, technically, I owe money back to the seller. Citing that (and this is the best part) the overall cost of work in the initial estimate was less than estimated so I ought to give 'X' dollars back to the seller. Wow... not that his son failed to properly estimate the cost of repair which forced my wife and I to pay out of pocket an extra $3,000 above the monies we received from the seller means anything...

Our phone conversations abruptly ended after that last call. By the time I got home from work, the contractor had packed things up and left.  Don't get me wrong, he was scheduled to leave that day anyway, but the remaining details showed their ill-placed frustration. The clapboard siding that was replaced lacked adequate caulking. A junction box by the coffin door was not secured properly. The interior wall by the coffin door was miss-aligned. The main power feed to the home was improperly secured after completing investigative work leading to the water in my electrical panel (see Water in my electrical panel). One section of flooring depressed in the old kitchen where they replaced the sill. Though our contract with him stated that we are responsible for waste removal, he told me (and I have it recorded) that he would remove the debris for us free of charge as our project is very small. I still have several construction bags in my backyard with wood, concrete, etc. inside after dumping quite a few already.

I hate fighting with contractors. I do it at work; I don't want to do it at home as well. I tried being the "bigger" man and mailed them a "thank you" card with the remaining balance due. I was planning on putting in two $100 bills for the father and son team as a "thank you" tip. After being treated the way I was with degrading comments and mild stupidity, I changed my mind.

If you're reading this Mr. G., you should treat your customers better.  You never know when they may be a repeat customer. I and my 250 year old home will not be.

Enough with the rant, so what was done and how much did it cost? 

Ah, yes, the important stuff…

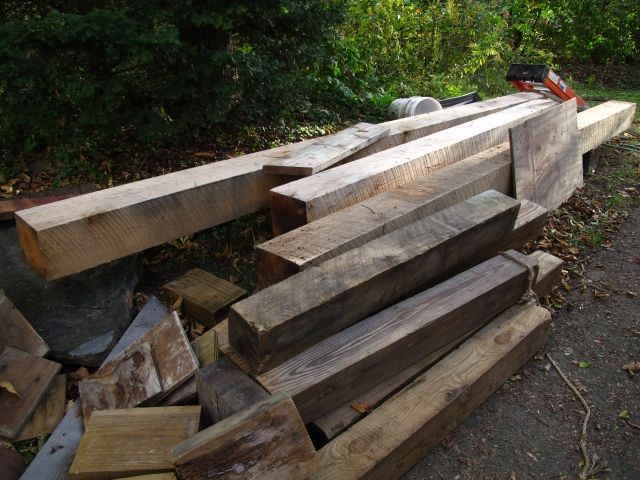
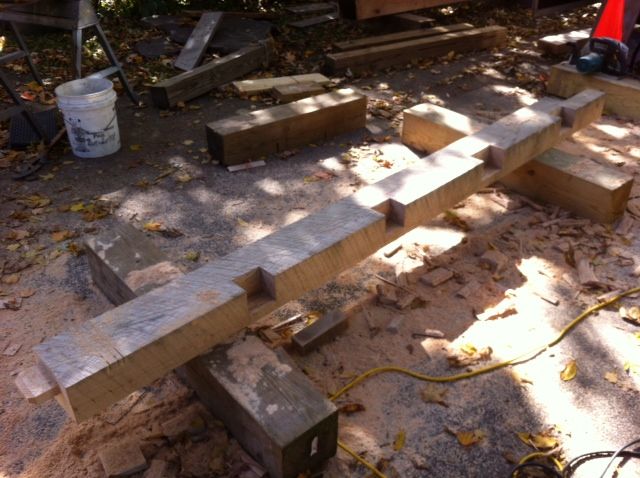
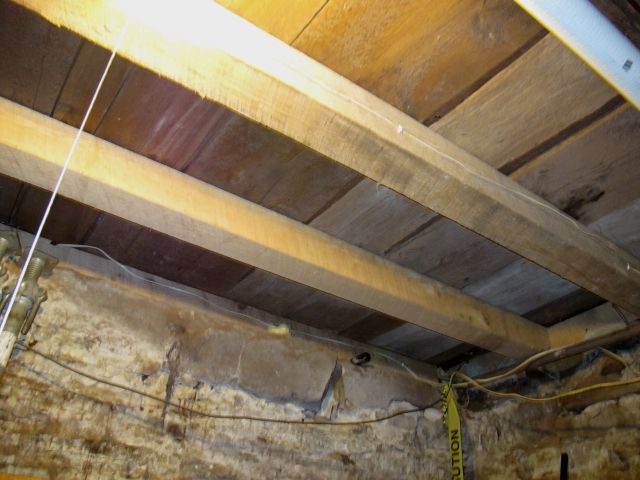
The two man crew did work long and hard while they were on site. Each piece of timber beam had to be custom fitted and hoisted into position. This is not like having a couple of 2"X10"'s nailed together and plopped into place. No, each beam and sill's depth was cut to fit into position. The sill is placed on top of an uneven stone foundation. Like a puzzle, each segment had to fit.  The home had to be lifted a fraction of an inch to allow the removal and installation of the new beams and sills. How they lifted the home is the secret as is how they lifted the heavy beams into place.  Mortise and tenon connections were also created.  The notches for the tenons were made using a circular saw and a large chisel.  Specifically how, must also be a secret.  Though to be quite honest, most methods can be researched online via youtube.com.

The initial estimate was $13,320.  For the:

1.      Removal and replacement of 26 linear feet of sill.
2.      Removal and replacement of 23 linear feet of beams at 6” x 6”.
3.      Remove temporary supports and replace with permanent Lally columns.
4.      Install a 2” x 6” oak to reinforce the beam under the old kitchen’s fireplace.
5.      Install additional horizontal and vertical support beams and posts on the right side of the chimney base.
6.      Reinforce the diagonal braces under the kitchen hearth.

The following was added:
  1. Additional sill removal and replacement, $3,135.00 (labor expense).
  2. Investigative work to explore a trouble area:  $85 for one hour of time.
  3. Additional material and Permit, $2,478.81.
  4. Additional material, $89.60 (clapboards).

So, this all cost a whooping $16,468.41.

But, how much did we pay?

We received three checks from the seller’s attorney totaling $13,320 based on the estimate.

We received a $250 discount for scheduling before a set date.

Out of pocket we paid $2,898.41.

Nothing in the attic was done.  No ventilation, no additional supports.  It was a disappointment for me, but I did not want to continue the relationship plus, having paid more than what we had expected to pay, our finances were short.  I’ll have to save the work in the attic for another day.

Sunday, February 12, 2012

Chimney and Stoves, Part III (Finally)

It's DONE!  Our secondary source of heat is finally installed.The crew from Fireworks Hearth and Home of Haddam, CT, arrived around 10:30 AM on February 10, 2011.  They completed their installation around 2:00 PM.  Thanks to my wife, the following are photos depicting the installation:

Mounting the roof:


Liner installation:


Damper removal:


The stove!
...being installed:

Connection to the liner:

Liner ready to be trimmed:
Bracket for liner at chimney cap:
Thanks to the crew, here's an awesome view down our 250 year old chimney showing the bracket and liner installed:
The Avalon 1190 installed and working: 
The original plan was to install two liners.  One for the fireplace and another for the oil boiler.  When the crew took off the 7" exhaust, it was immediately noticed that the clay bell that received the 7" pipe was not large enough to accommodate the liner with a 90 degree bend.  The installation of the larger liner was cancelled.  The owner was frustrated that he was unable to complete the job, but was kind enough to remove the cost of the large 7" liner and it's installation cost from the final bill.  Although he could not return the liner to the manufacturer, he may be able to use it on another job.


Starting the stove was a bit difficult at first.  There are also fumes from the paint that are given off in that first burn.  My pregnant wife left our home for 2 hours to avoid smelling them.  She was instructed to go spend money... luckily she didn't take it so literally.  Two hours later with a new addition to her maternity attire, she arrived.  The fume smell persisted, however, for the next two days.  I only hope there is no impact on her.

This stove is a monster.  It took about an hour to get the stove up in temperature, but once it was, the heat output was awesome.  With the oil heating off and the outside temperature in the mid to low 40's, inside, the library's thermostat read around 50 deg and the kitchen around 45 deg (bare minimum setting on the thermostats).  With the stove running at full power for a couple hours, the temperature in both locations climbed a minimum of 10 degrees.  Now, there is a more even temperature distributed throughout the home.  It's an incredible feeling to not have to put on the liquid gold and still be warm... hot in fact.  We can walk into the kitchen without dreading it.

Efficiency wise, we'll have to see over time, but some quick math found the following.  I purchased three boxes of hardwood from Walmart ($6.24 per 0.75 cu. ft.) then another 10 cases from the local Stop and Shop (2 for $12 at 0.75 cu. ft. each).  The boxes from Walmart had mold growing in them, Stop and Shop kept there's outside and had two different brands.  One brand was covered in mold and the other dry without mold.  I am on the lookout for a supplier of seasoned hardwood.  Pricing should be around $250 per a chord (128 cu. ft) which should equate to $1.95 per cu. ft.  These small bundles from our local stores are at $8.00 a cu. ft.  We went through three cubic feet of the store bought hardwood from Friday night and then relighting for all of Saturday.  Assuming we have a mild winter the rest of the season, we'll go through 9 cu. ft. a week, one chord should last us roughly 14 weeks.  Obviously we'll go through much more wood as temperatures are more winter like.  

Let's compare this to oil.  Now, of course, please take into account the rather mild winter that we are having and the power outage in October/November.  We spent $2503.99 on heating oil since moving in on October 1, 2011.  That's $1,321.24 since winter started on December 21, 2011, 53 days ago.  If we offset the oil heating with our new wood stove, burning 9 cu. ft. of wood per 7 day period, each day will cost $2.51 (using a bulk buy of $250 per chord).  Over the same 53 day period, we would've spent approximately $133.  That's an insane difference!  Another thing to keep in mind is that our heating system also heats the hot water.  So regardless, if we used wood everyday, we'll still use the oil for hot water.  I'm curious to see how this fair during a bitterly cold winter.

So, how much did this cost us? (I hope the store won't mind this part...)

Avalon 1190:              $2,000.00
Optional Cast Iron Legs:    $100.00
Optional Blower:            $200.00
6" by 35' Liner:            $650.00
Custom support bracket:      $25.00
Black exposed pipe:          $50.00
Installation Fee:           $600.00
Taxes:                      $230.18

Grand Total:              $3,855.18

So was it all worth it?  Absolutely!  The pricing was quite reasonable since other places charged more for all the items listed and installation was questionable due to the nature of the home's age.  Fireside completed the work as promised with no major damage to our historic home.  I am very pleased at this point.  The stove looks the part and functions quite well.  We'll eventually buy a cauldron and stick it on the arm over the stove, just to add to the look and perhaps even put a pot of water on the cook top surface for humidity.  I do plan on having Fireside come back for an annual cleaning.

Now onto the next project!

Wednesday, January 18, 2012

Radon MItigation

The radon mitigation is complete.  Well, it has been complete, I'm just now getting around to posting it up.  The installation took roughly a half day with two insertion points into the slab in the basement.  For those reading that are unfamiliar with Radon and it's importance, here's a quick synopsis.  

Radon is a radioactive gas that is colorless, odorless and tasteless.  It is an element that comes from the breakdown of uranium and can be found being given off from igneous rock, soil and sometimes well water.  It can lead to lung cancer and 20,000 cases of lung cancer a year are attributed to the exposure of Radon.  Radon is found everywhere, it's the level of your Radon exposure that matters.

The EPA set a standard reading of 4.0 pCi/L as a maximum exposure level before remediation.  This does not mean that Radon is harmless at or below 4.0 pCi/L, but that the government issues a certain limit for remediation to be considered.  What does 4.0 pCi/L mean?  Doing a little searching online found this comparison:
A family whose home has radon levels of 4 pCi/L is exposed to approximately 35 times as much radon as the Nuclear Regulatory Commission would allow if that family was standing next to the fence of a radioactive waste site.  (25 mrem limit, 800 mrem exposure).(Source:  http://radon.com/radon/radon_fact.html)
Now, doesn't that just scare the crap out of you!

During our home inspection, a Radon test was conducted and a reading of 5.0 pCi/L was found.  Through negotiation, we were able to have the seller pay for the remediation to reduce that amount to a more acceptable level.  The test was conducted in the basement where the seller had previously had a concrete floor poured over the original dirt floored basement.  Radon can seep through most materials, which includes concrete.  For each floor of the home, the Radon exposure is reduced in half.  So, the first floor would be 2.5 pCi/L, second floor would be 1.25 pCi/L, etc.  The only true way to get rid of this carcinogen is to pump it out.

The contractor selected came for a preliminary visit to discuss the installation of a sub-slab depressurization unit.  Our home's addition has a separate foundation from that of the original footprint.  Because of this division, two insertion points were required.  Each point is a drilled hole through the concrete slab that has a PVC pipe coming out of it that ultimately leads to an exterior mounted pump.  The pump runs 24 hours a day creating a negative pressure within the pipe that draws the air from underneath the slabs and out of the home, kinda like a bathroom vent fan, just more expensive.  I requested that the installer install the pump on the rear of our home so that the curb appeal isn't blemished with a large white pump and piping.

So what did this cost?  Each insertion point was $250.  So, after tacking in any applicable taxes, labor fees, pump cost and the insertion points, the total was $1,300.00.  Our Radon levels have dropped from 5.0 pCi/L to 0.7 pCi/L in the basement.

Tuesday, January 10, 2012

Chimney and Stoves, Part II

Being completely distraught by Part I, I haven't dealt with another vendor for several weeks. Speaking with a co-worker, another stove store in their locale was brought up. I paid a visit to their establishment and met with the owner. He was the only other seller of the same stove that we saw previously in our area. Through our conversations, we found out that the Travis made Lopi Laydon is poorly made for heavy use, cosmetically, it's very attractive, but is not built to handle heating a home.


We became dismayed but were drawn to a stove that had a huge glass front, with plenty of surface area to cook on, should it be necessary. This is another Travis product, however, this one is built for heating, not for looks. It's the Travis Avalon 1190.

We received a price that was the same as for the Lopi Laydon but the performance of this beast is greater than that of the Laydon. We also wanted the blower, cast iron legs and front door options. The pedestal look doesn't seem to flow well in a 250 year old home so these options made sense. We had the store owner give us a quote for the installation. The first trip out was by his son who gave a quote for the stove install only. We also needed a quote for a liner in the basement. So a second trip was made by the owner to examine exactly what was needed.

From our home inspection, we found out that we had a Crane oil furnace. Online searching revealed that the Crane company ceased production of oil furnaces in 1968, leading me to believe that our furnace is at least 44 years old at the time of this writing. We had a chimney inspection which also revealed that we did not have a liner for our very old boiler. Thoughts of leaking CO are a major concern with it venting past our bedrooms. In that second trip, the owner came himself, as we discussed the options, I wanted to know if it were possible to get some of the other fireplaces working back to original. We planned on a third visit where he would bring his mason in.

The mason arrived with the owner and they went over the chimney briefly. The conclusion was that YES! it is possible; however, we would never be able to get all 5 fireplaces working due to the current codes limiting space in our chimney. I'll take what I can get, but first our stove.

The final quote for the stove I'll reveal later as it is not installed yet and anything can pop up. The scheduled installation date is February 10, 2012. Look for an update after that date.